Monthly Archives: March 2016

Block 4 – Joseph’s Coat

Standard

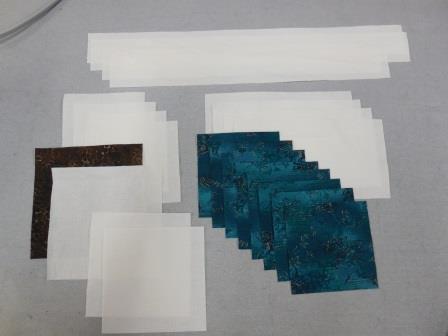
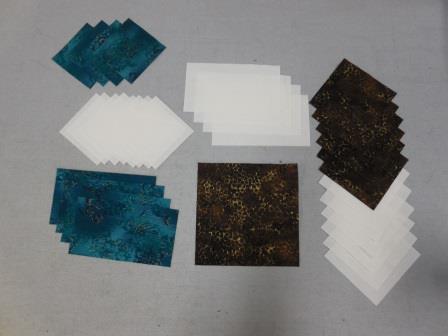
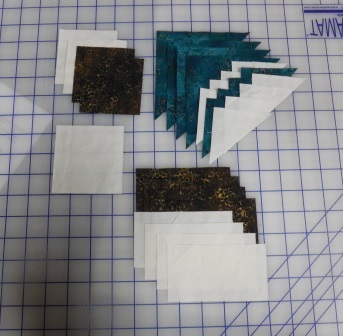
Cut the following for EACH block:

Neutral

Two 3″ x 3″ squares

Four 2 7/8″ x 2 7/8″ squares (cut in half diagonally)

Four 2 1/2″ x 4 1/2″ rectangles

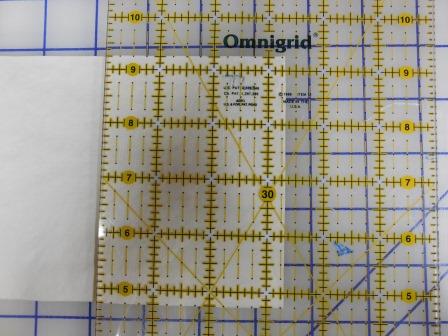
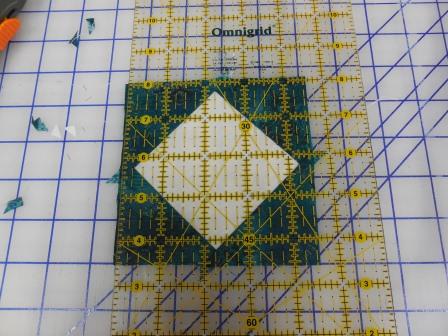
One 3 5/16″ x 3 5/16″ square


Color 1

Two 2 7/8″ x 2 7/8″ squares (cut in half diagonally

Four 2 1/2″ x 4 1/2″ rectangles

Two 4 7/8″ squares (cut in half diagonally)


Color 2

Two 3″ x 3″ squares

JC1

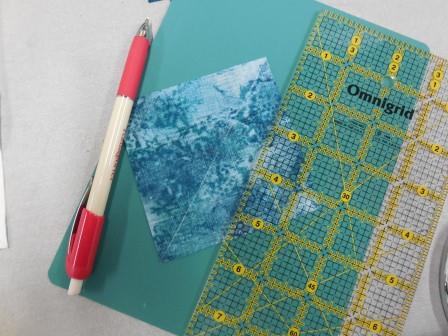
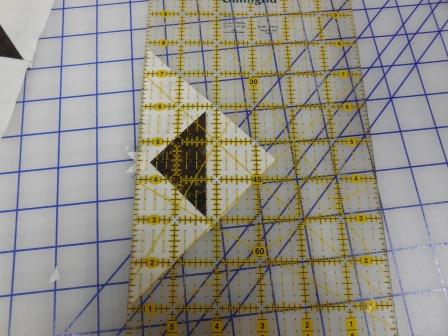
In order to cut the 3 5/16″ square position edge of the fabric half way between the 3 1/4″ and 3 3/8″ marks on the ruler.

JC1a

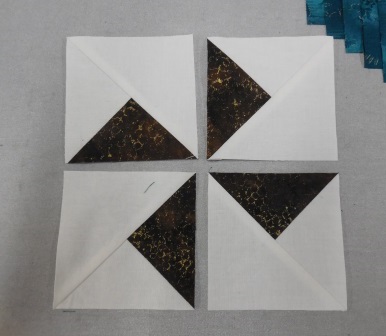
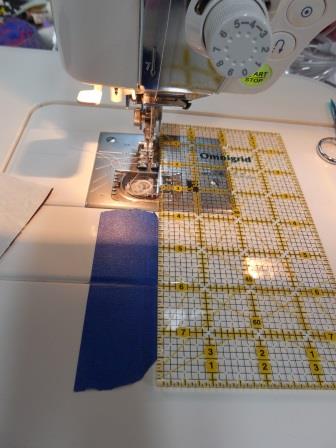
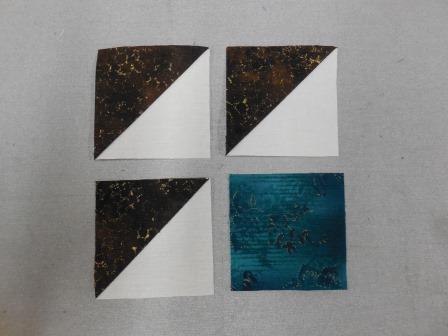
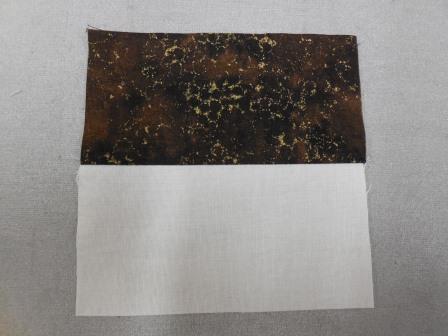
With the 3″ squares make half square triangle units using one of the previous methods.  Cut them apart between the two seams and press toward the dark fabric.  Trim all four units into 2 1/2″ squares, using the 45 degree line on your ruler.

JC2

Add two of the triangles cut from the 2 7/8″ squares to either side of the half square triangle unit as shown below.

JC3

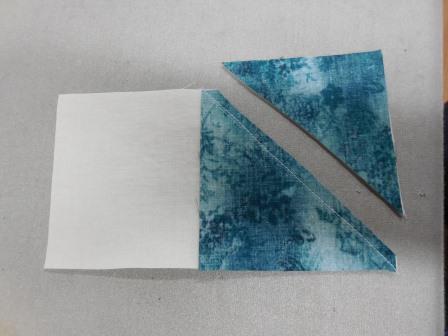
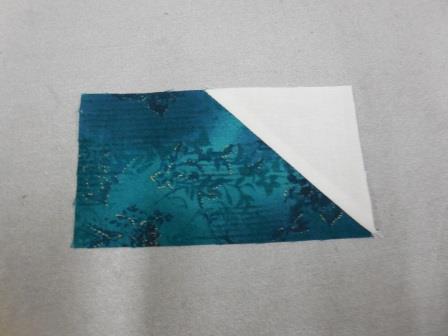
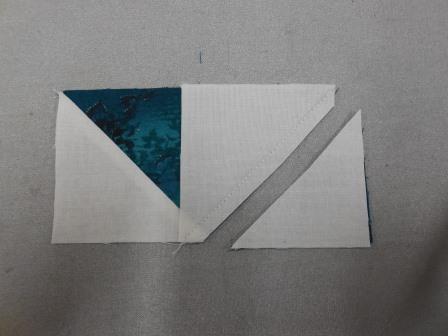
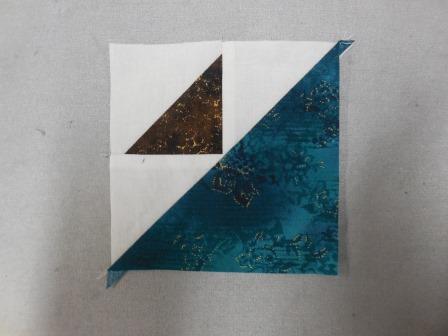
Press and trim so one edge lies along the 45 degree line and the tip of the triangle is on the 3 1/2″ line.

JC4

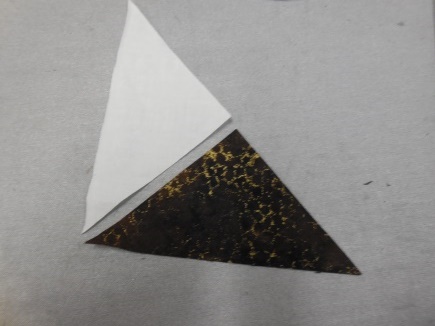
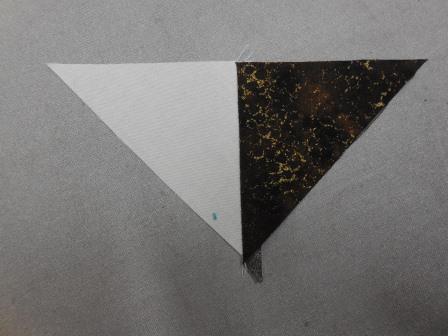
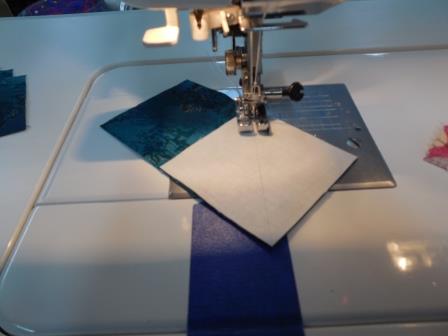
Place this unit on top of the triangle cut from the 4 7/8″ square and carefully sew with a 1/4″ seam allowance.

JC5

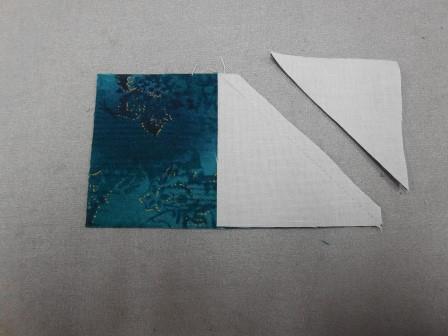
If unit you made isn’t perfect you can lay it on top of the 4 7/8″ triangle and use that for the guide.  You can see the triangle on the left isn’t exactly right.  I made sure all the points matched and then used the brown triangle as my guide for my 1/4″ seam allowance.

JC5a

Make four units using the 2 1/2″ x 4 1/2″ pieces as shown below.

JC6

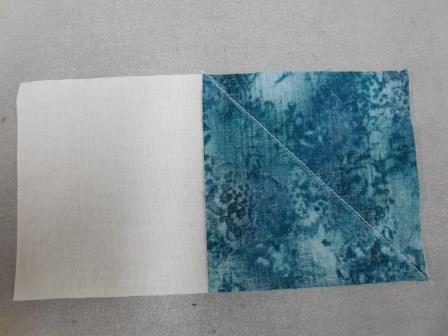
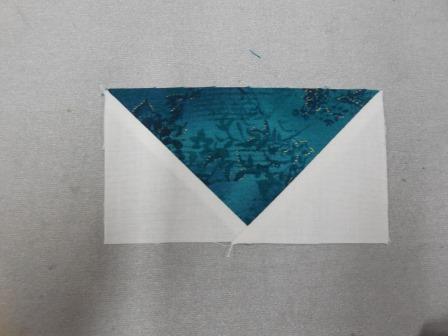
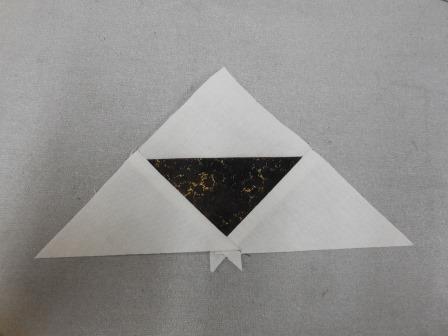
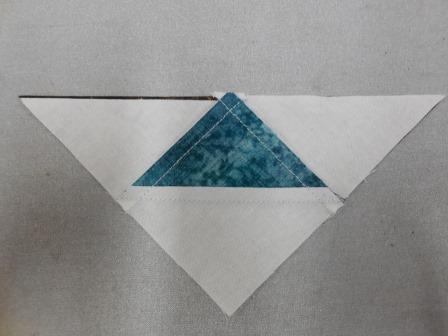
For the center block lay the long edge of two of the triangles cut from the 2 7/8″ squares on either side of the 3 5/16″ neutral square.  Stitch on a 1/4″ seam allowance.

JC7

Press and trim the dog ears.

JC9

Add the last two triangles on the remaining sides.

JC10

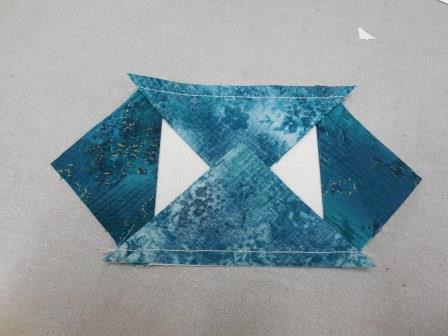
Press and trim to 4 1/2″

JC11

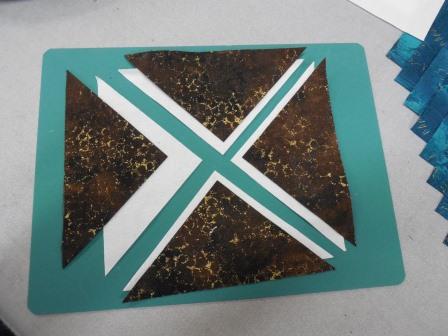
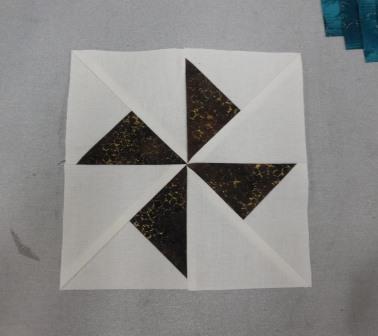
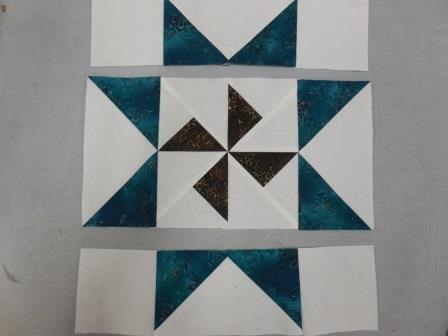
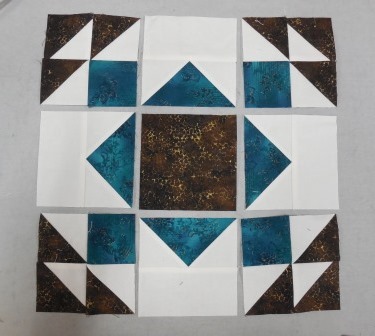
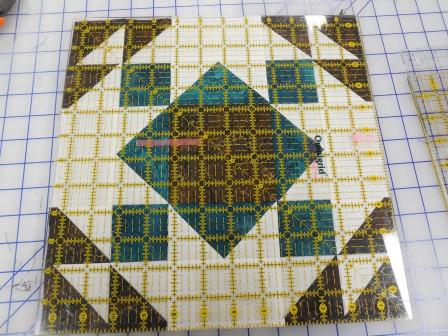
Lay the units out as shown below.

JC13

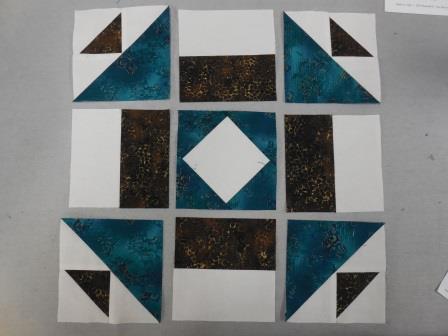
Sew the pieces together and press well.  Trim to 12 1/2″

JC14

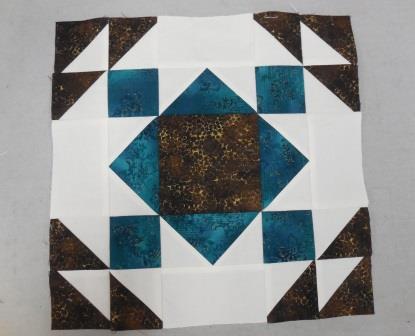
Add the 1 1/2″ x 12 1/2″ pieces to two opposite sides.  Press

Add the 1 1/2″ x 14 1/2″ pieces to the remaining sides.  Press

Block 3 – Martha Washington’s Star

Standard

Following are the pieces you will need to cut for EACH block:

Neutral

(2) 1 1/2″ x 14 1/2″ rectangles

(2) 1 1/2″ x 12 1/2″ rectangles

(4) 3 1/2″ x 3 1/2″ squares

(4) 3 1/2″ x 6 1/2″ rectangles

(2) 4″ x 4″ squares

(1) 4 1/2″ x 4 1/2″ square

Color 1

(8) 3 1/2″ x 3 1/2″ squares

Color 2

(1) 4 1/2″ x 4 1/2″ square

MWS 1

Take the Neutral 4 1/2″ square and the Color 2 4 1/2″ square and lay one on top of the other.  Lay your ruler from corner to corner and cut in half diagonally.  Without moving the fabric pieces, cut between the other two corners to make 4 smaller triangles of each fabric.

MWS 2

Lay one neutral and one color 1 triangle next to each other as shown below.

MWS 3

Sew them together on two of the short edges to make a larger triangle.  Do the same with the remaining triangle pieces.  You should have four pieces that look like the picture below.

MWS 4

Cut the 4″ squares in half diagonally once.  Center the pieced triangle on one of the neutral triangles and stitch together.  Trim to make 3 1/2″ squares with the intersection meeting at the 1 3/4″ mark in both directions.

MWS 5

Sew the four blocks together as shown to make a pinwheel block.

MWS 6

Mark all eight of the  3 1/2″ Color 2 squares from corner to corner.

MWS 7

As with the Block 2 you will make four Flying Geese blocks by laying the 3 1/2″ square at the end of the 3 1/2″ x 6 1/2″ rectangle and stitch just outside of the drawn line.  You should be able to see the distance on this picture.

MWS 8

Cut the excess away.

MWS 9

And press.

MWS 10

Repeat this on the other side of the rectangle.  Make four Flying Geese units and lay all the units out as shown below.

MWS 12

Stitch together and press well.

Add the 1 1/2″ x 12 1/2″ pieces to two opposite sides.  Then add the 1 1/2″ x 14 1/2″ pieces to the other sides to finish the block.

MWS 13


Block 2 – Summer Winds

Standard

For this block you will need to cut the following pieces for each block:

Neutral:

(6) 3″ x 3″ squares

(8) 2 1/2″ x 2 1/2″ squares

(4) 2 1/2″ x 4 1/2″ rectangles

(2) 1 1/2″ x 12 1/2″ rectangles*

(2) 1 1/2″ x 14 1/2″ rectangles*

*I cut a piece of neutral 12 1/2″ x WOF and also 14 1/2″ x WOF.  For each block I cut the 1 1/2″ pieces from these strips.

Color 1:

(6) 3″ x 3″ squares

(1) 4 1/2″ x 4 1/2″ squares

Color 2:

(4) 2 1/2″ x 2 1/2″ squares

(4) 2 1/2″ x 4 1/2″ rectangles


SW 1

We are going to make HST (half square triangle) units again.  However, this time I’m not going to draw the pencil line through the center.  With smaller pieces you can just use a piece of painters’ tape instead.  Place a ruler flat against your quarter inch foot and lay a piece of tape along the line formed by the ruler in front of the foot.  This will be your guide.

SW 2

Using the 3″ squares of the neutral and color 1, place one of each square together.  Place one of the corners at the edge of the quarter inch foot and make a seam toward the opposite corner.  Guide the pieces through the machine keeping the front corner on the edge of the tape as shown below.  This will make your first seam.

SW 3

Do the same thing on for the 2nd seam.  Cut the piece into two between the two seams.  Press toward the darker fabric.

SW 5

Trim each unit to 2 1/2″ x 2 1/2″.

SW 6

Lay out three of the HST units with one of the 2 1/2″ squares from color 2 as shown below.

SW 7

Sew the units together as shown below.  You will make 4 of these.

SW 8

For the flying geese units you will need to draw the pencil line from corner to corner on the 2 1/2″ neutral squares.

SW 9

Lay one of the 2 1/2″ marked neutral squares at one end of a 2 1/2″ x 4 1/2″ color 2 rectangles.

SW 10

Typically when you make the flying geese unit using this method you will come up with a unit that is a little smaller than needed.  However, this little tip will give you the correct size unit.  Do NOT stitch directly on the drawn line.  Stitch about 2-3 threads to the outside of the line.  My needle barely touches the line on one side, but it is not directly on the line.

SW 11

Cut off the excess.

SW 12

Press as shown below

SW 13

Repeat on the opposite side.

SW 14

SW 15

Don’t forget to trim this unit to 2 1/2″ by 4 1/2″ being careful that the “v” intersection is right at 1/4″.


Assemble the units as shown below.

SW 17

Piece them together.

SW 18

Square up the block to 12 1/2″ x 12 1/2″.

SW 20

Sew the 1 1/2″ x 12 1/2″ strip to opposite sides.  Press and stitch the 1 1/2″ x 14 1/2″ strips to the remaining sides and press.