Category Archives: BOM

London Square – November/December BOM

Standard

London Square

Please make this block in November to bring to the December meeting.

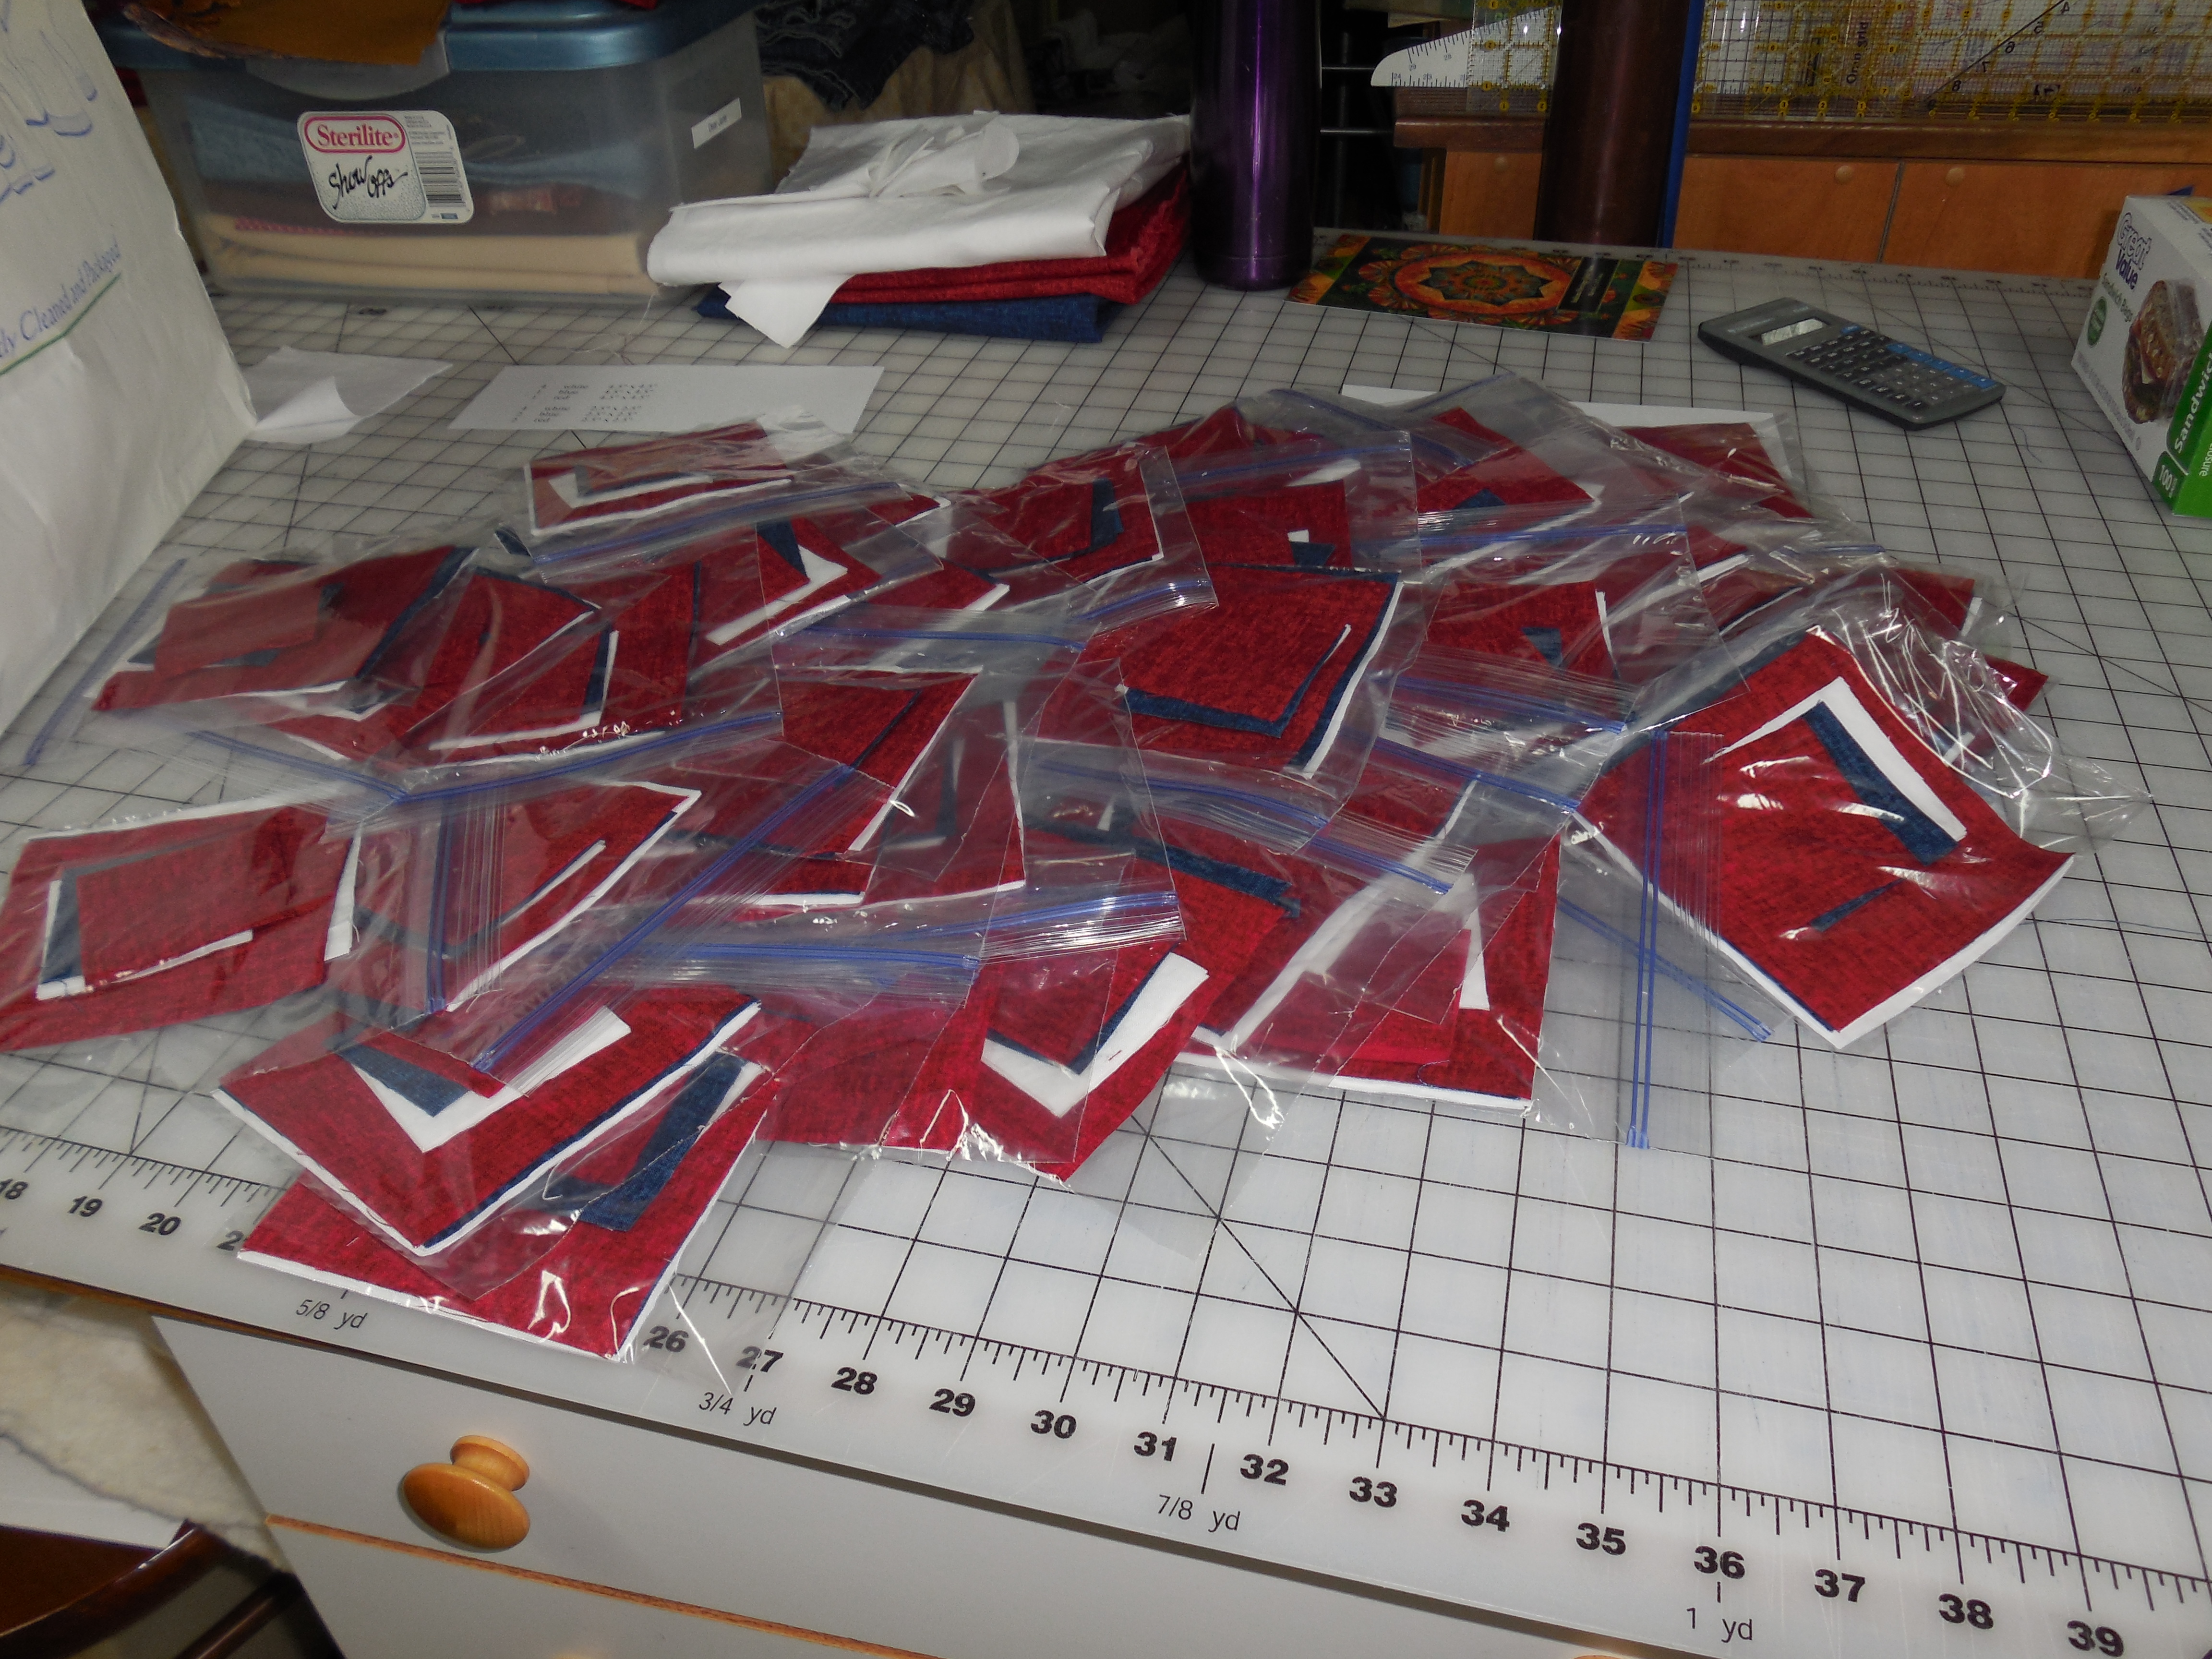
We will be using warm fall colors for this block.  Please use two different fabrics that contrast each other.

Cutting instructions:

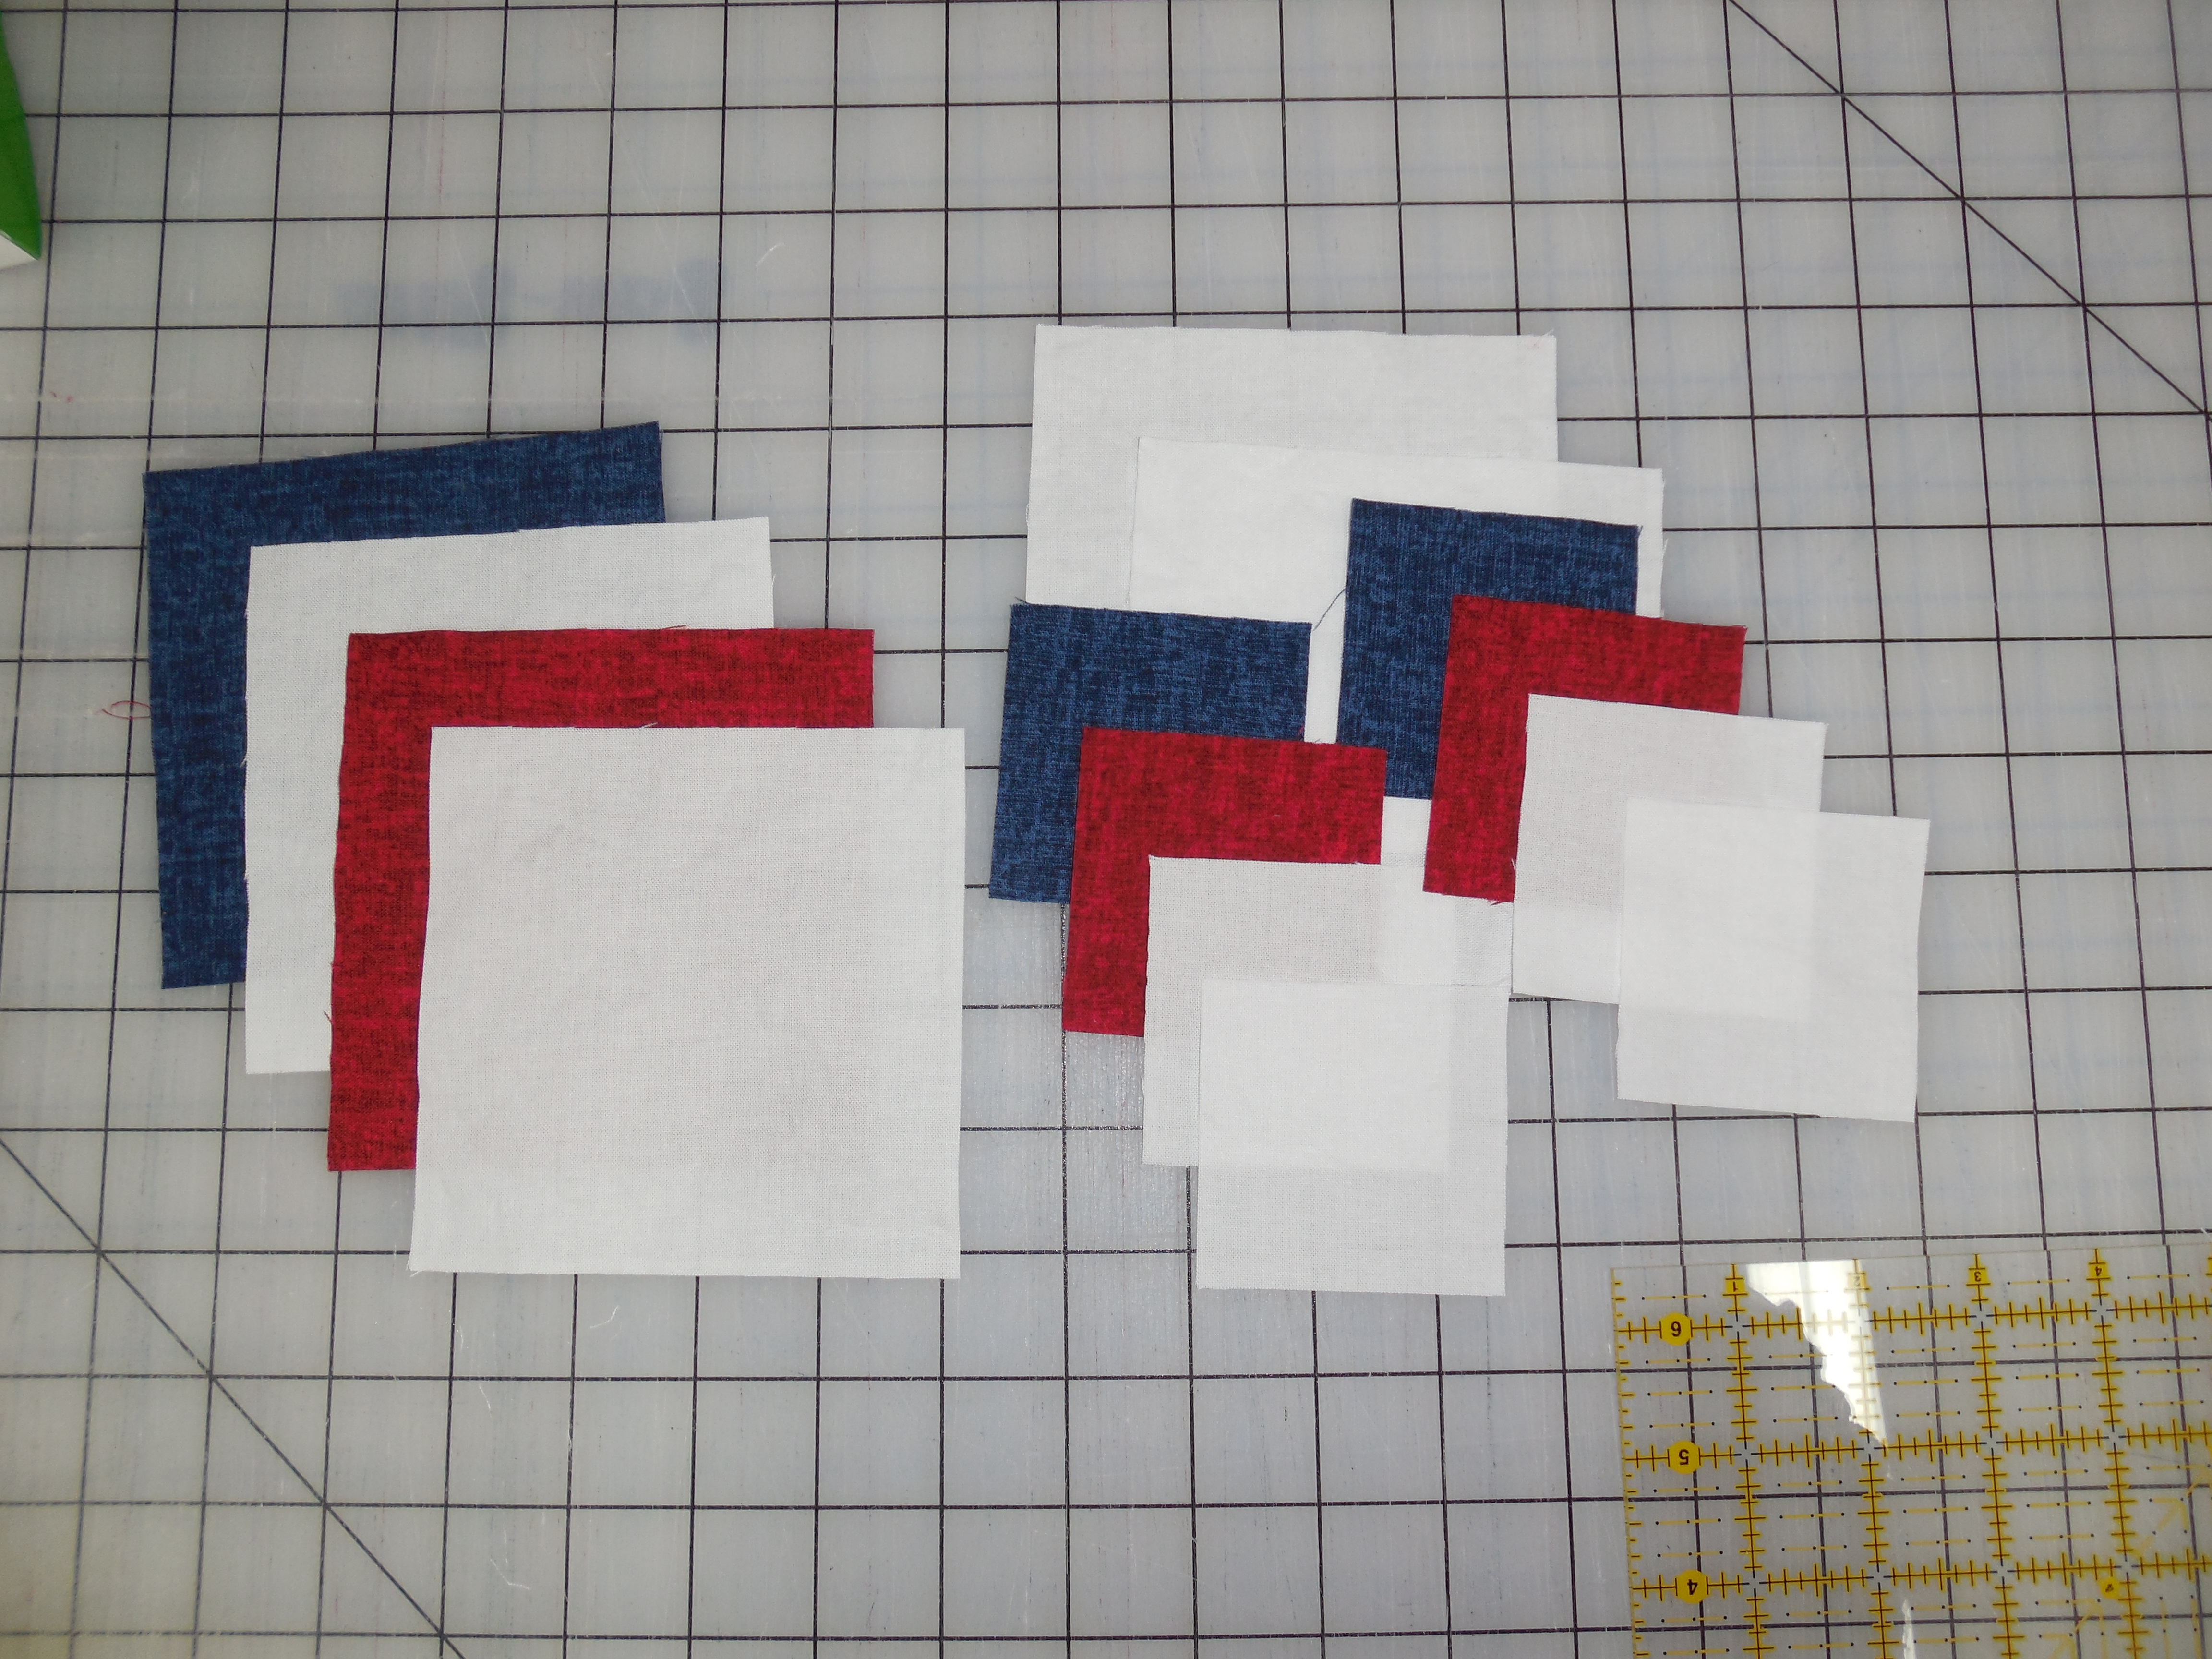
You will cut the same pieces from both of your fabrics.

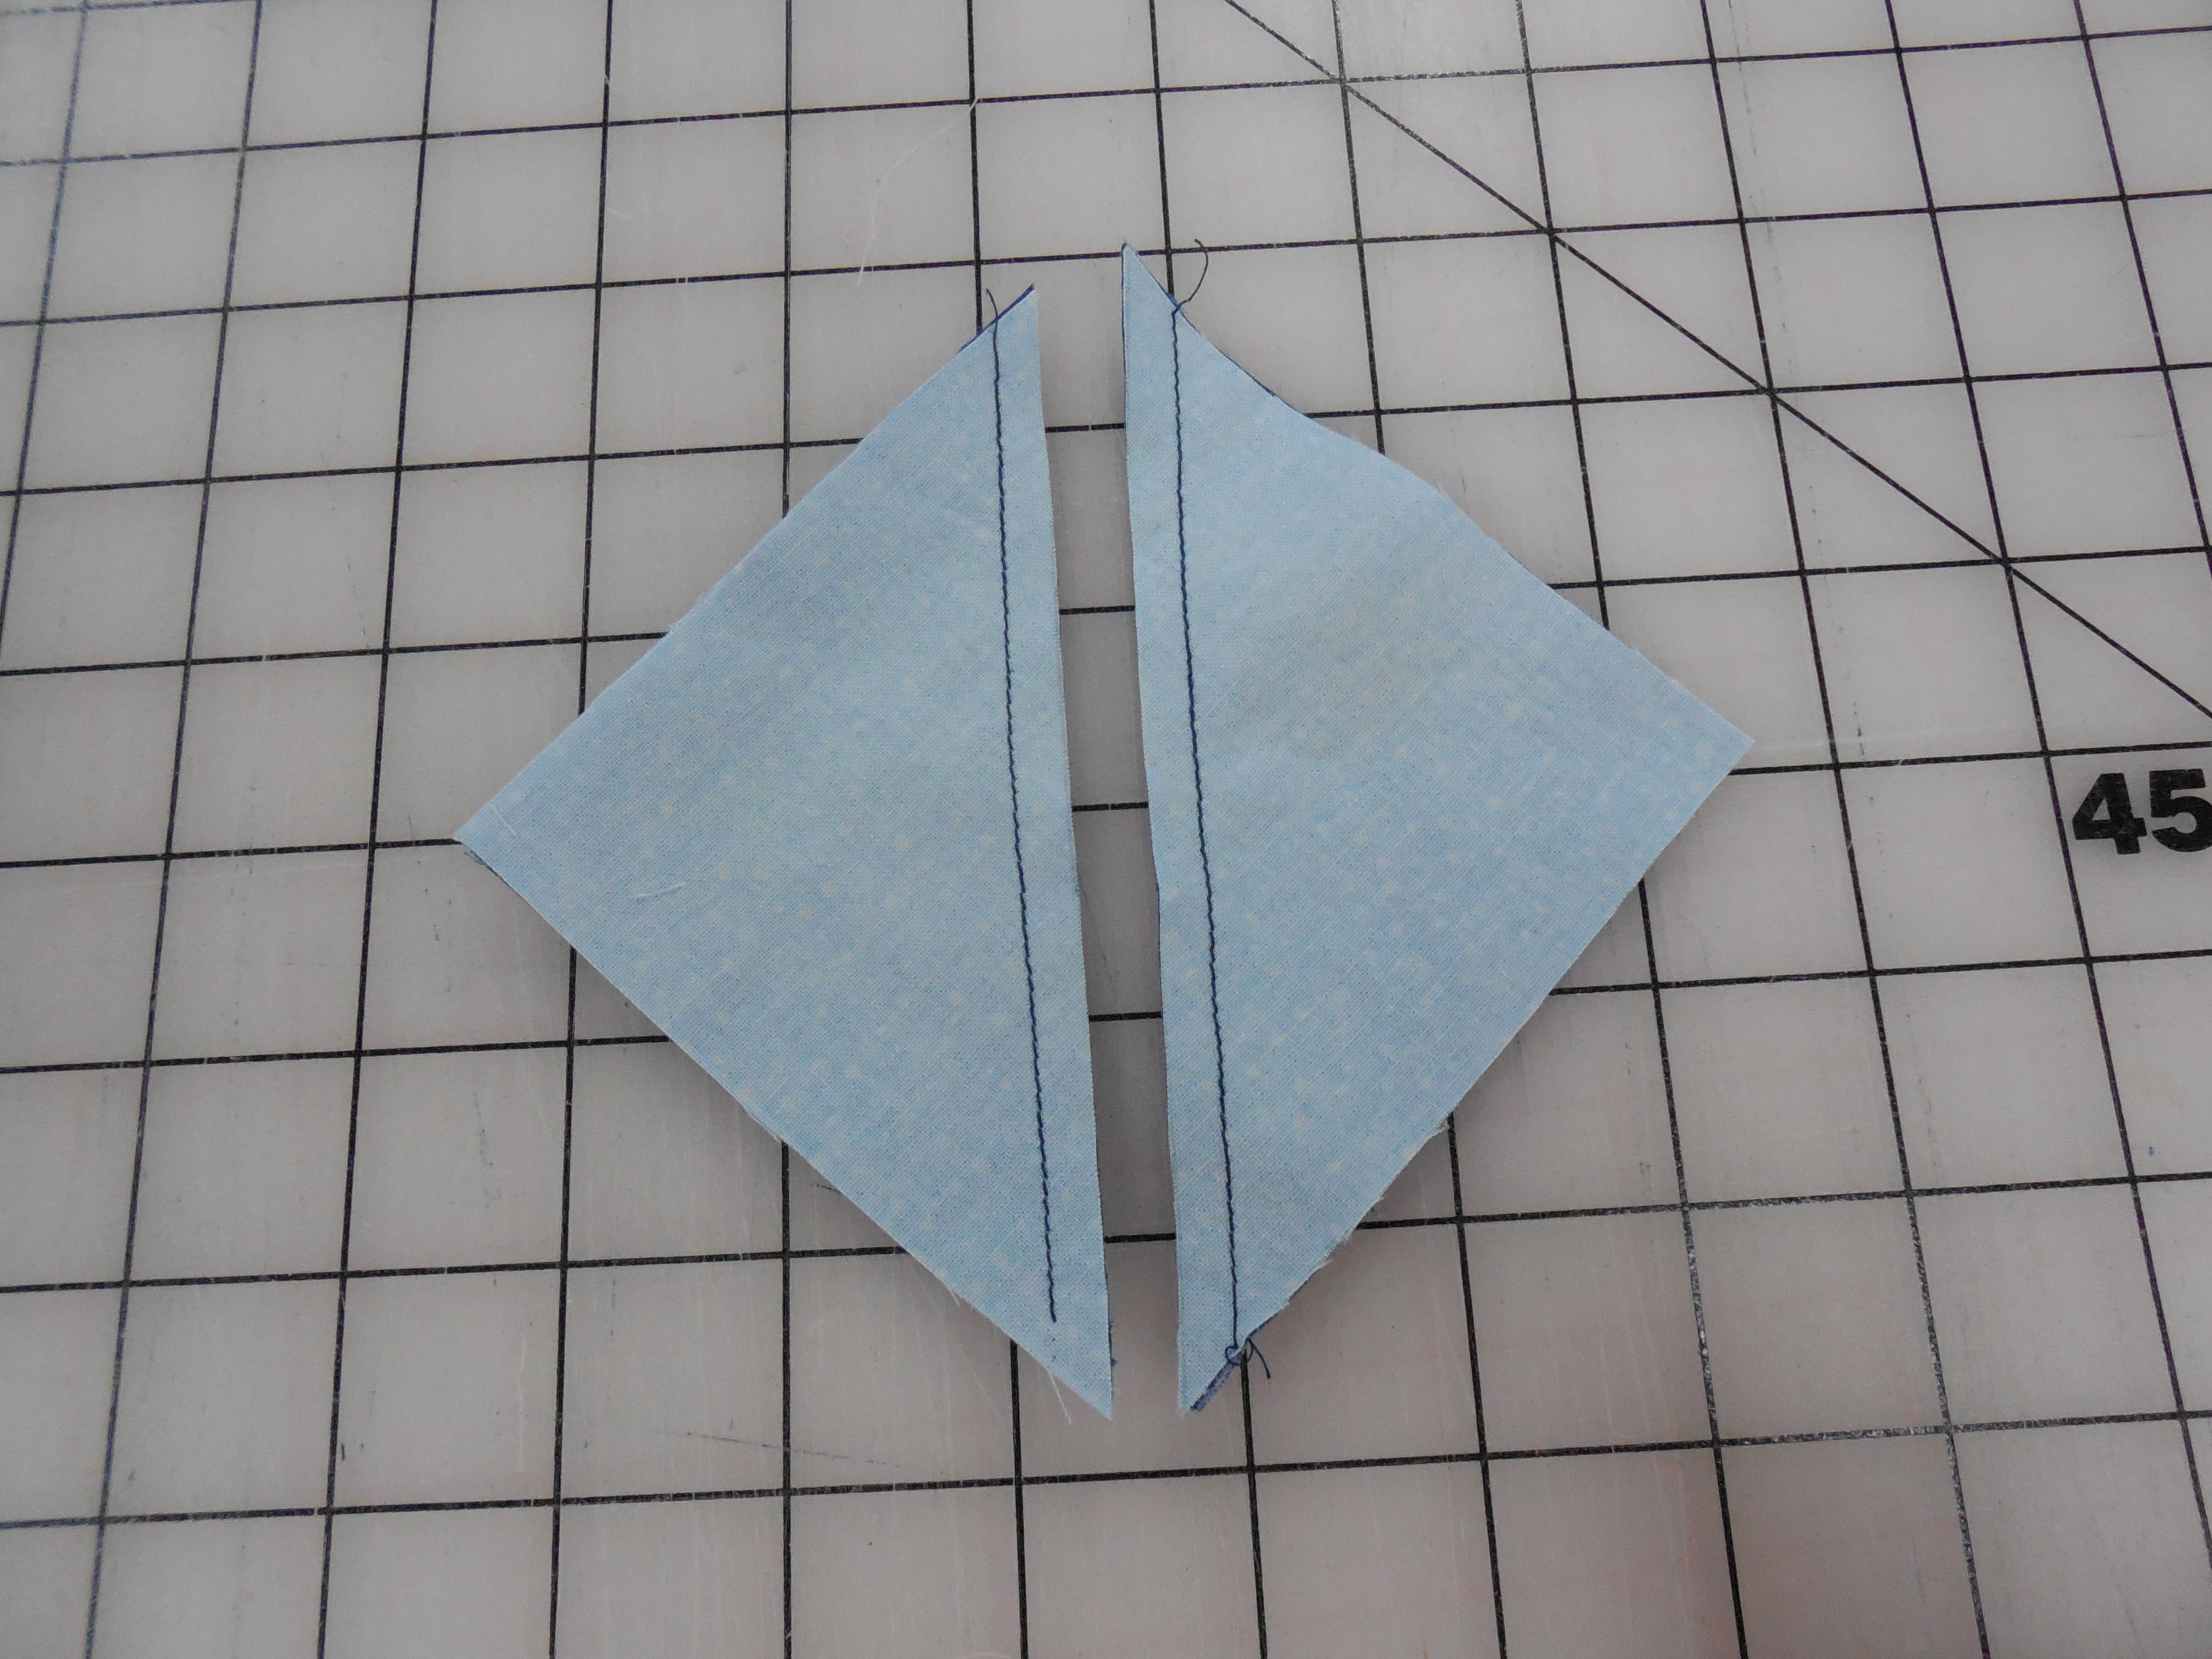
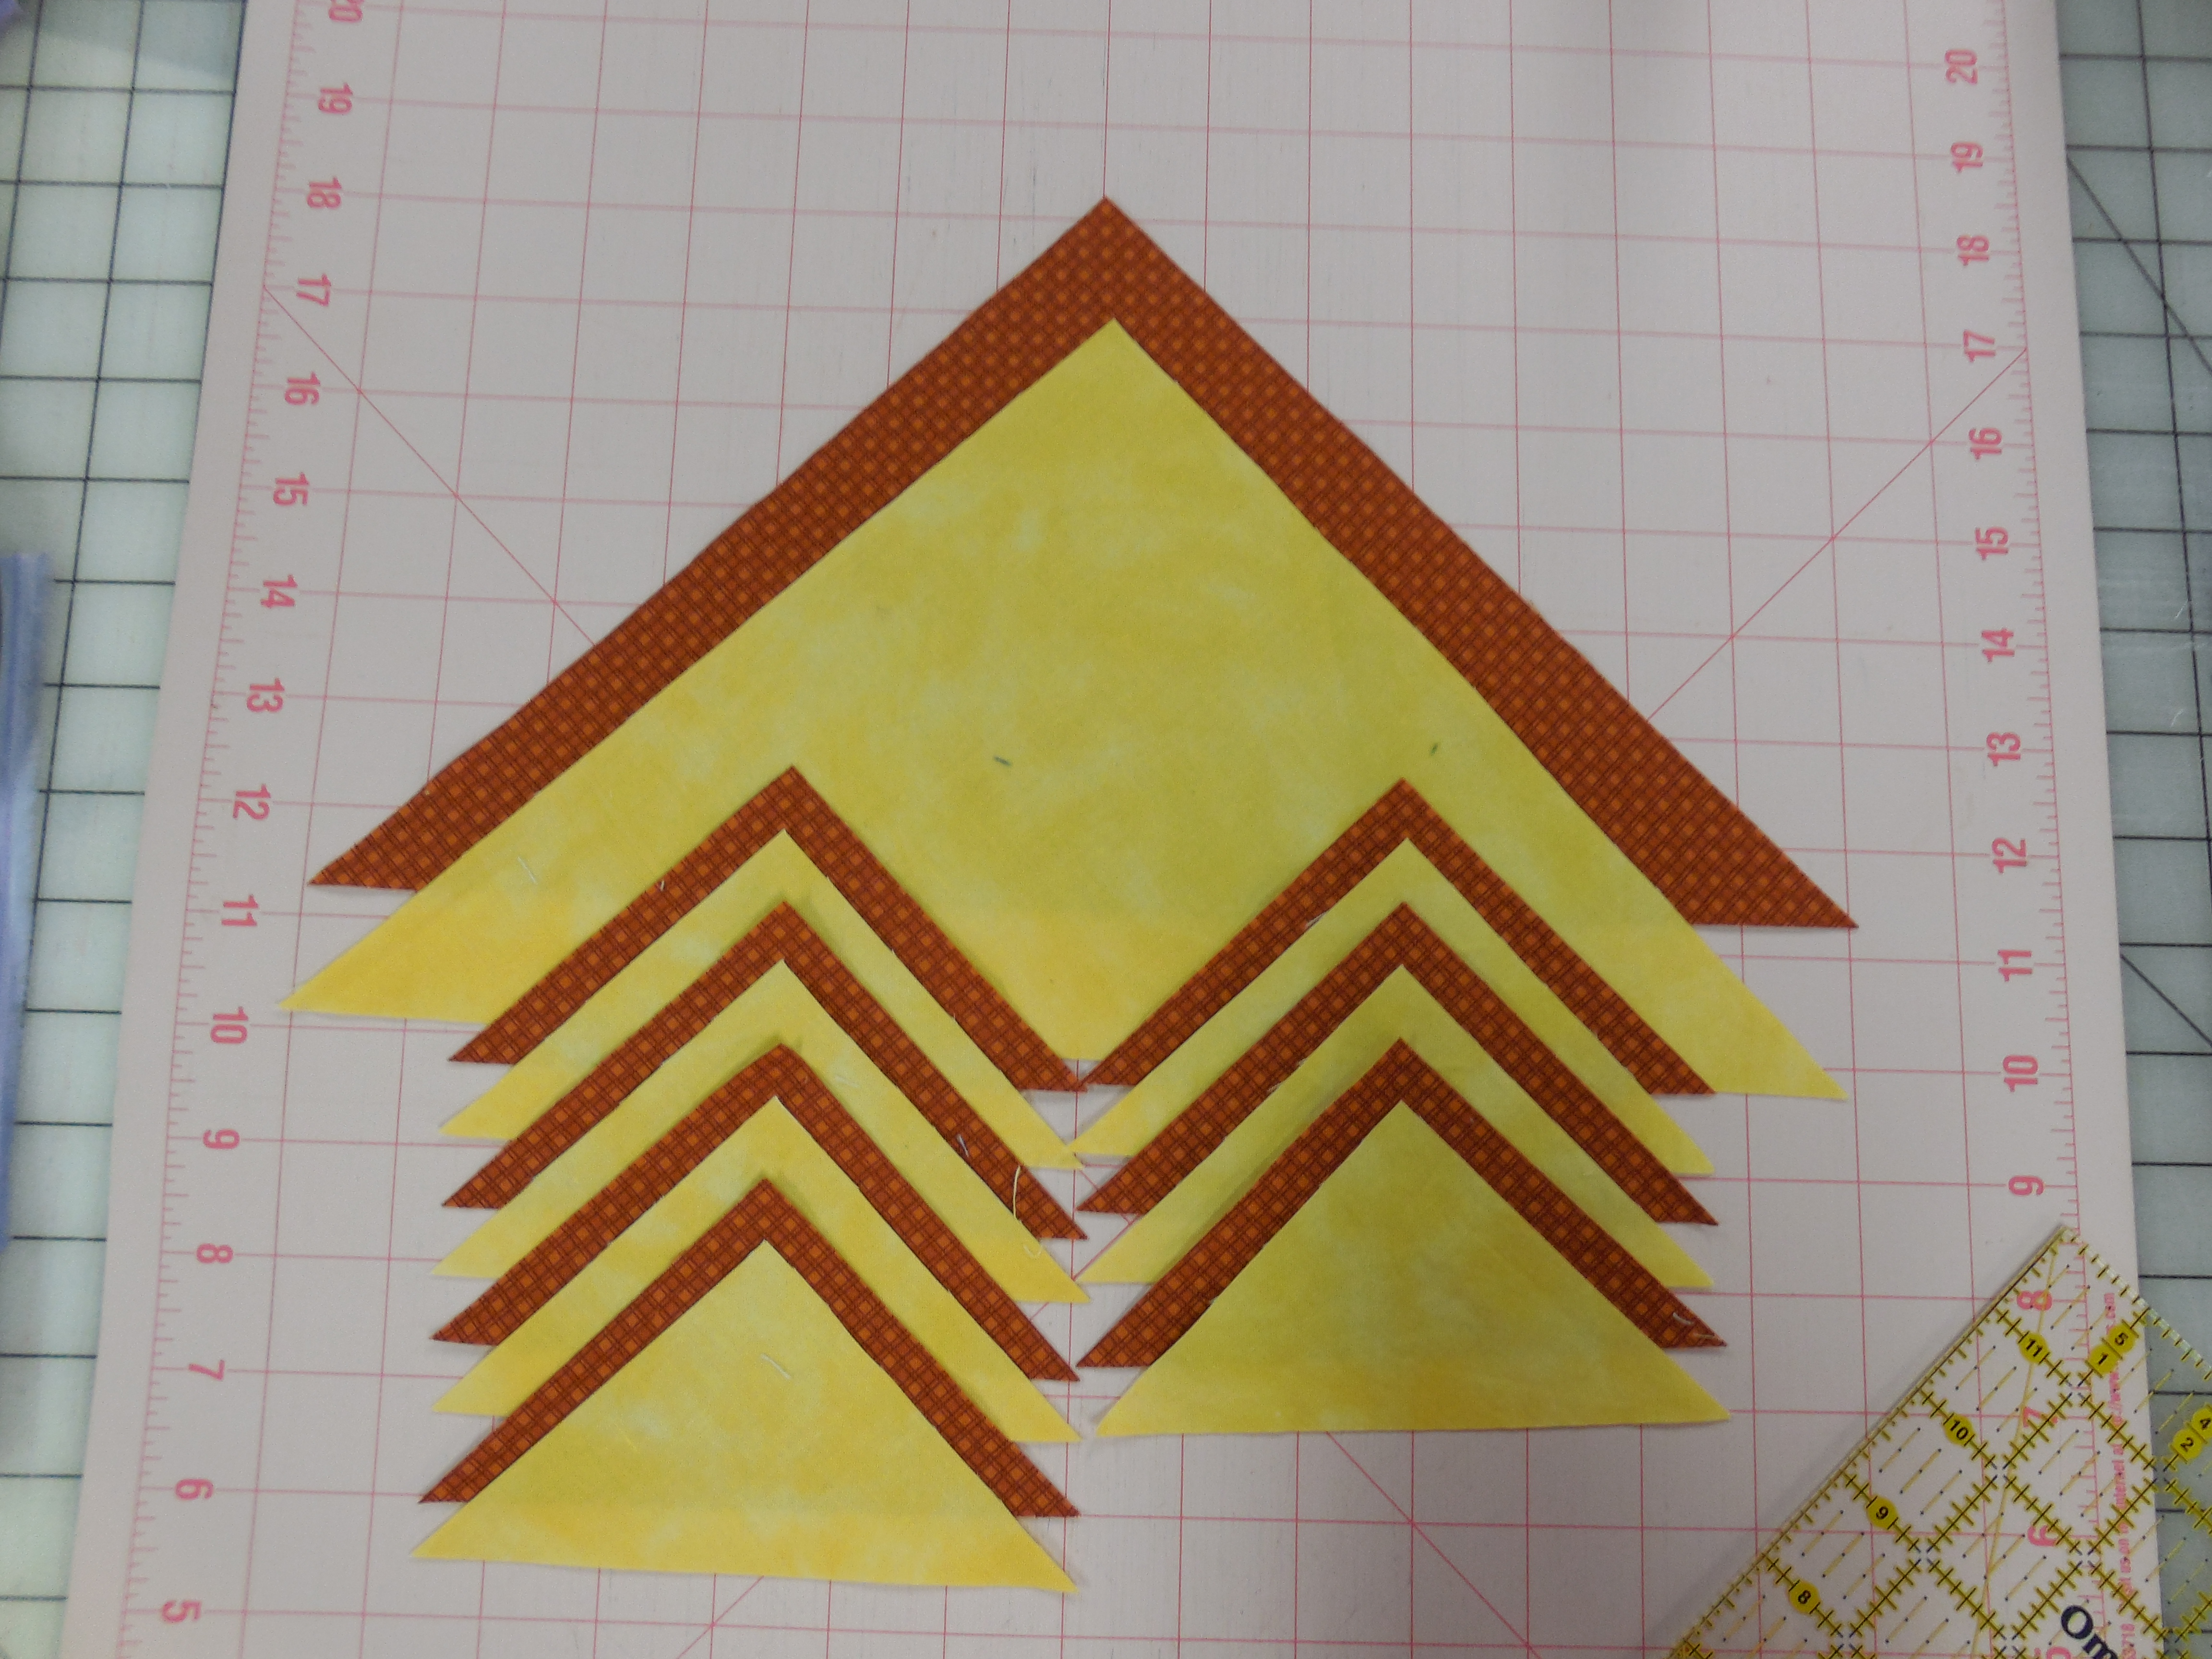
Out of each fabric cut a 9 7/8″ square.  Then cut the square in half diagonally.  You will have two extra triangles, one of each fabric.  (So you can make two blocks, right?  ☺)

Out of each fabric cut four 3 7/8″ squares.  Cut each of these diagonally.  You will need 7 triangles, so you will have one of each fabric left over.

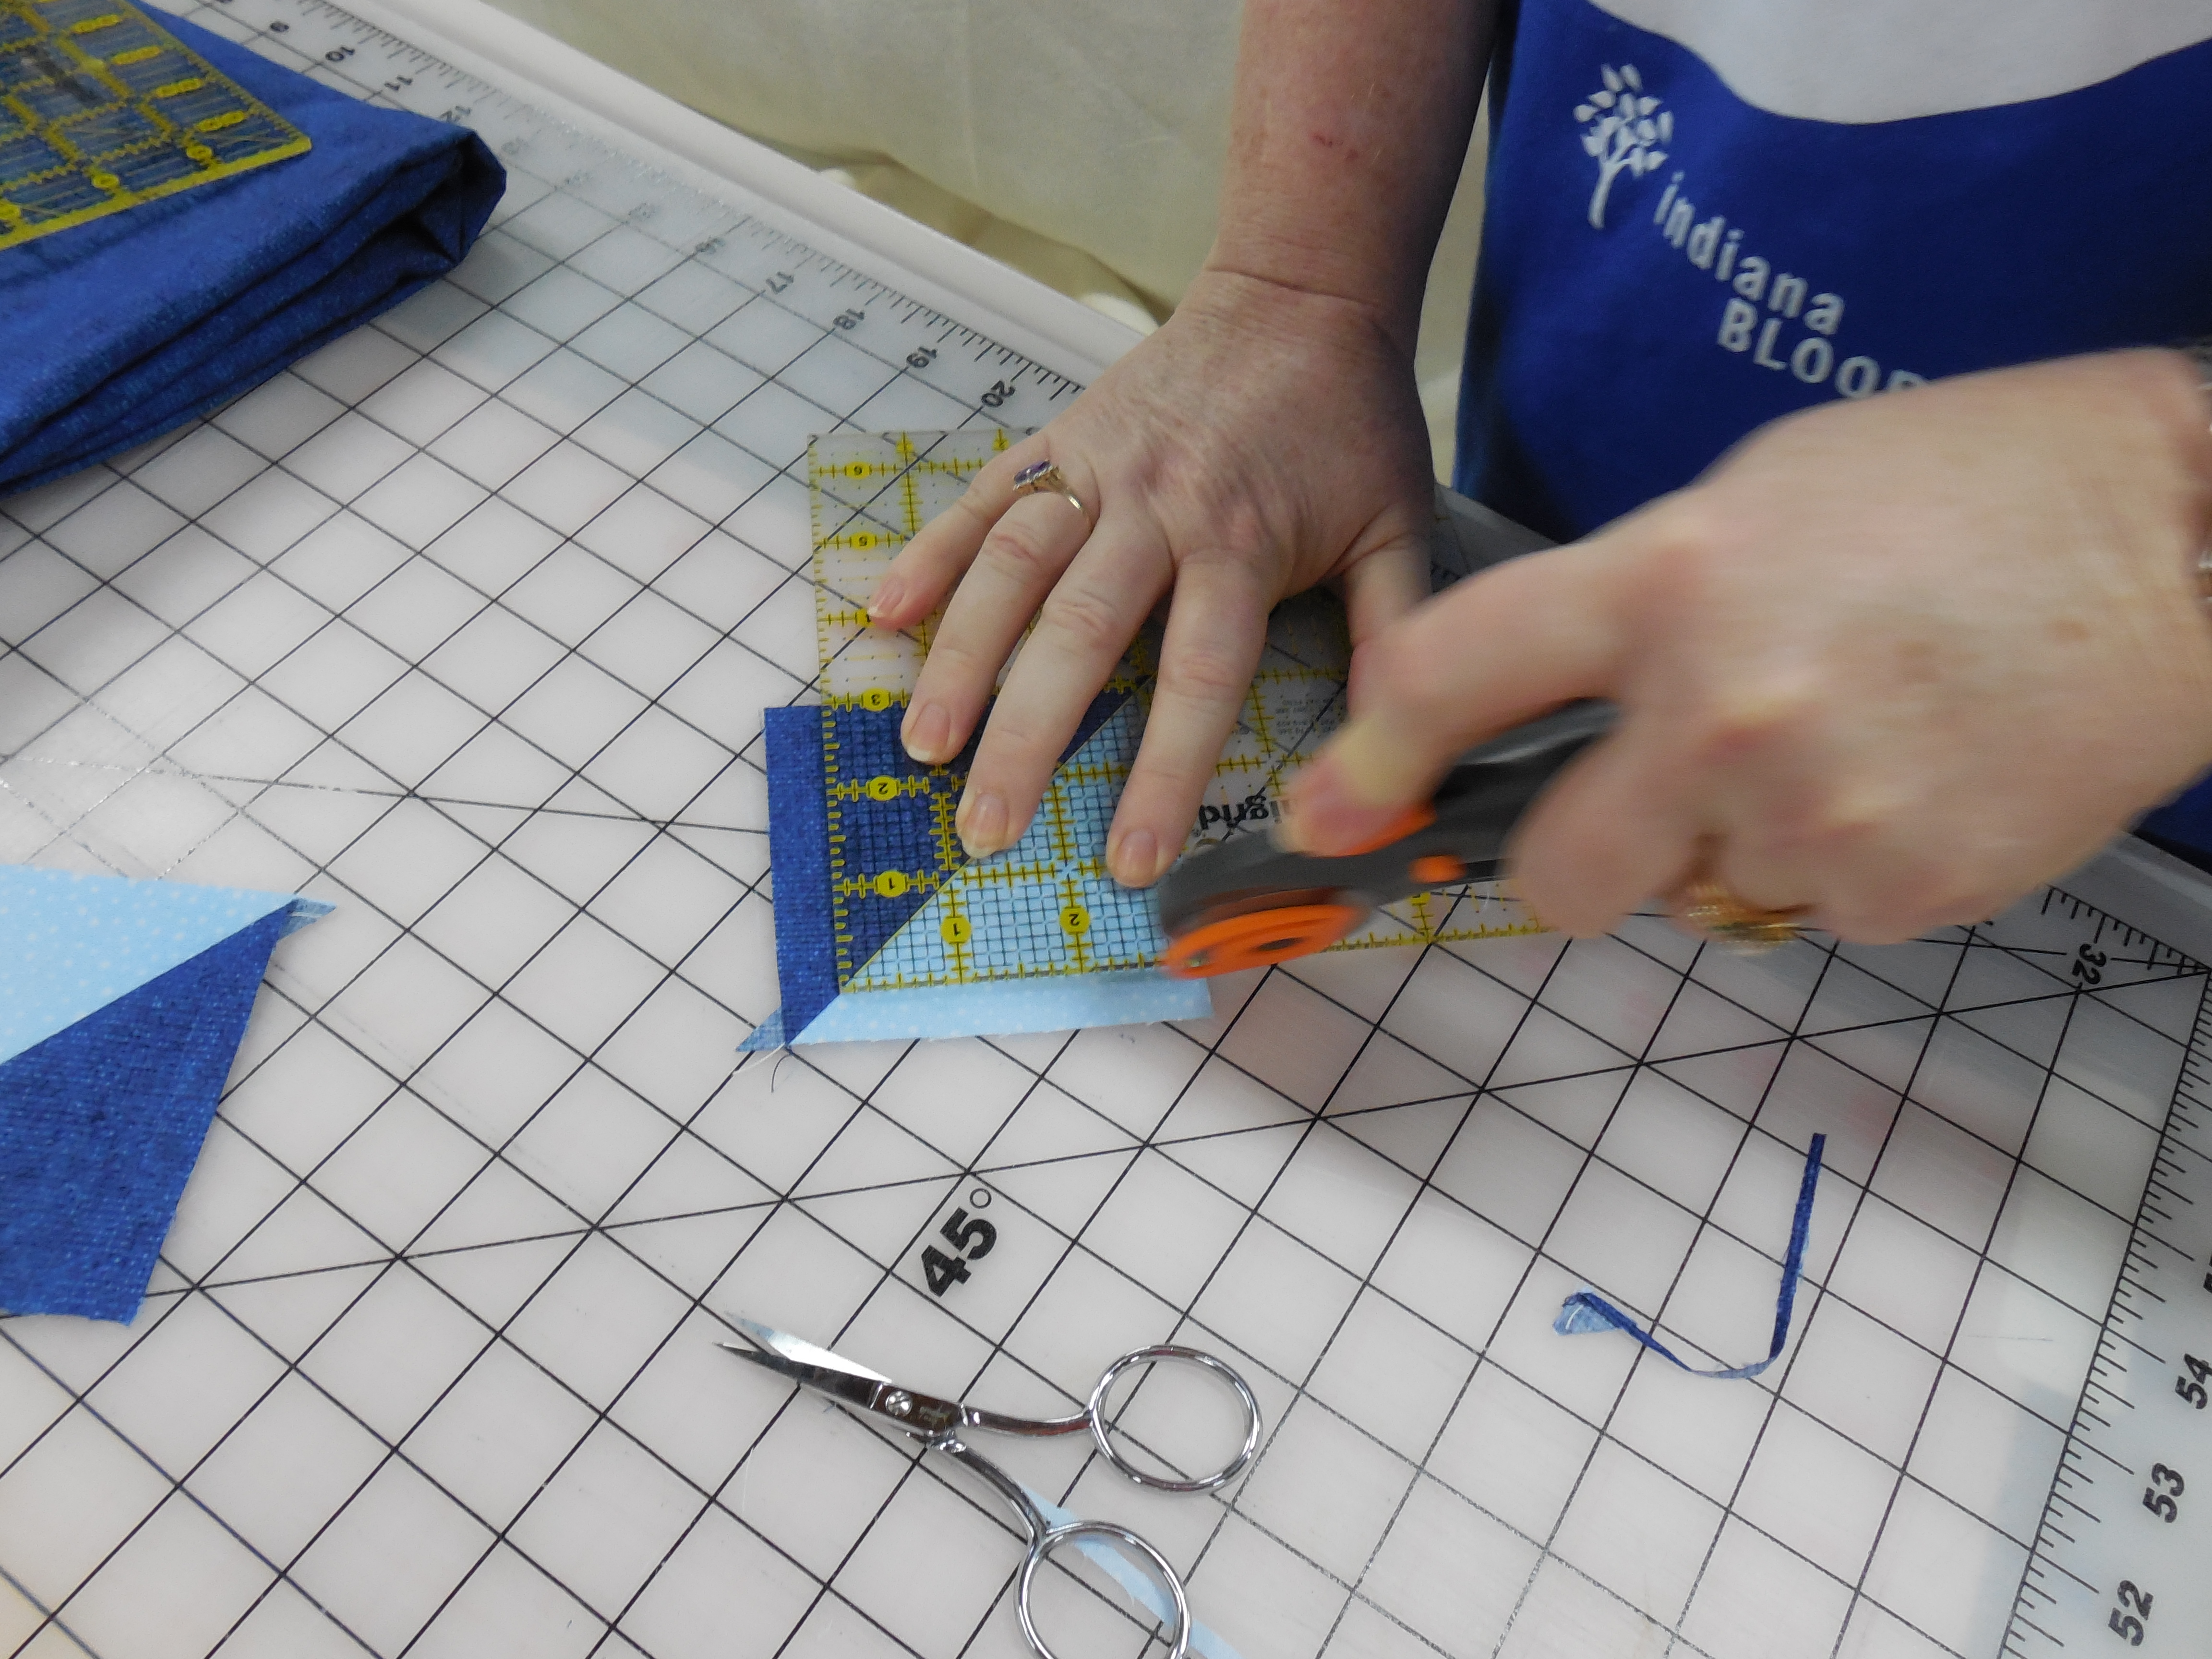
**I tend to cut my squares a smidge larger and then trim them after I’ve assembled them.

DSCN0706

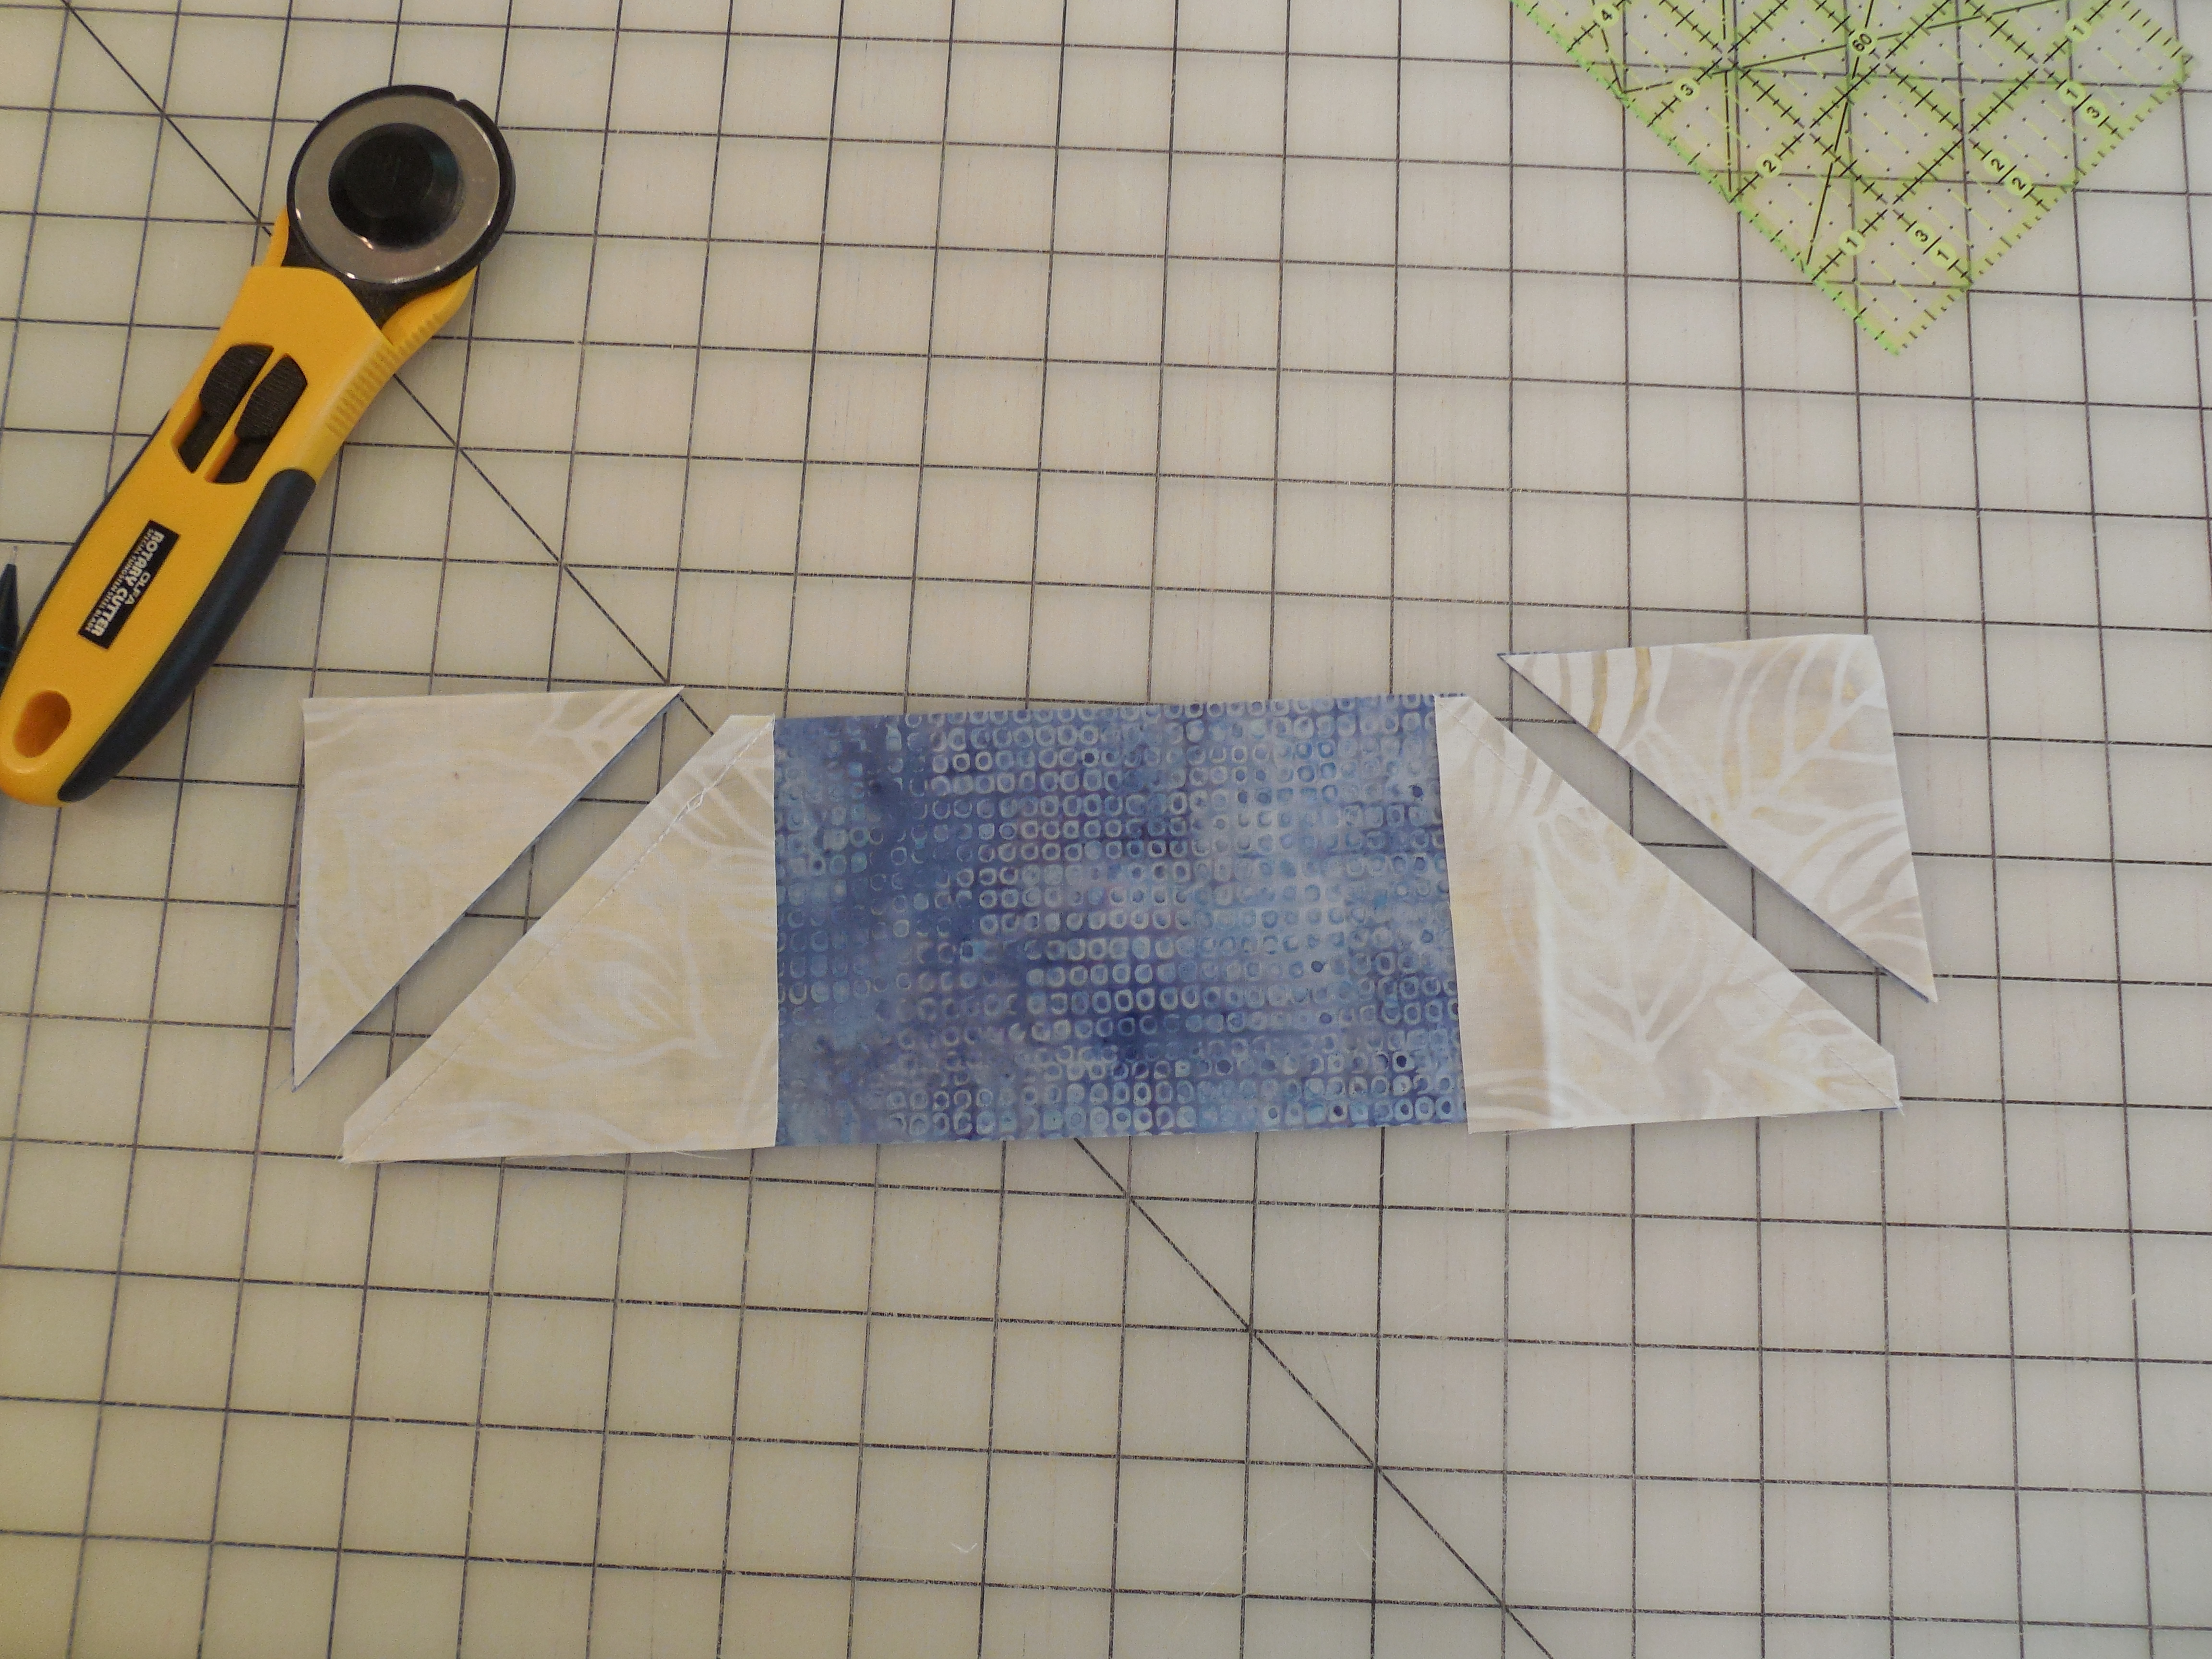
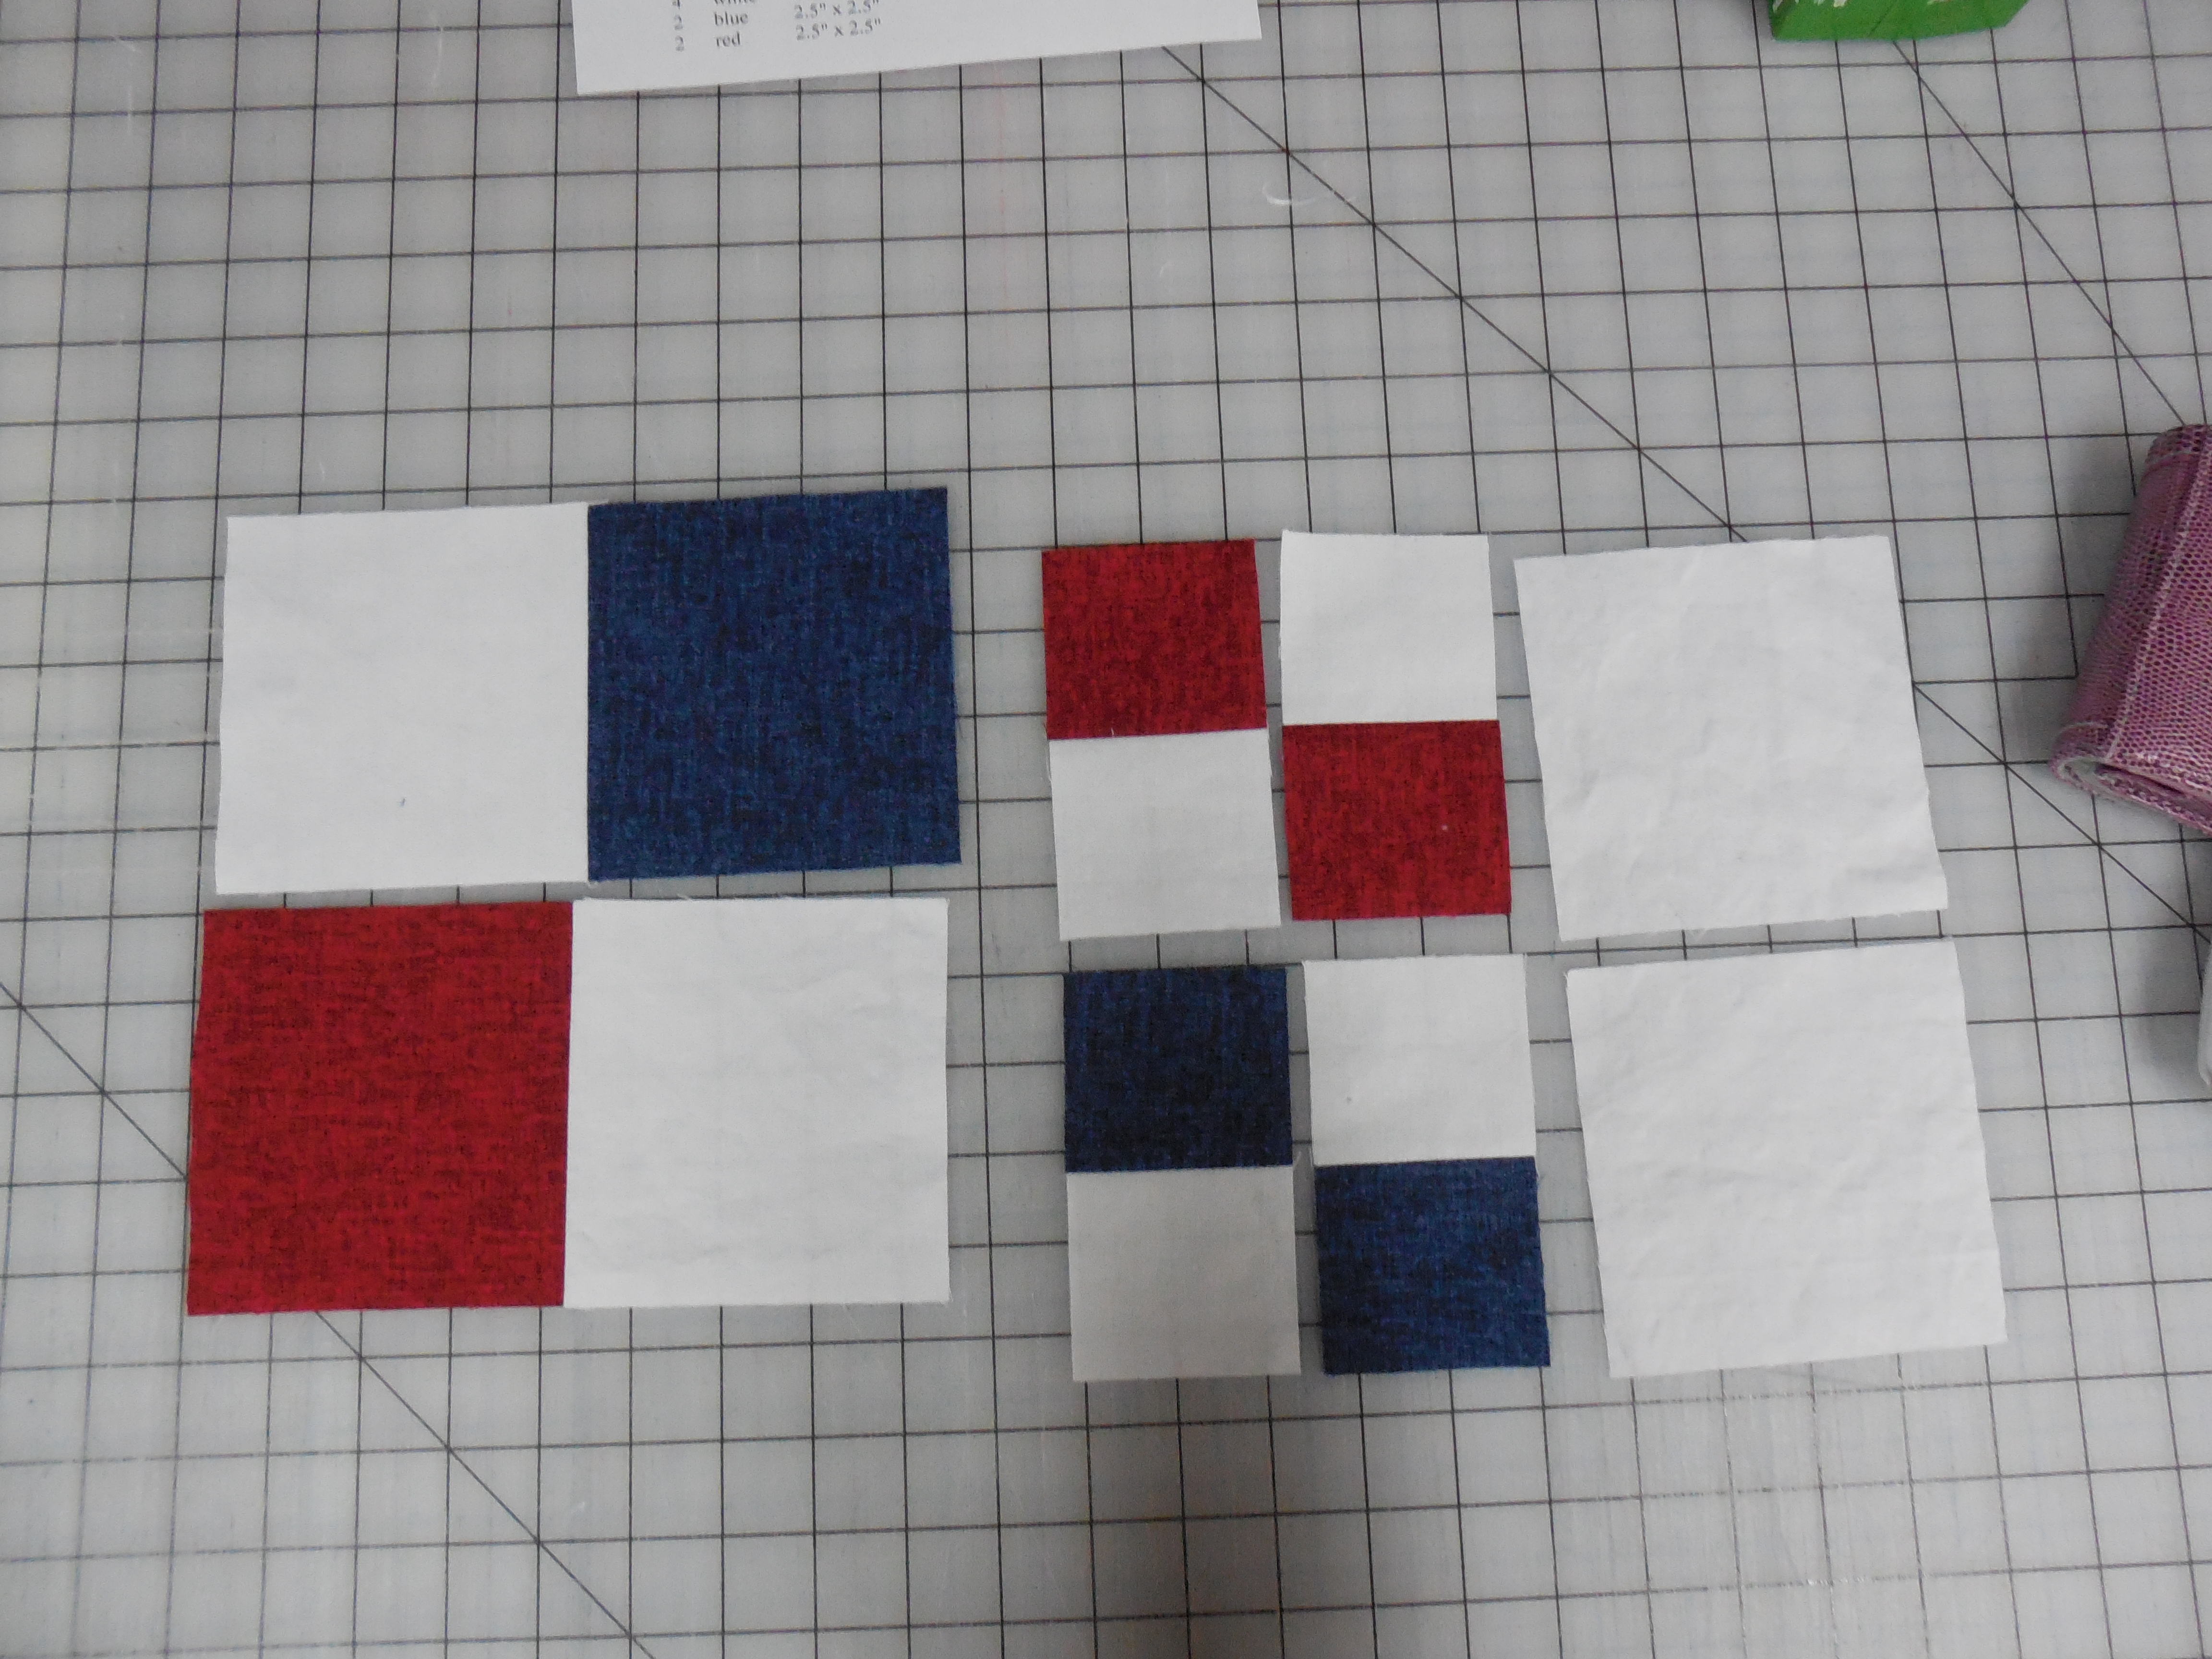
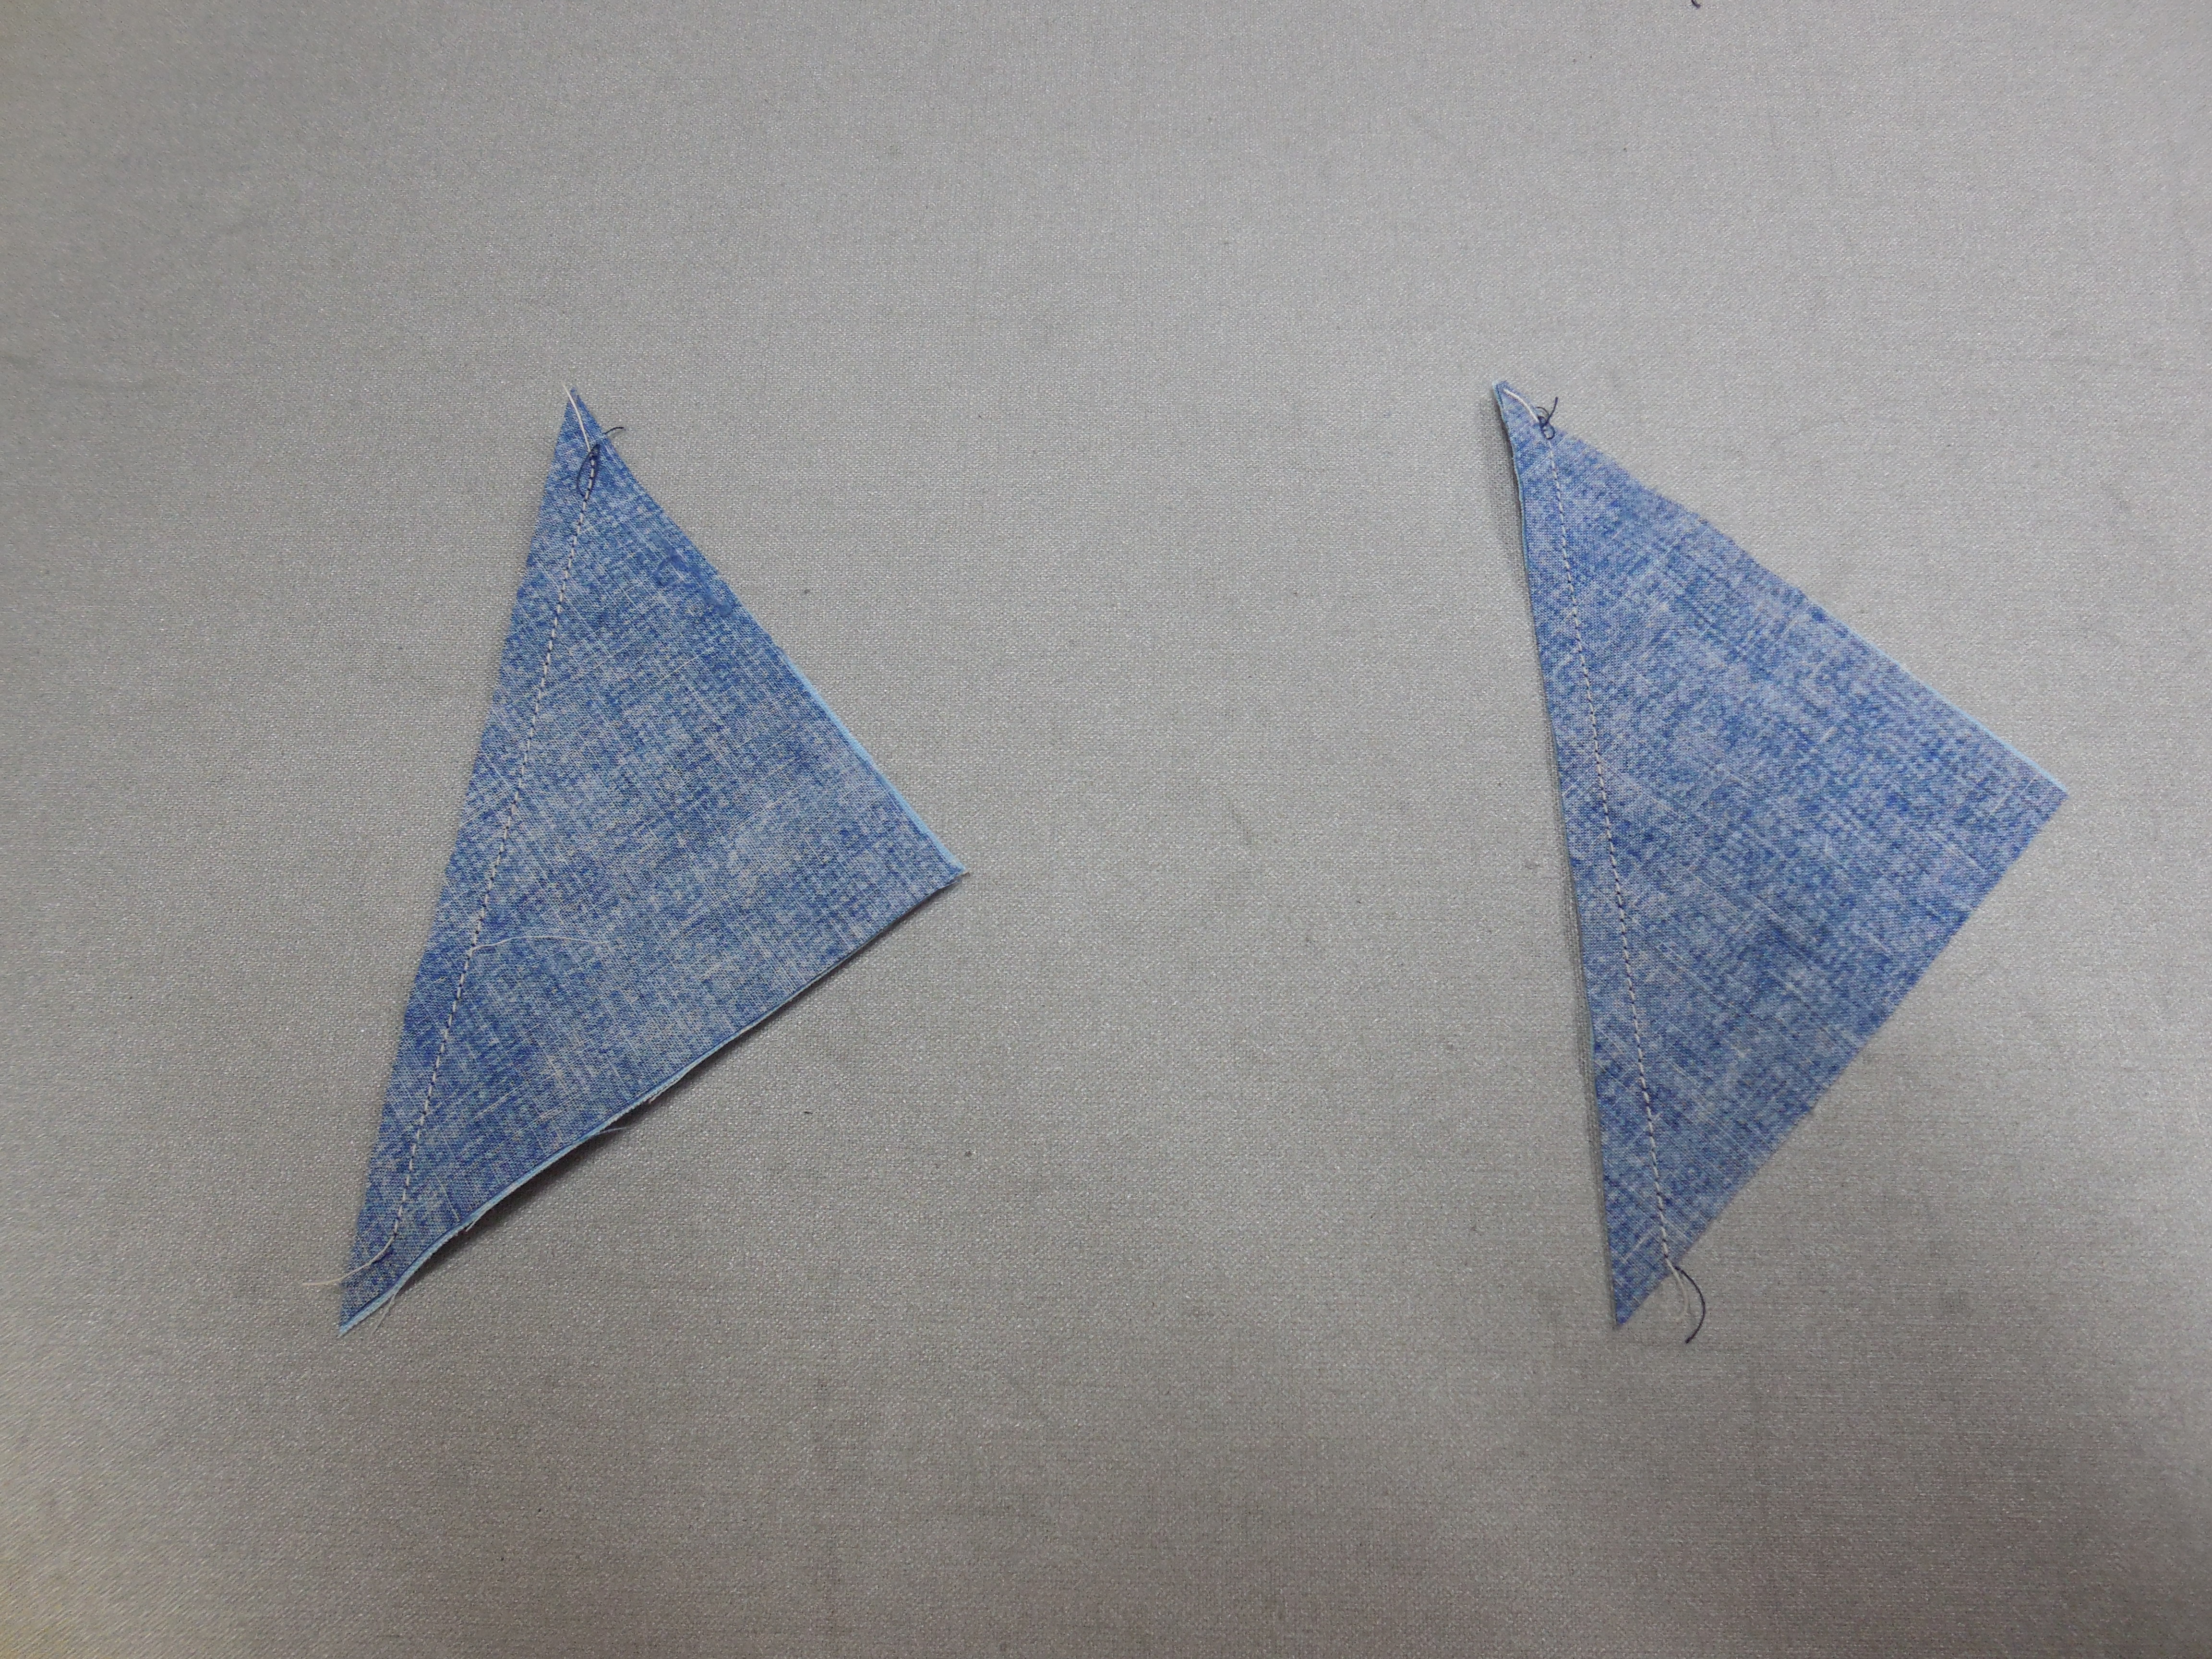
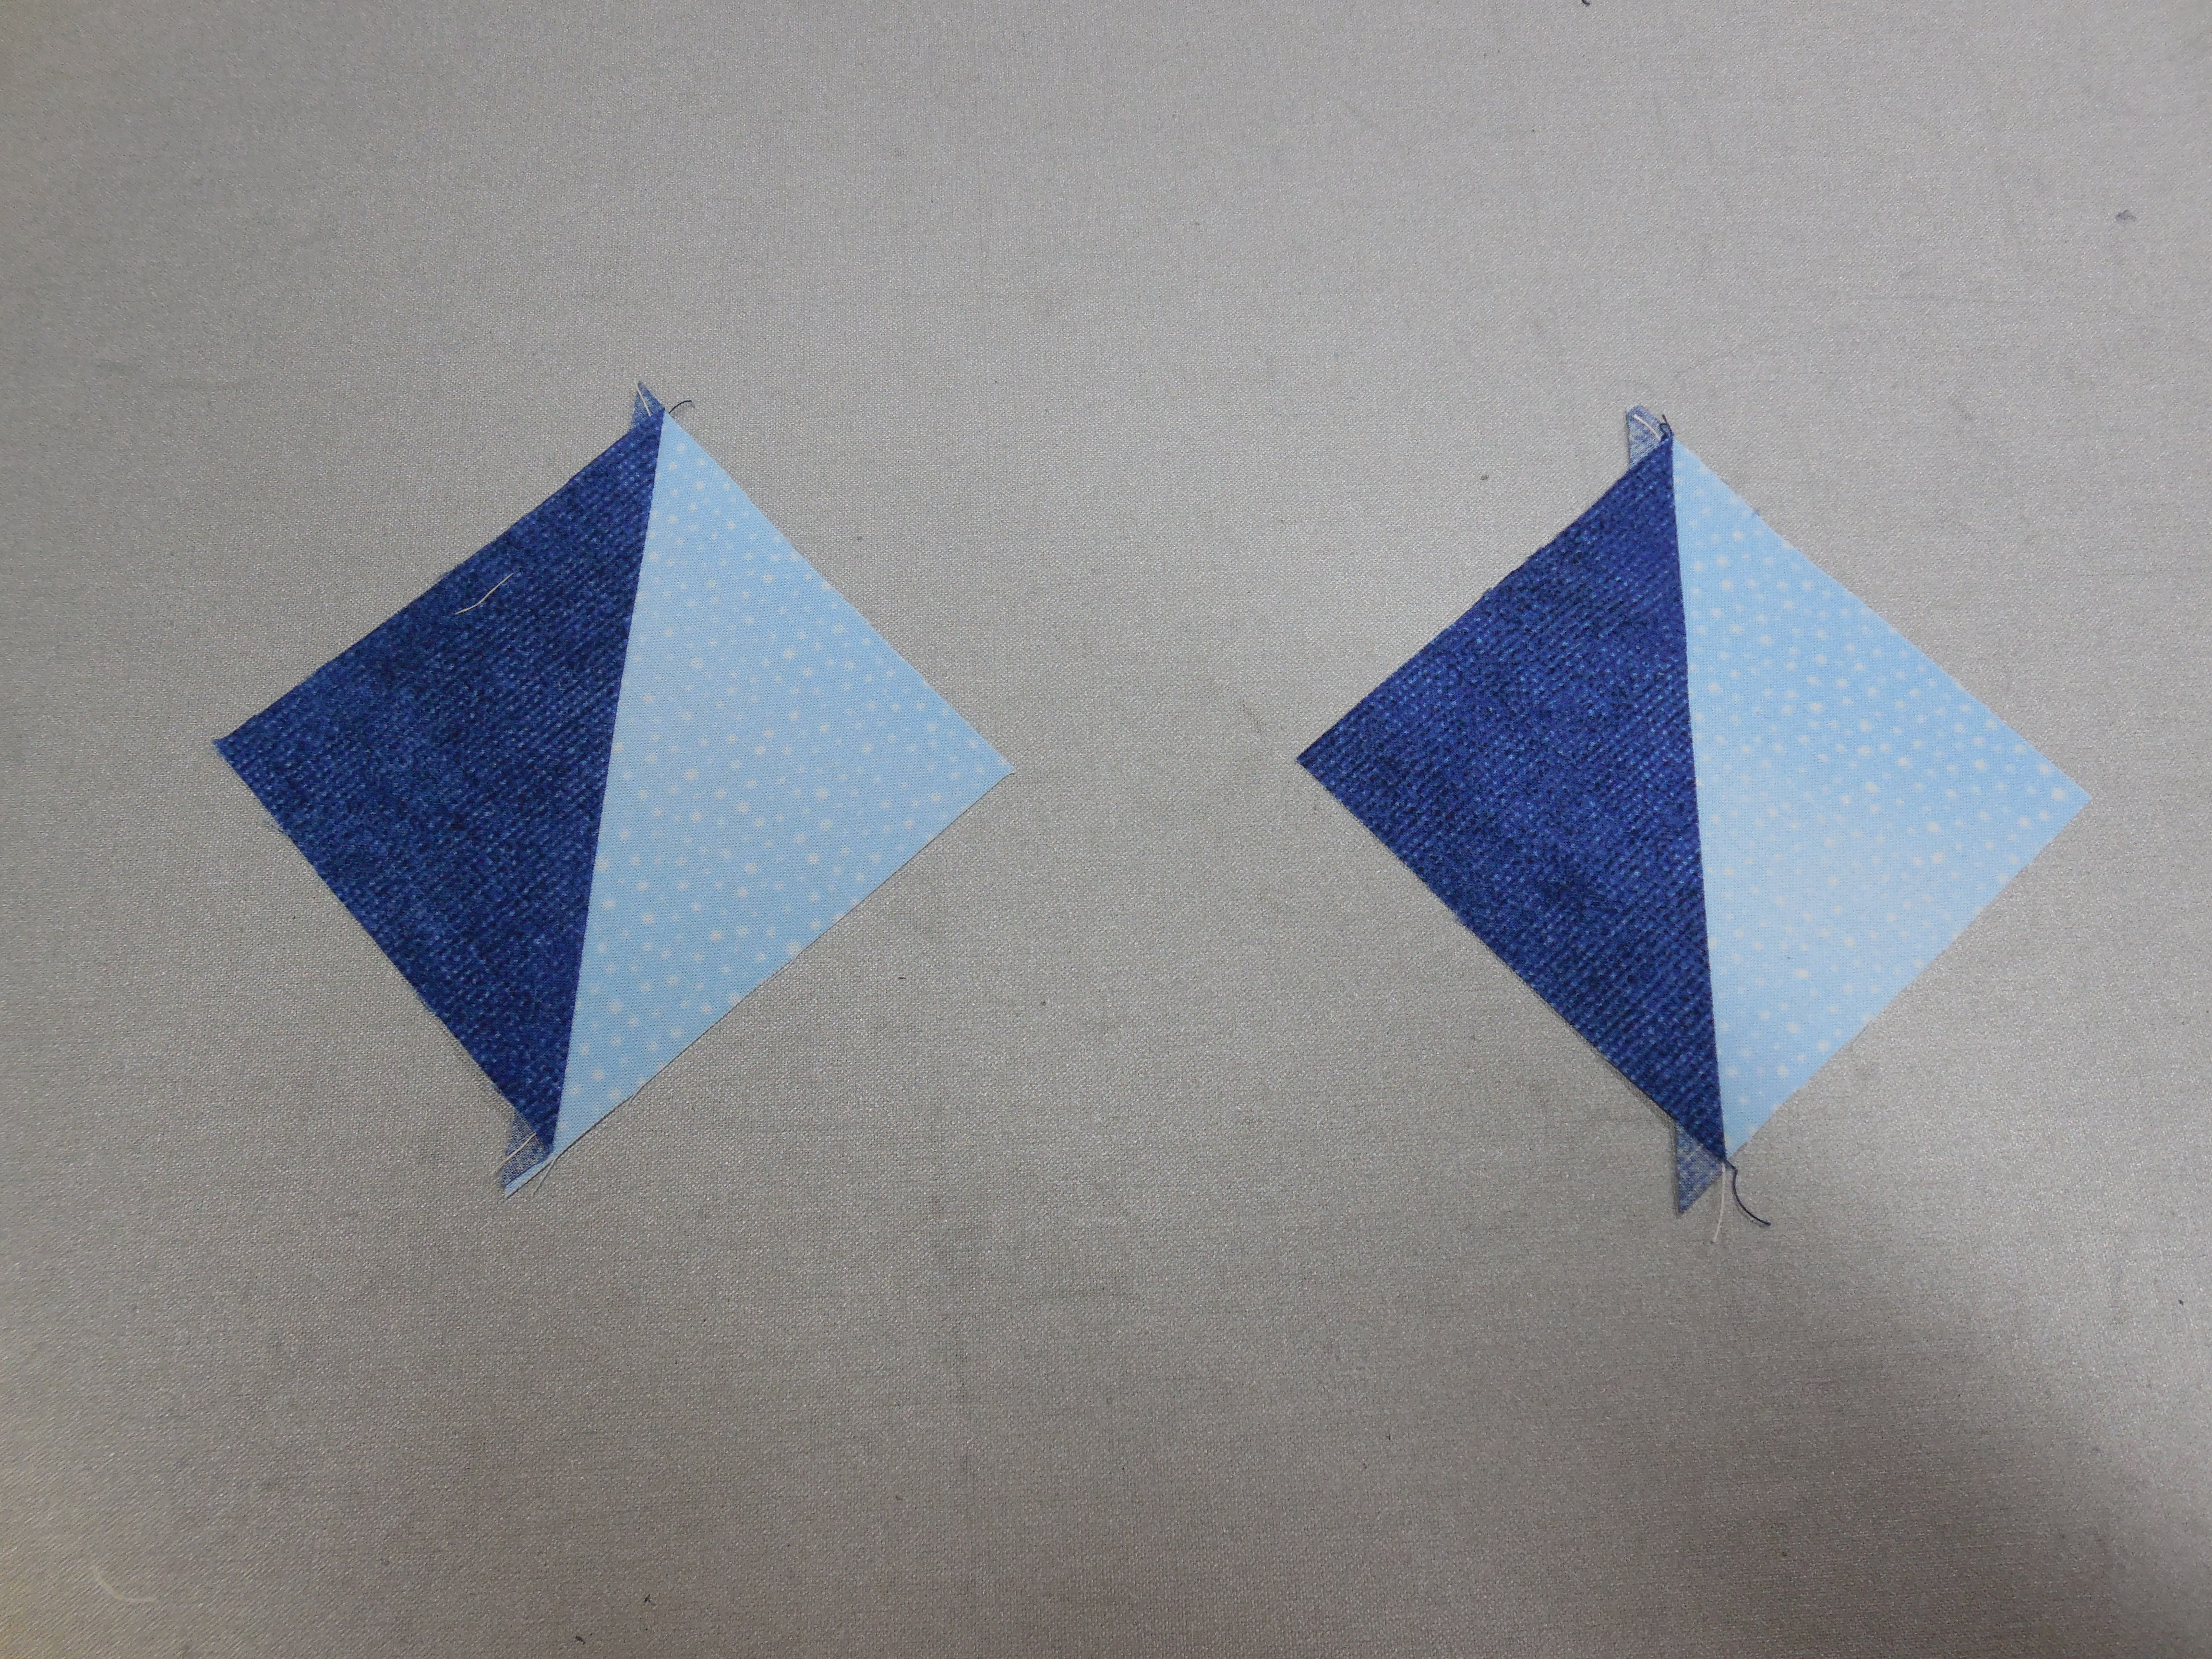
I first assembled four HST units using one of each color.  If you cut your triangles a little bigger you would trim the ones you used in the HST units to 3 1/2″

DSCN0707

I then added the triangles to these HST units as shown below.

DSCN0708

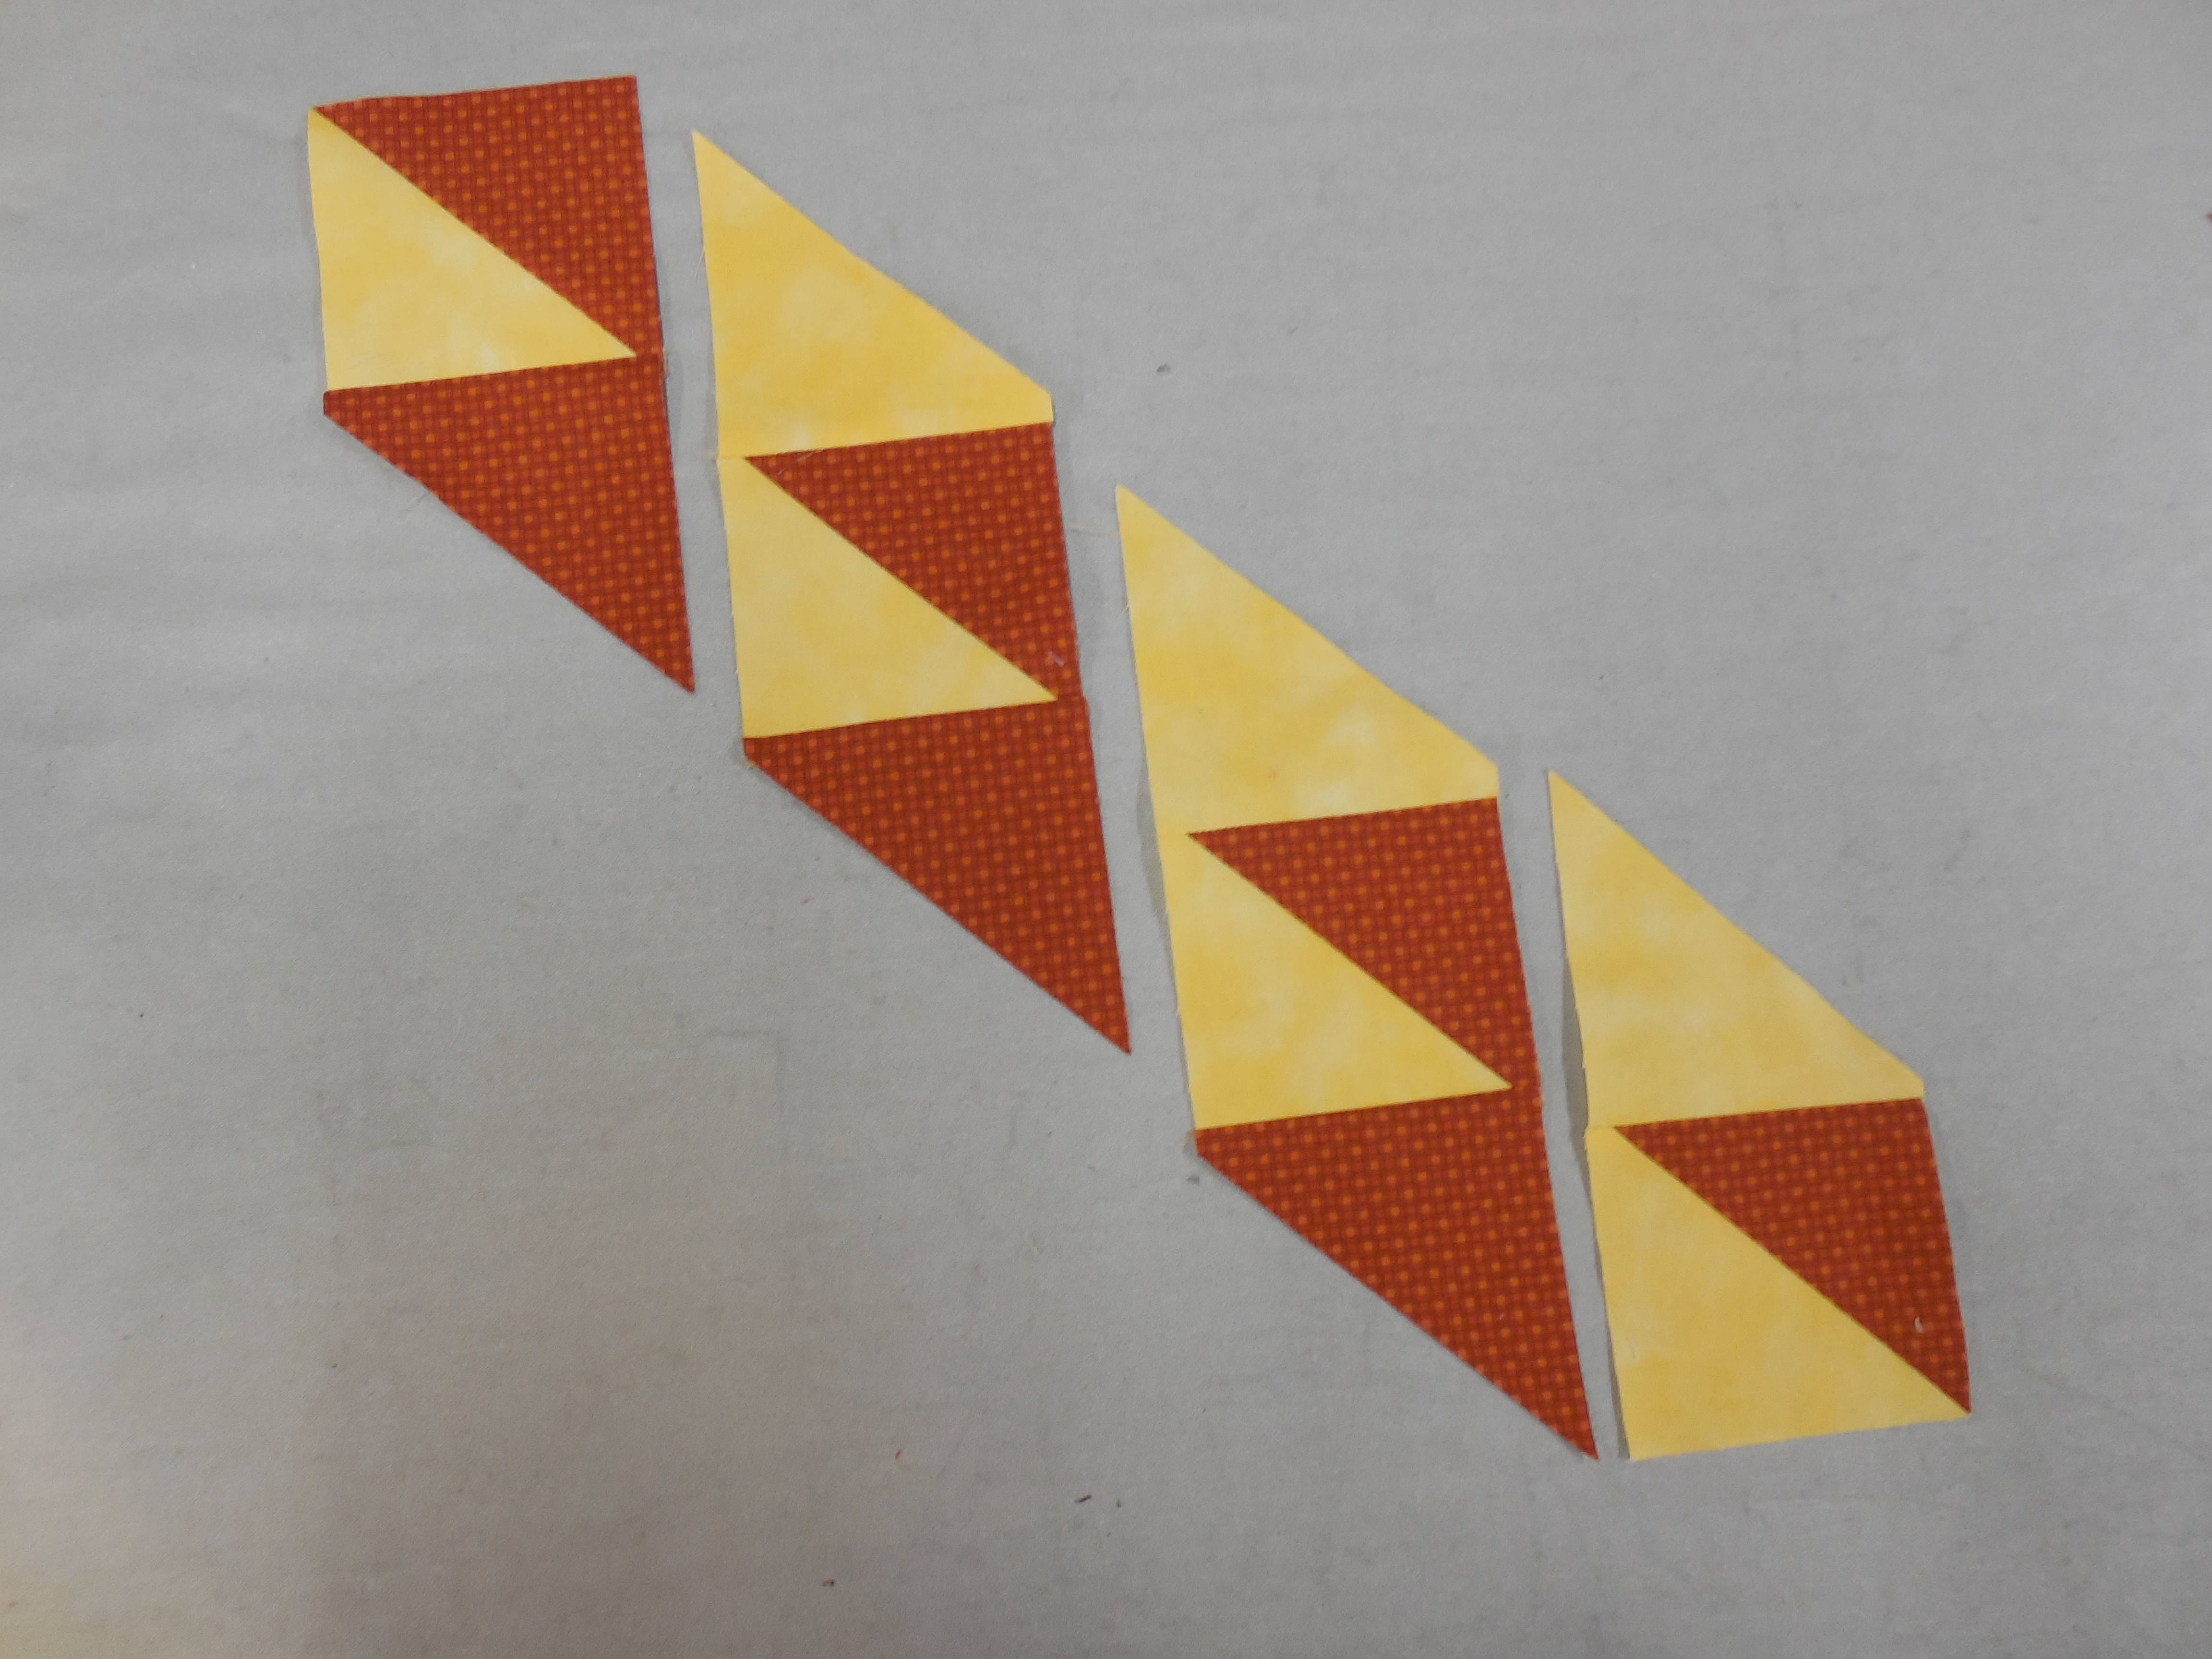
After adding the additional triangles I trimmed them even with the HST unit.

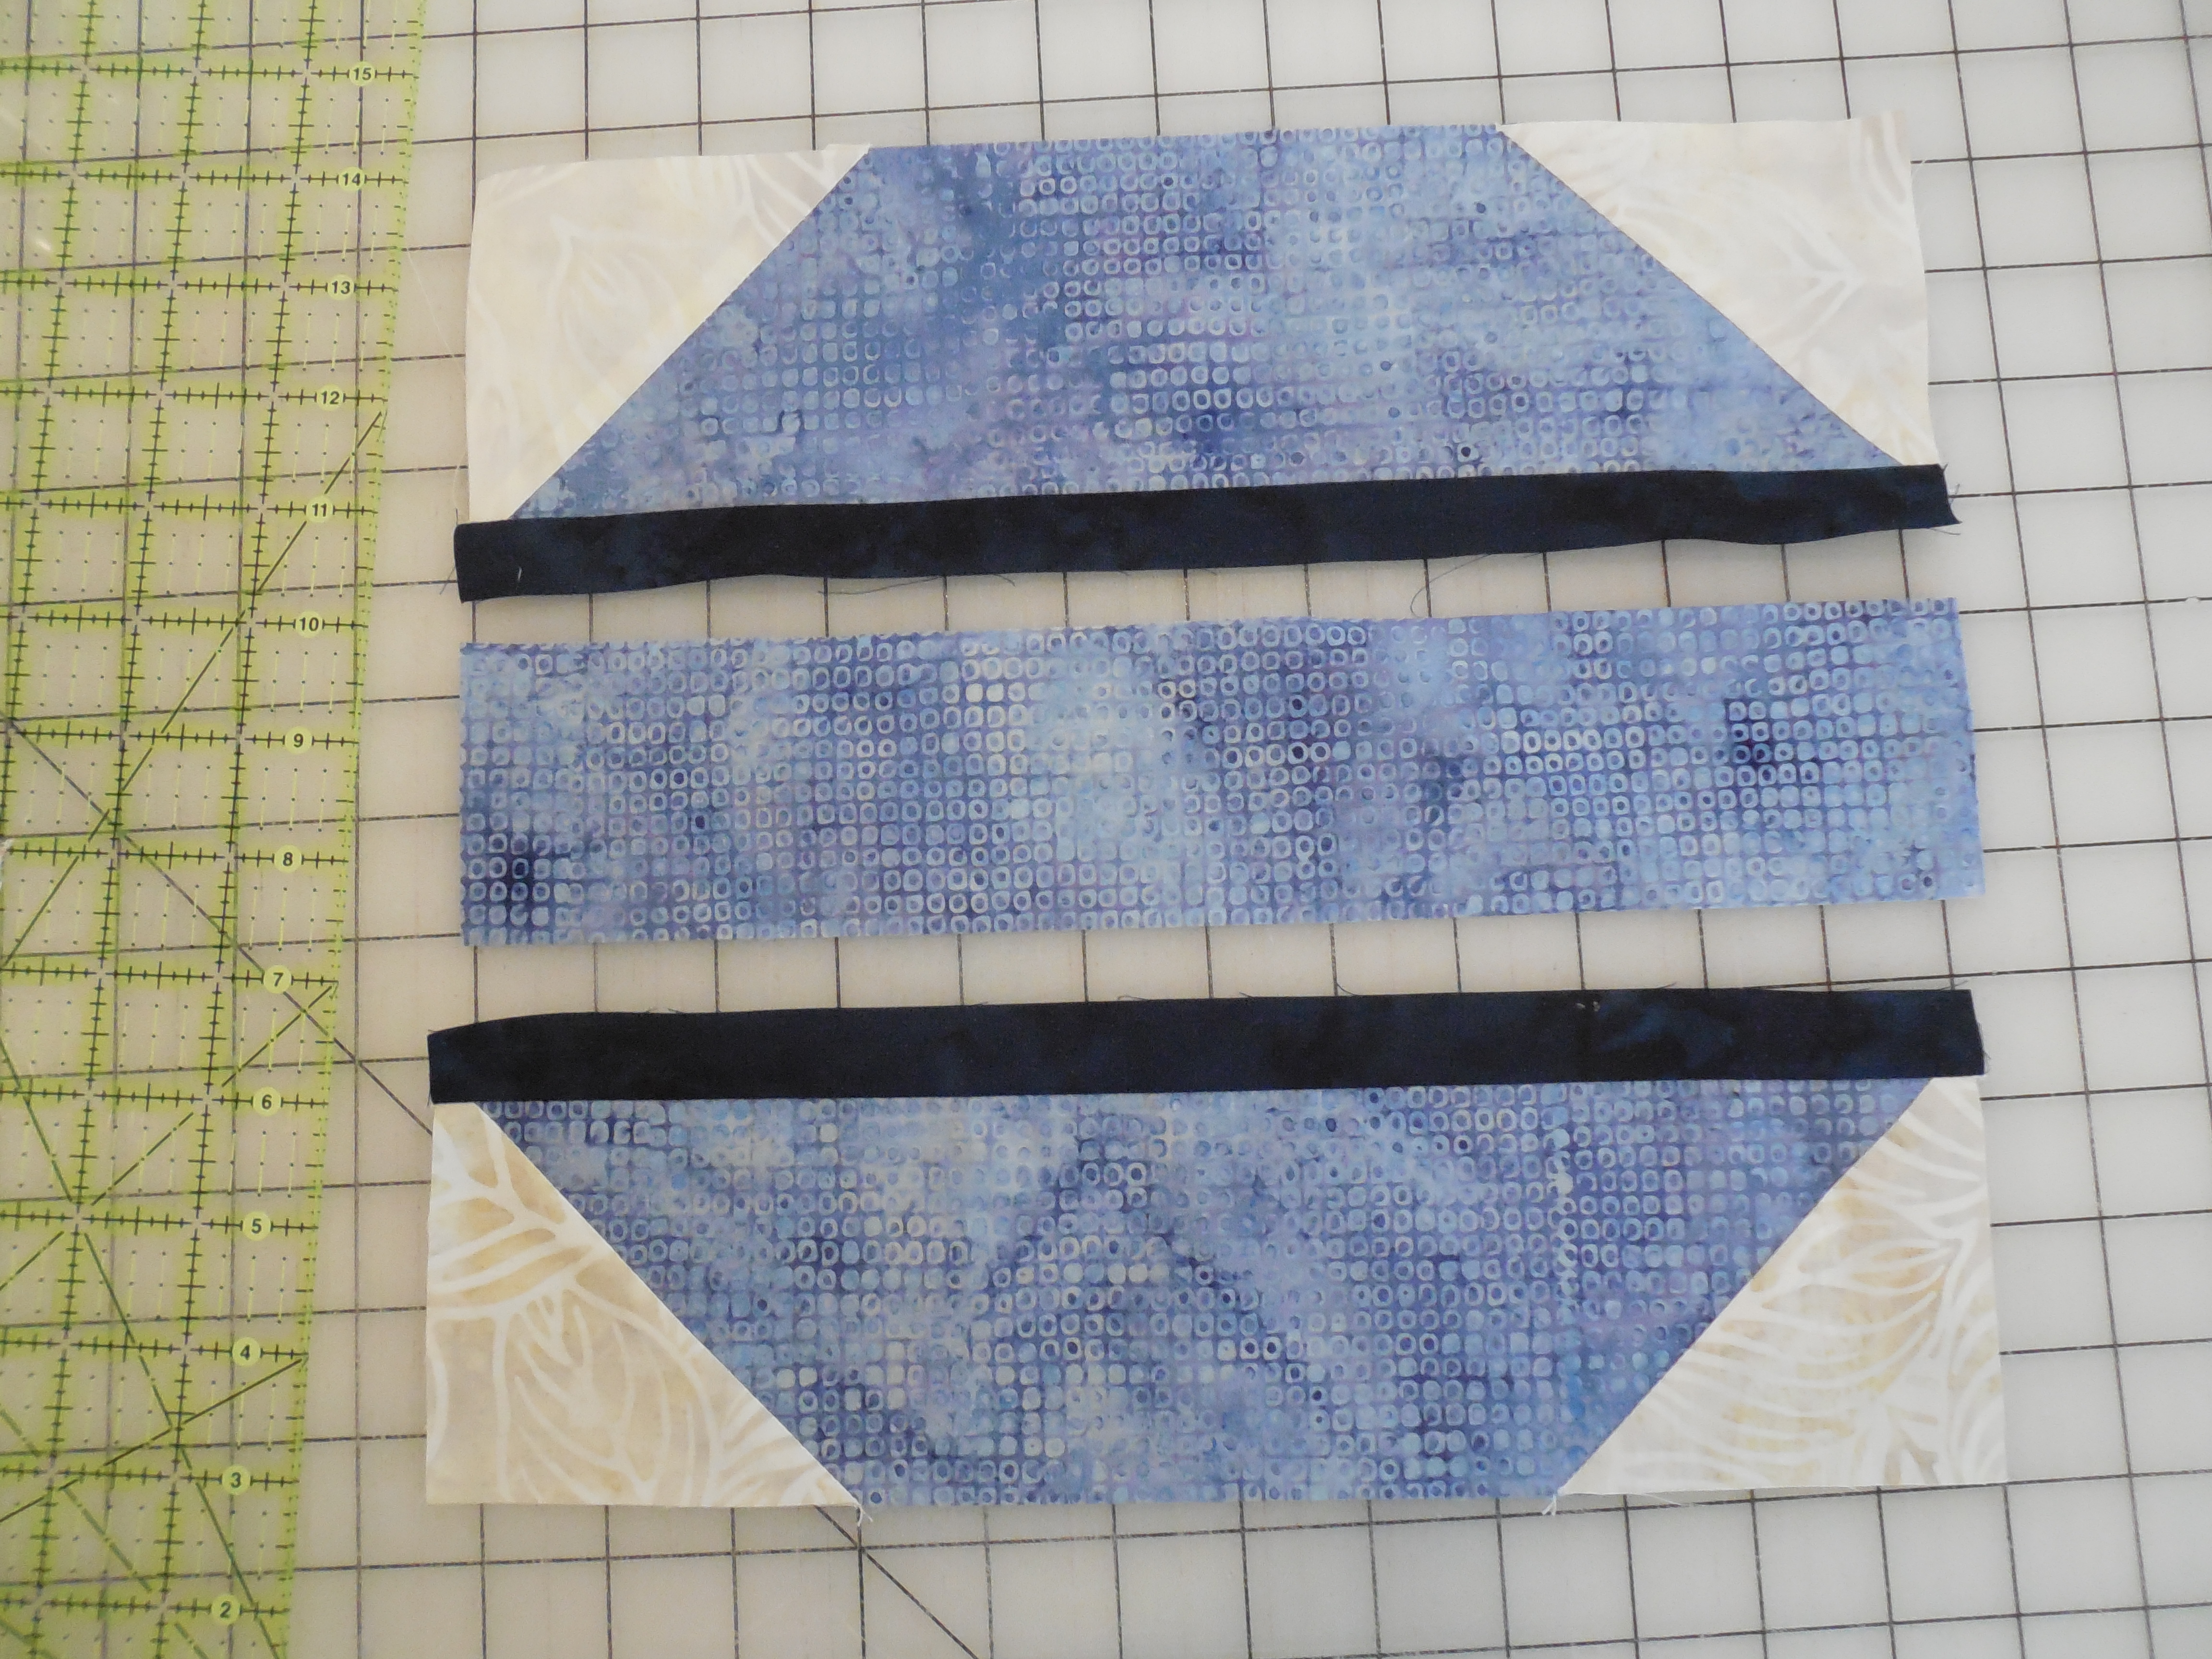
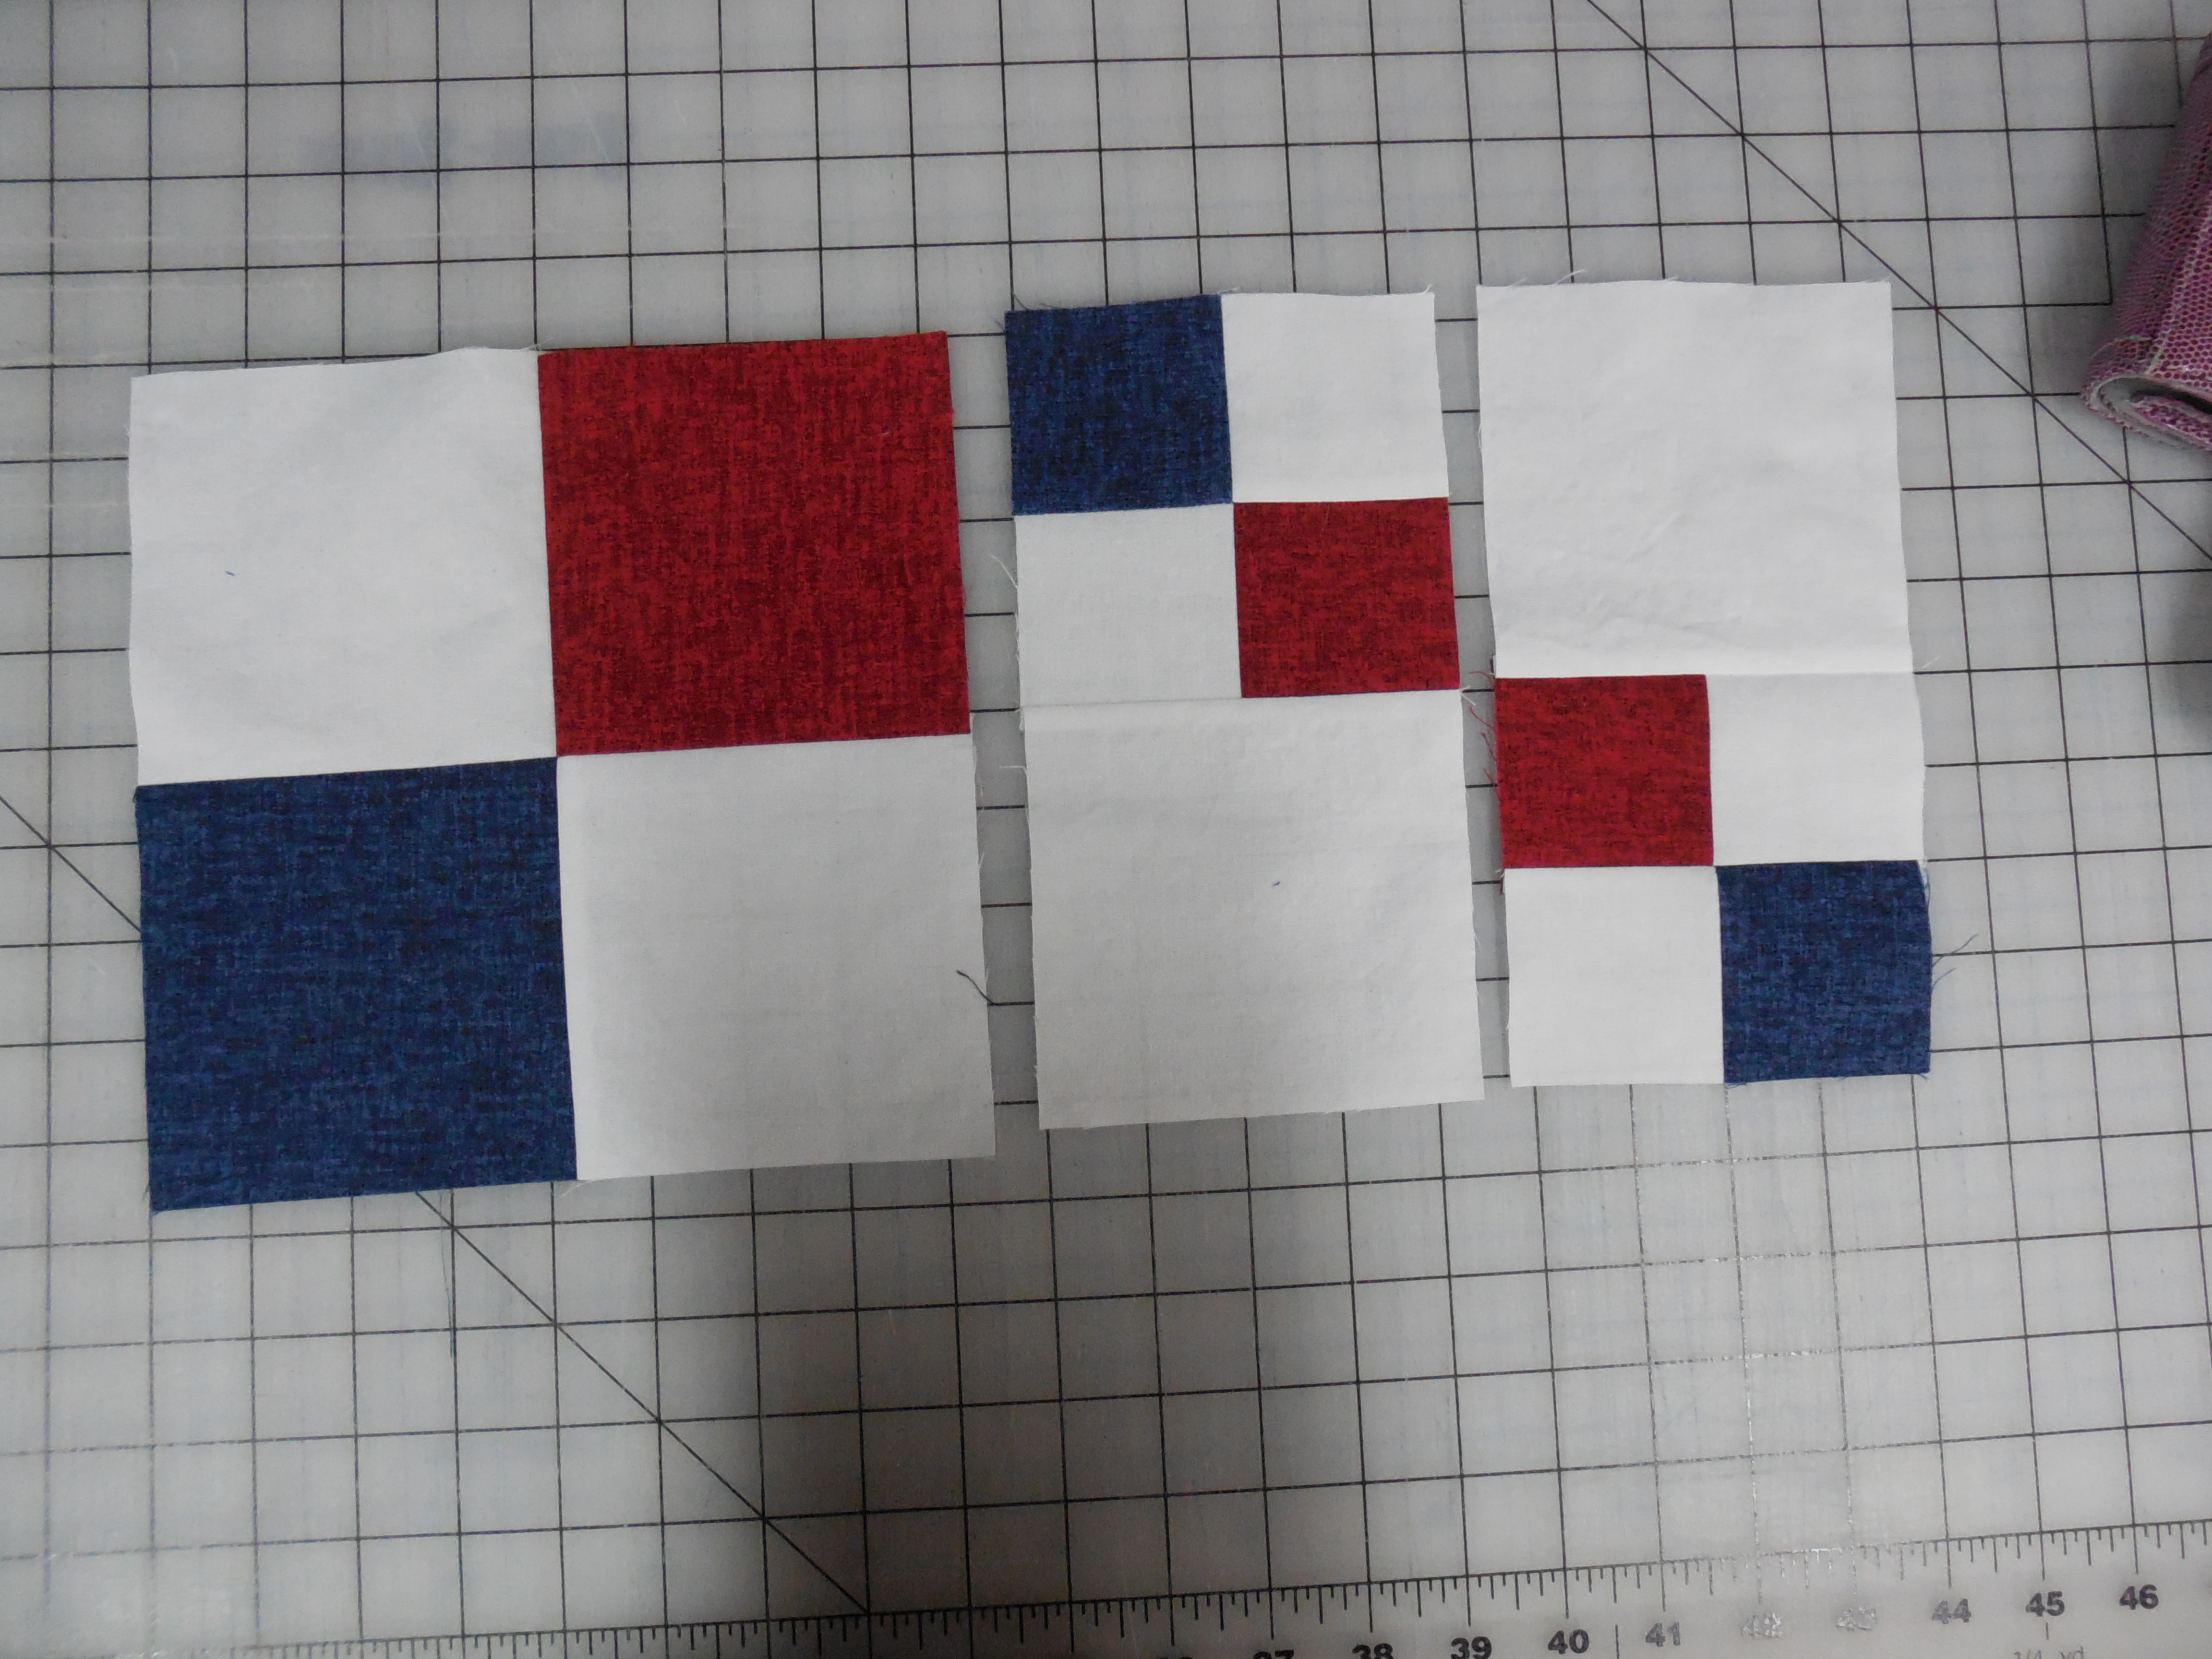
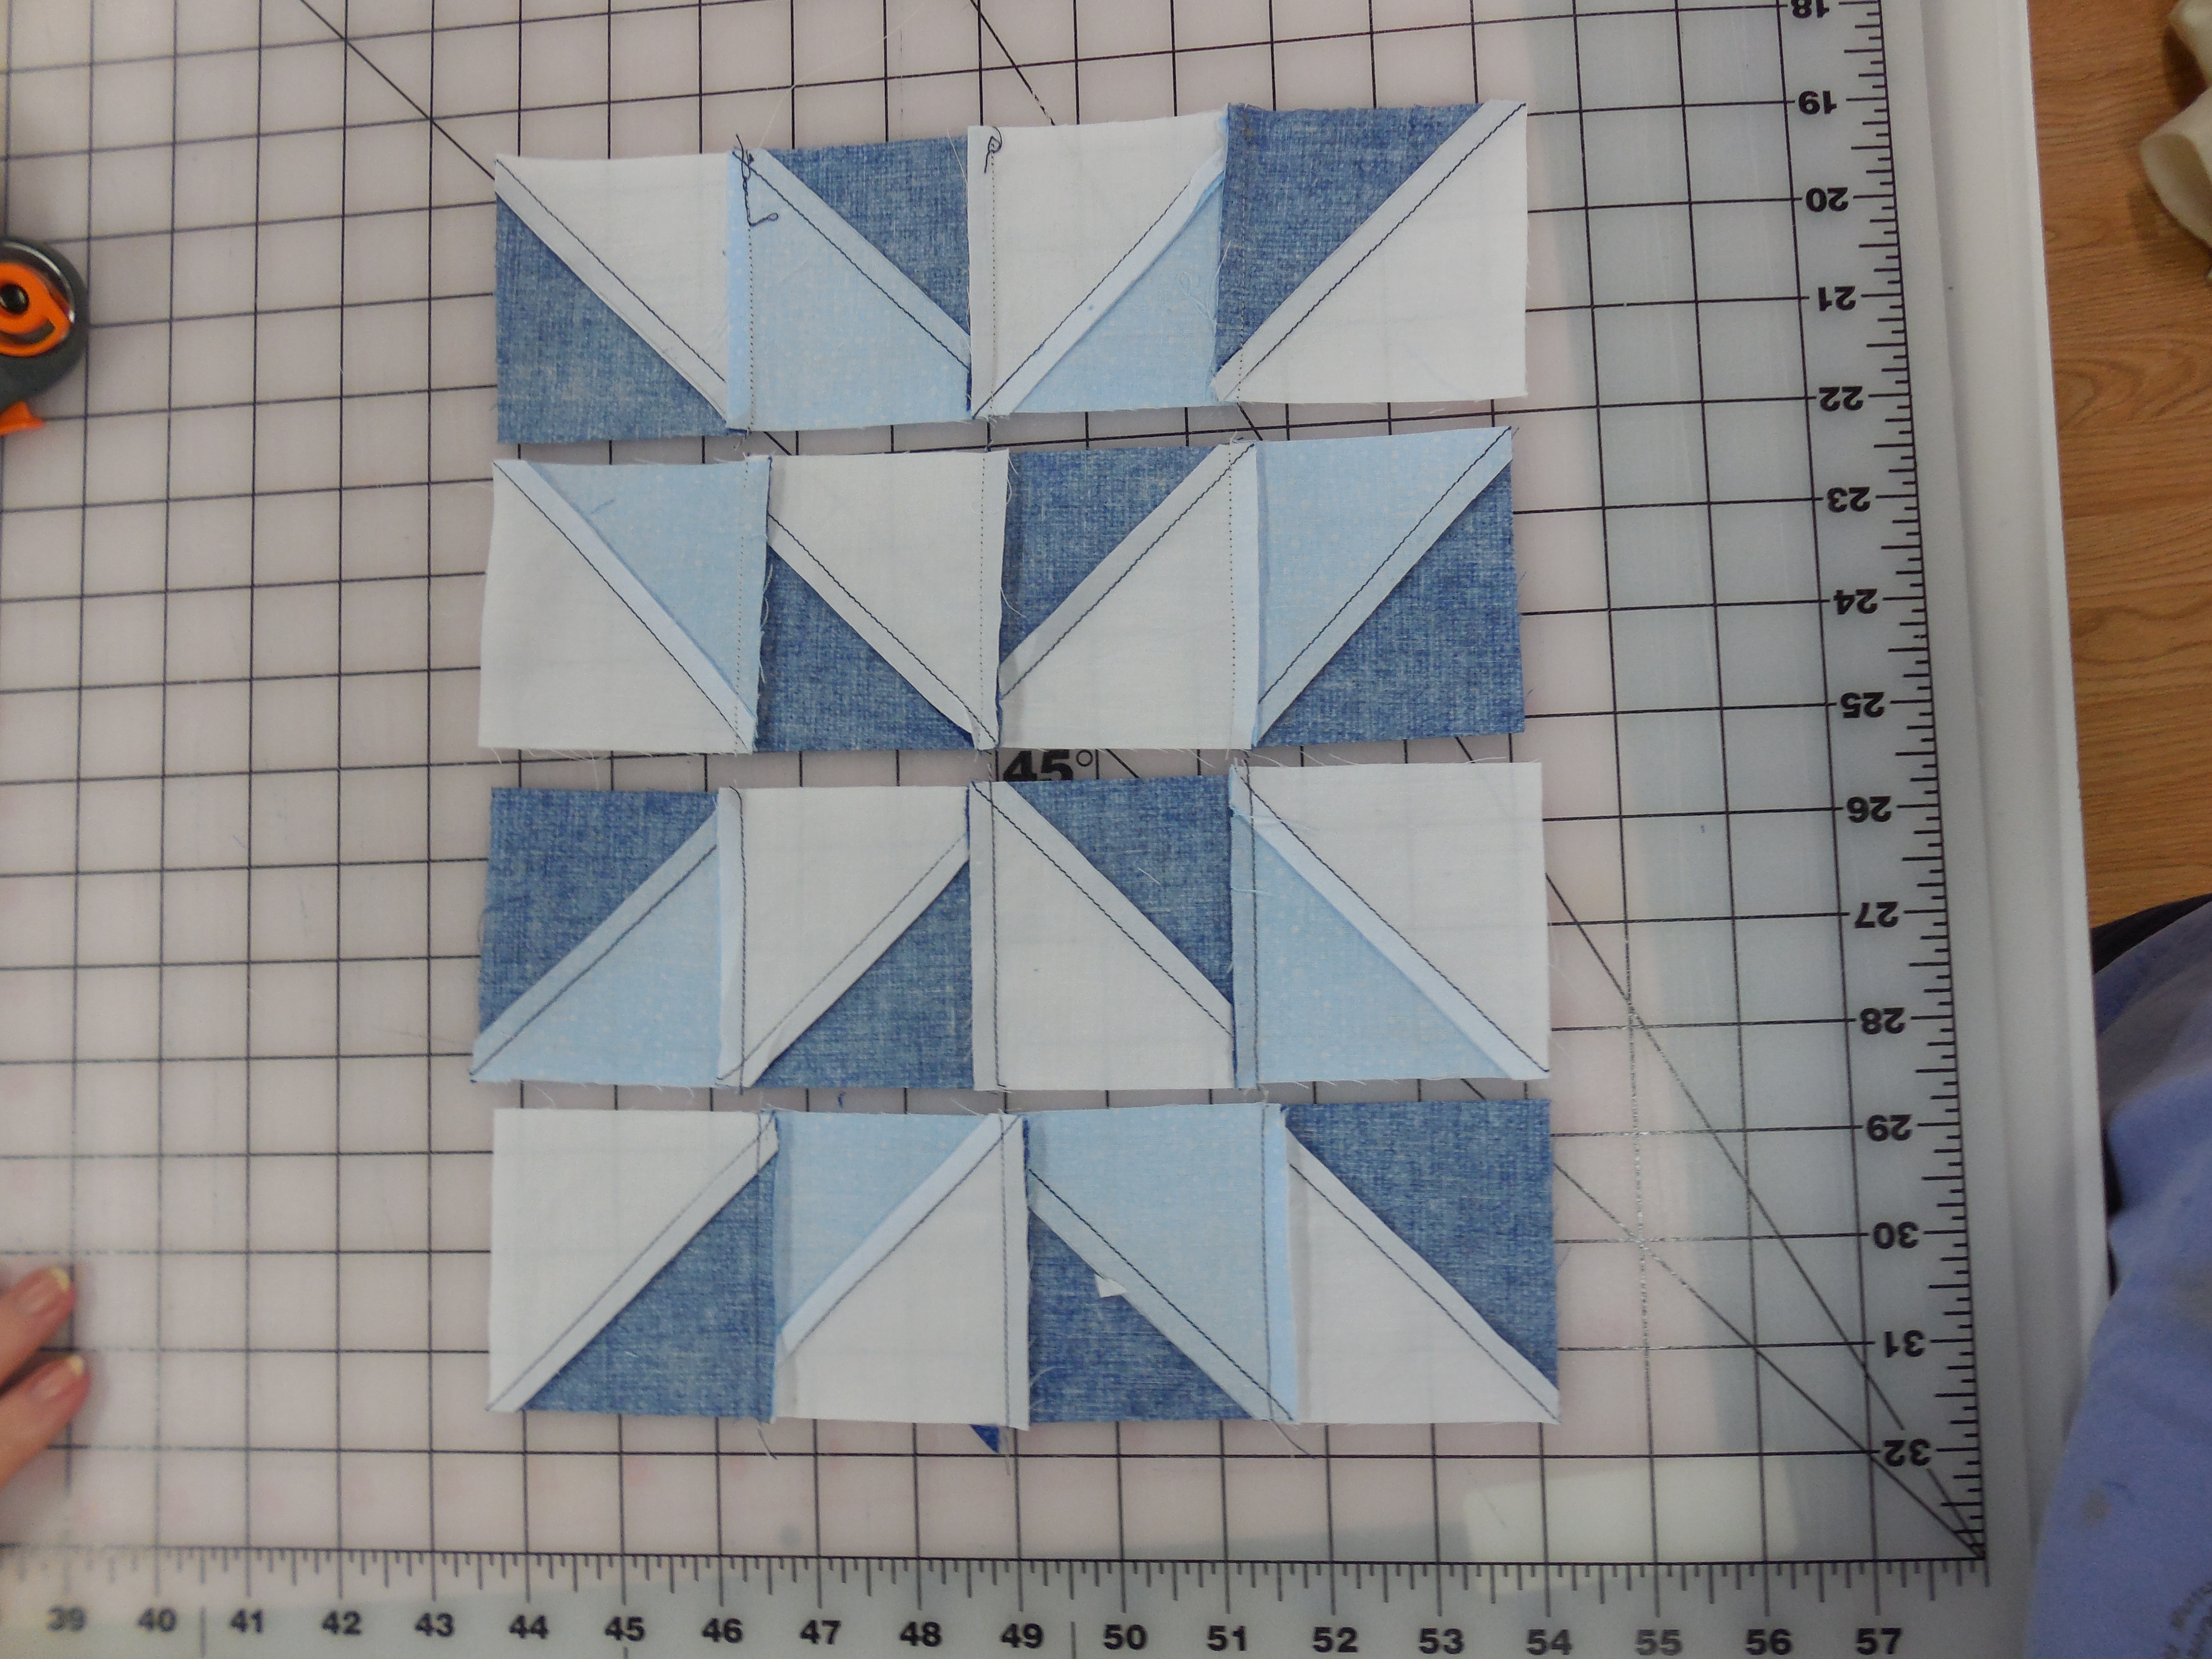
Next begin piecing these units together matching the points as well as possible.

DSCN0709

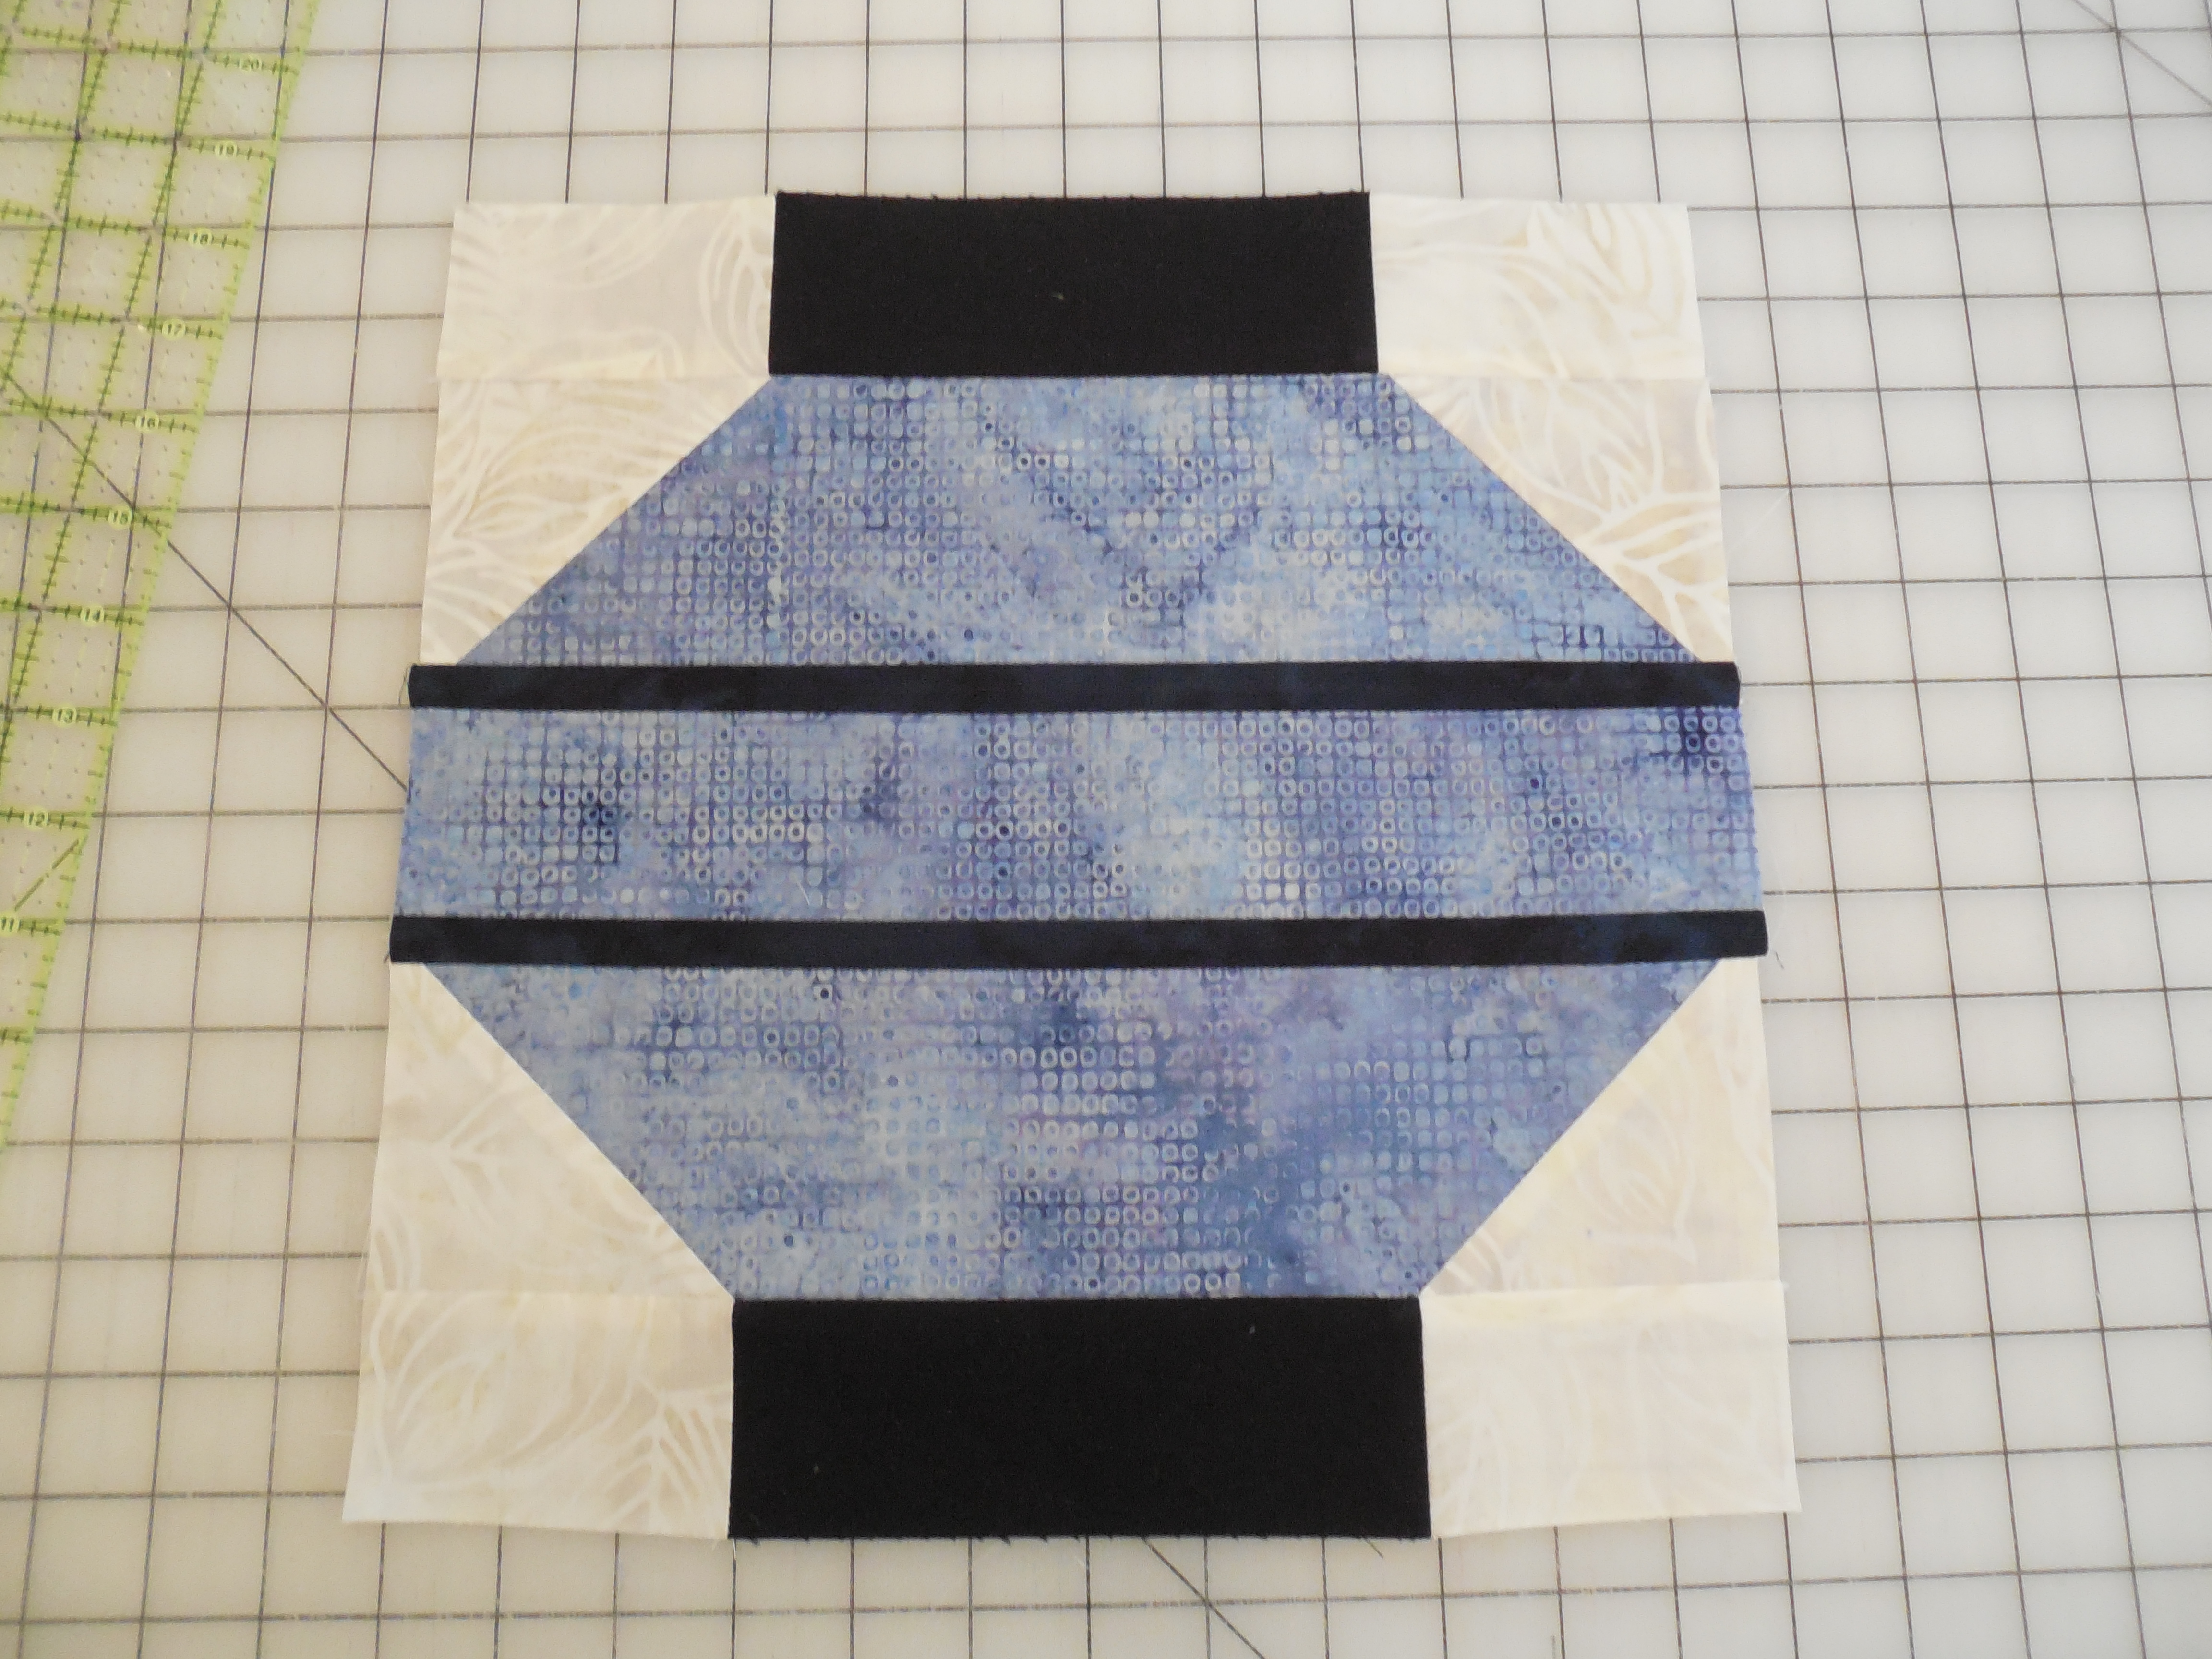
Once all four units are pieced together, you will sew the dark triangle to the side of the strip that has the light triangles.  You will sew the light triangle to the other side.  It should look something like this.

DSCN0710

I left mine untrimmed to give the winner of the blocks a little extra room to play if they need it.

BOM June/July 2014

Standard

Welcome to China!  If you missed the meeting last night you missed learning that our ever-important toilet paper was invented in China.  However, only Emperors were able to own and use it.  Sure glad that has changed!

So our Block of the Month is the Chinese Lantern.  You will make this block in June and bring it to the July meeting.  I really enjoyed making this block and think several of these blocks together in a quilt would be adorable.

Our palette for this block will consist of a medium batik for the bulk of the lantern, a darker, coordinating batik for the two stripes in the middle.  A pale or neutral (batik or solid) for the four corners and black (batik or solid) for the top and bottom of the lantern.

Cutting instructions

Neutral:    4 pieces cut 2 x 3 1/2″

4 pieces cut 3 1/2″ x 3 1/2″

Black:         2 pieces cut 6 1/2″ x 2″

Medium Batik:    1 piece cut 12 1/2″ x 2 1/2″

2 pieces cut 12 1/2″ x 3 1/2″

Dark Batik:            2 pieces cut 12 1/2″ x 1″

DSCN0455

Next sew the white rectangles to each side of the black rectangles

DSCN0457


On each neutral square, draw a pencil line diagonally.

DSCN0463

Place the squares on each side of both medium batik (3 1/2″) rectangles.  Be sure the drawn lines are going in opposite directions.

DSCN0465

Sew ON the line and trim off the excess fabric.

DSCN0468

Assemble the center pieces together as shown below.

DSCN0471

Add the top and bottom and you will be finished!

DSCN0474

I hope you enjoy this block as much as I did!


Product Recommendation

Standard

I buy a fair amount of specialty rulers and other gizmos that come out on the market.  Most of the time they get used once, put into its place never to be seen again.  Not so with this product from Quilt in a Day.  I bought this ruler at least 2 years ago and finally used it last night!  Our bee was putting next month’s BOM together (hint, hint) and this gave us the best result.  It is the Small Flying Geese ruler.  This ruler comes in several sizes.  You can see them here:  http://www.quiltinaday.com/search/default.asp?search=geese&x=11&y=3.

I also have the mini set which I used a couple of weeks ago at my Dear Jane club that meets at The Fussy Cut in Beech Grove.  The directions are very clear and you end up with perfect flying geese blocks.  I love this product!

By the way, next month’s BOM will contain at least two 3″ x 6″ (finished size) flying geese units.

20140318_170429

March/April BOM–Irish Chain

Standard

Please make this block with green and white fabric.  This block will be made in the month of March to bring to the April meeting.

Your block should be 12 1/2″ x 12 1/2″ when you are finished.  That will make a 12″ x 12″ block when it is put into a quilt.

Cut the following strips:

           Green fabric:

                      Cut 2 strips 1 7/8” x 20”

                      Cut 1 strip 1 7/8” x 10”

           White fabric

                      Cut 2 strips 1 7/8” x 10”

                      Cut 1 strip 1 7/8” x 20”

                      Cut 4 squares 4 1/2” x 4 1/2”


Sew the 20” strips together lengthwise putting the white strip in the center.

Sew the 10” strips together lengthwise putting the green strip in the center.

DSCN0375

Press the 1/4” seam allowances toward the dark fabric

Cut the strip sets into 1 7/8” units.  You should have:

           10 green/white/green

            5 white/green/white

DSCN0376


Lay out your units to make 5 nine patches and sew them together as shown.

DSCN0380

DSCN0381

DSCN0382

January BOM – Quilts of Valor project

Standard

We had a great response to the Quilts of Valor project last night!  We had 39 block kits made up and every one of them were signed out.  If you were not at the meeting or didn’t get a block kit, you can still participate!  You can still make a set of blocks (or more) out of your fabric (red, white & blue please) to bring to the January meeting.

DSCN0260

We would like to make a couple of quilt tops for Quilts of Valor at the January meeting.  The first one will be made from our block kits and we are hoping to get enough scrappy blocks to make at least another quilt top.

So, on to the tutorial.

Here are the pieces that were in your block kits

DSCN0258

With this kit you will make two blocks.  They are made up of simple 4 patches.

DSCN0261          DSCN0262

When they are finished they will look like this

DSCN0263

In the block on the right the arrangement of the red and blue squares are not important.

The final quilt will be laid out in one of the following ways.

QOV2          QOV1

If you would prefer to print out the block layouts they are here

QOV block 2          QOV block 1


AND look what Sherry Foster did!!  She typed up step-by-step directions for making the blocks.  Sherry, you are awesome!

(click the link below to open the file)

QUILT OF VALOR SET OF BLOCKS FOR GREENWOOD QUILT CONNECTION

November BOM (make in October, bring to November meeting)

Standard

November BOM is made with a dark blue, a light, icy blue and white.  Please use fabrics that read as a solid.  The white can be either a solid or a white on white, but please, no ecru, beige, natural, off-white, etc.  Also please try to stay away from the greenish-blues & turquoises.

This block is called Margaret’s Choice.  It will be a 10″ finished block, so your completed block should measure 10.5″

Margaret’s Choice is made up of half square triangles in a 16 patch setting.  Each patch measures 2.5″ (finished).  Typically to make a 2.5″ half square triangle you would start with squares that are 3 3/8″.  It has been my experience that using that exact measurement rarely gives me a perfect half square triangle unit so we decided to make the squares bigger and trim them down to the correct size.  If you prefer to start with a 3 3/8″ square, you are most welcome to do so.  Be sure to trim the triangle units to 3″ so they will finish at 2.5″.

So…..we begin by cutting 4″ squares.  You will need 6 dark blue, 4 light ice blue and 6 white.

DSCN0173

Your squares will be paired up as follows:

2 dark blue/2 light ice blue

2 light icy blue/2 white

4 dark blue/4 white

DSCN0174

Using a pencil and ruler, draw a diagonal line on the wrong side of the lightest square of each pair.  Then place each square with it’s partner, right sides together.

DSCN0176             DSCN0177

Stitch 1/4″ from both sides of the drawn line.

DSCN0179             DSCN0182

Cut the two triangle units apart on the drawn line.

DSCN0184             DSCN0185

Open the triangle units and press toward the darker fabric.  Trim each unit to 3″.

DSCN0186             DSCN0190

Lay the units out as shown below and sew into rows.

DSCN0192             DSCN0193

Press the seams in each row in opposite directions so the seam allowances will “nest” together as you sew them together.

DSCN0194             DSCN0195

Your finished block should look something like this.

DSCN0197


NOTE:  The printable is available in the post just below this one.