Tag Archives: Quilt Connection Guild

Block 3 – Martha Washington’s Star

Standard

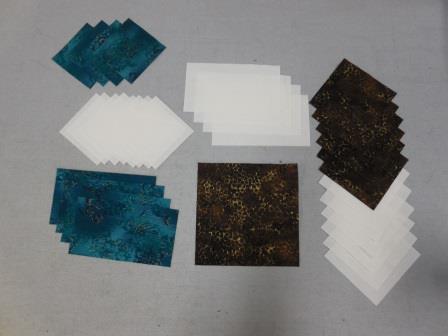
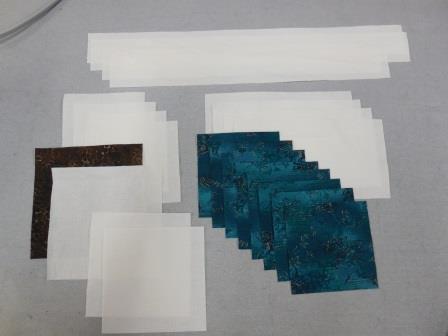
Following are the pieces you will need to cut for EACH block:

Neutral

(2) 1 1/2″ x 14 1/2″ rectangles

(2) 1 1/2″ x 12 1/2″ rectangles

(4) 3 1/2″ x 3 1/2″ squares

(4) 3 1/2″ x 6 1/2″ rectangles

(2) 4″ x 4″ squares

(1) 4 1/2″ x 4 1/2″ square

Color 1

(8) 3 1/2″ x 3 1/2″ squares

Color 2

(1) 4 1/2″ x 4 1/2″ square

MWS 1

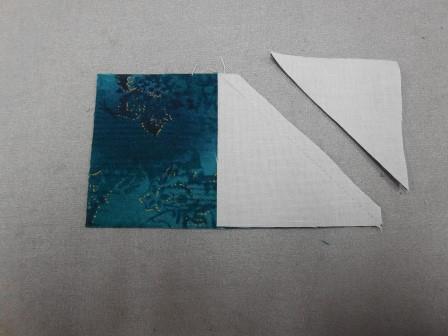
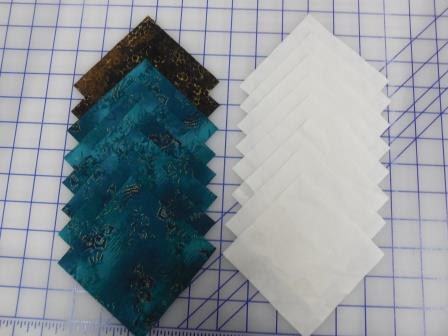
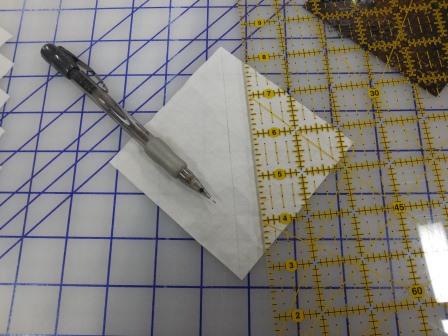
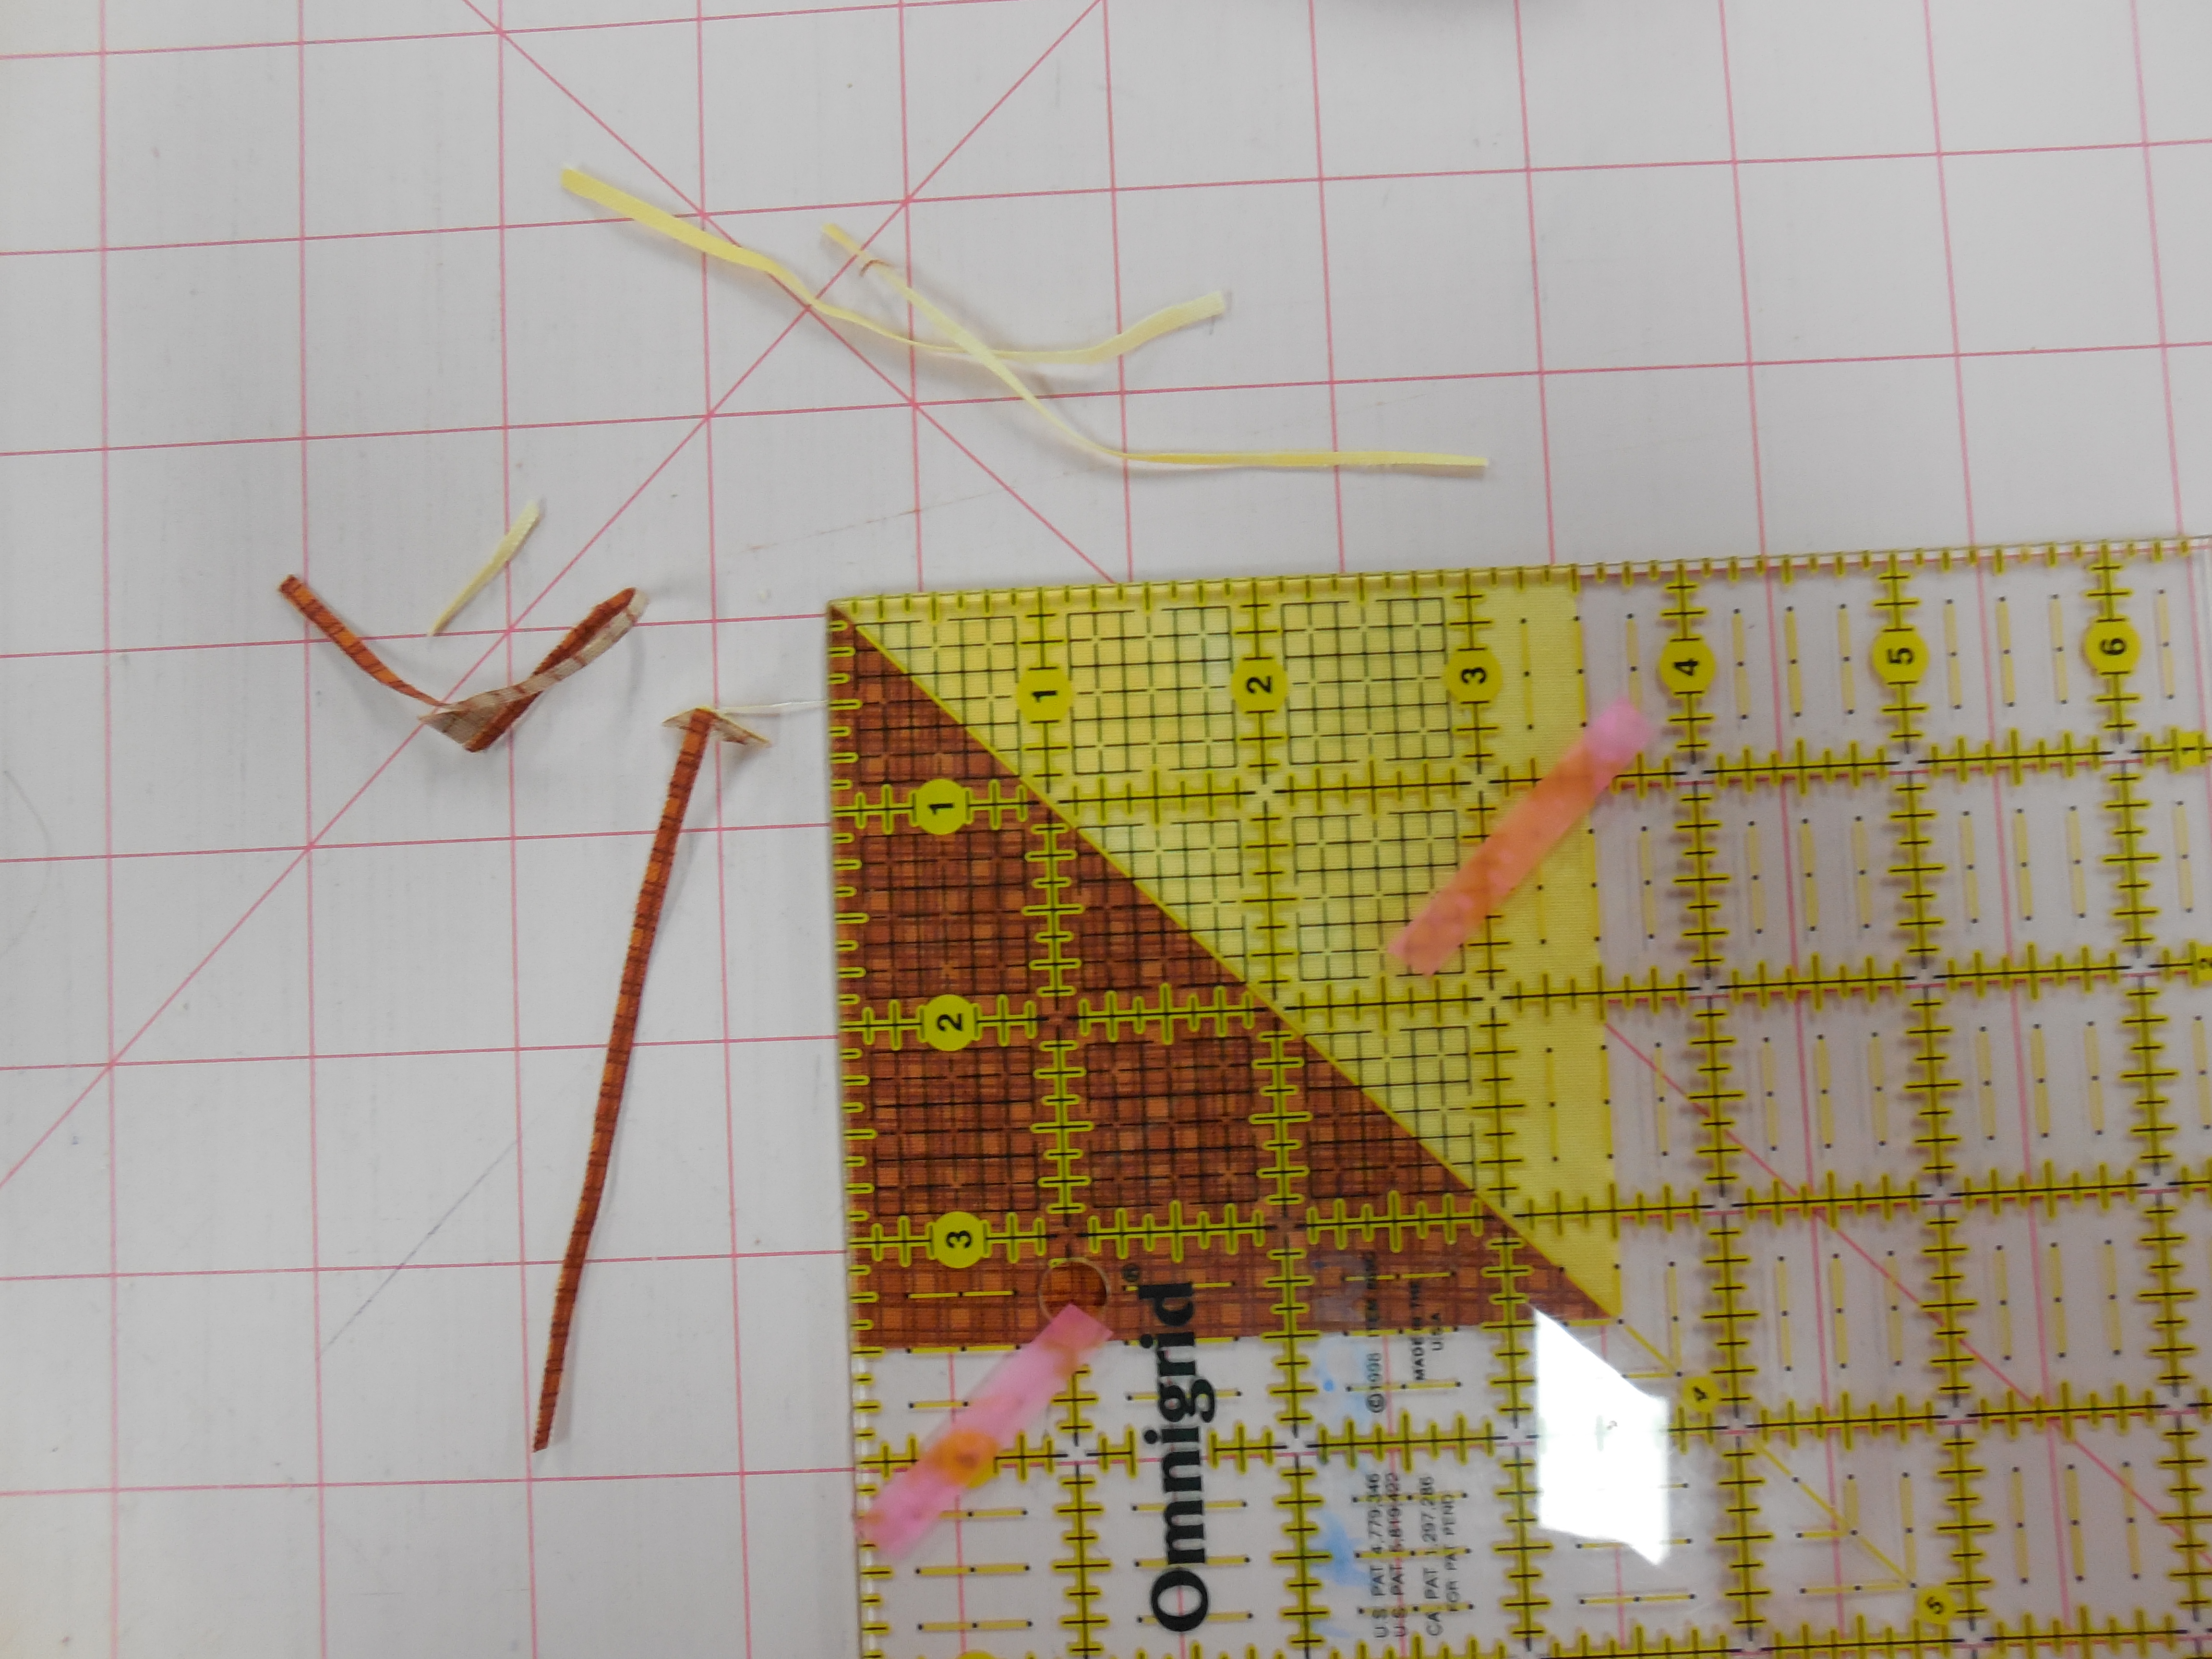
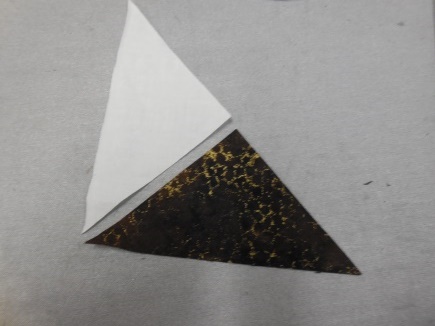
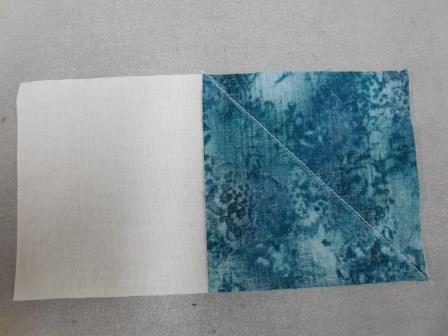
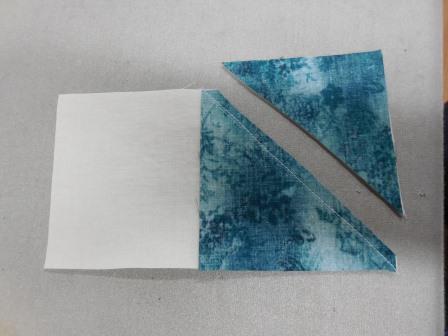
Take the Neutral 4 1/2″ square and the Color 2 4 1/2″ square and lay one on top of the other.  Lay your ruler from corner to corner and cut in half diagonally.  Without moving the fabric pieces, cut between the other two corners to make 4 smaller triangles of each fabric.

MWS 2

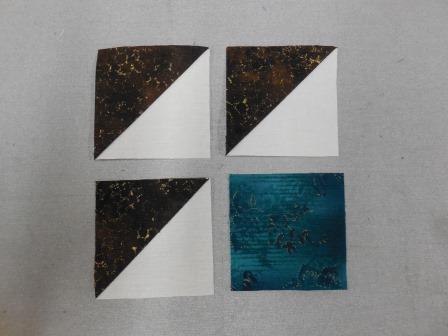
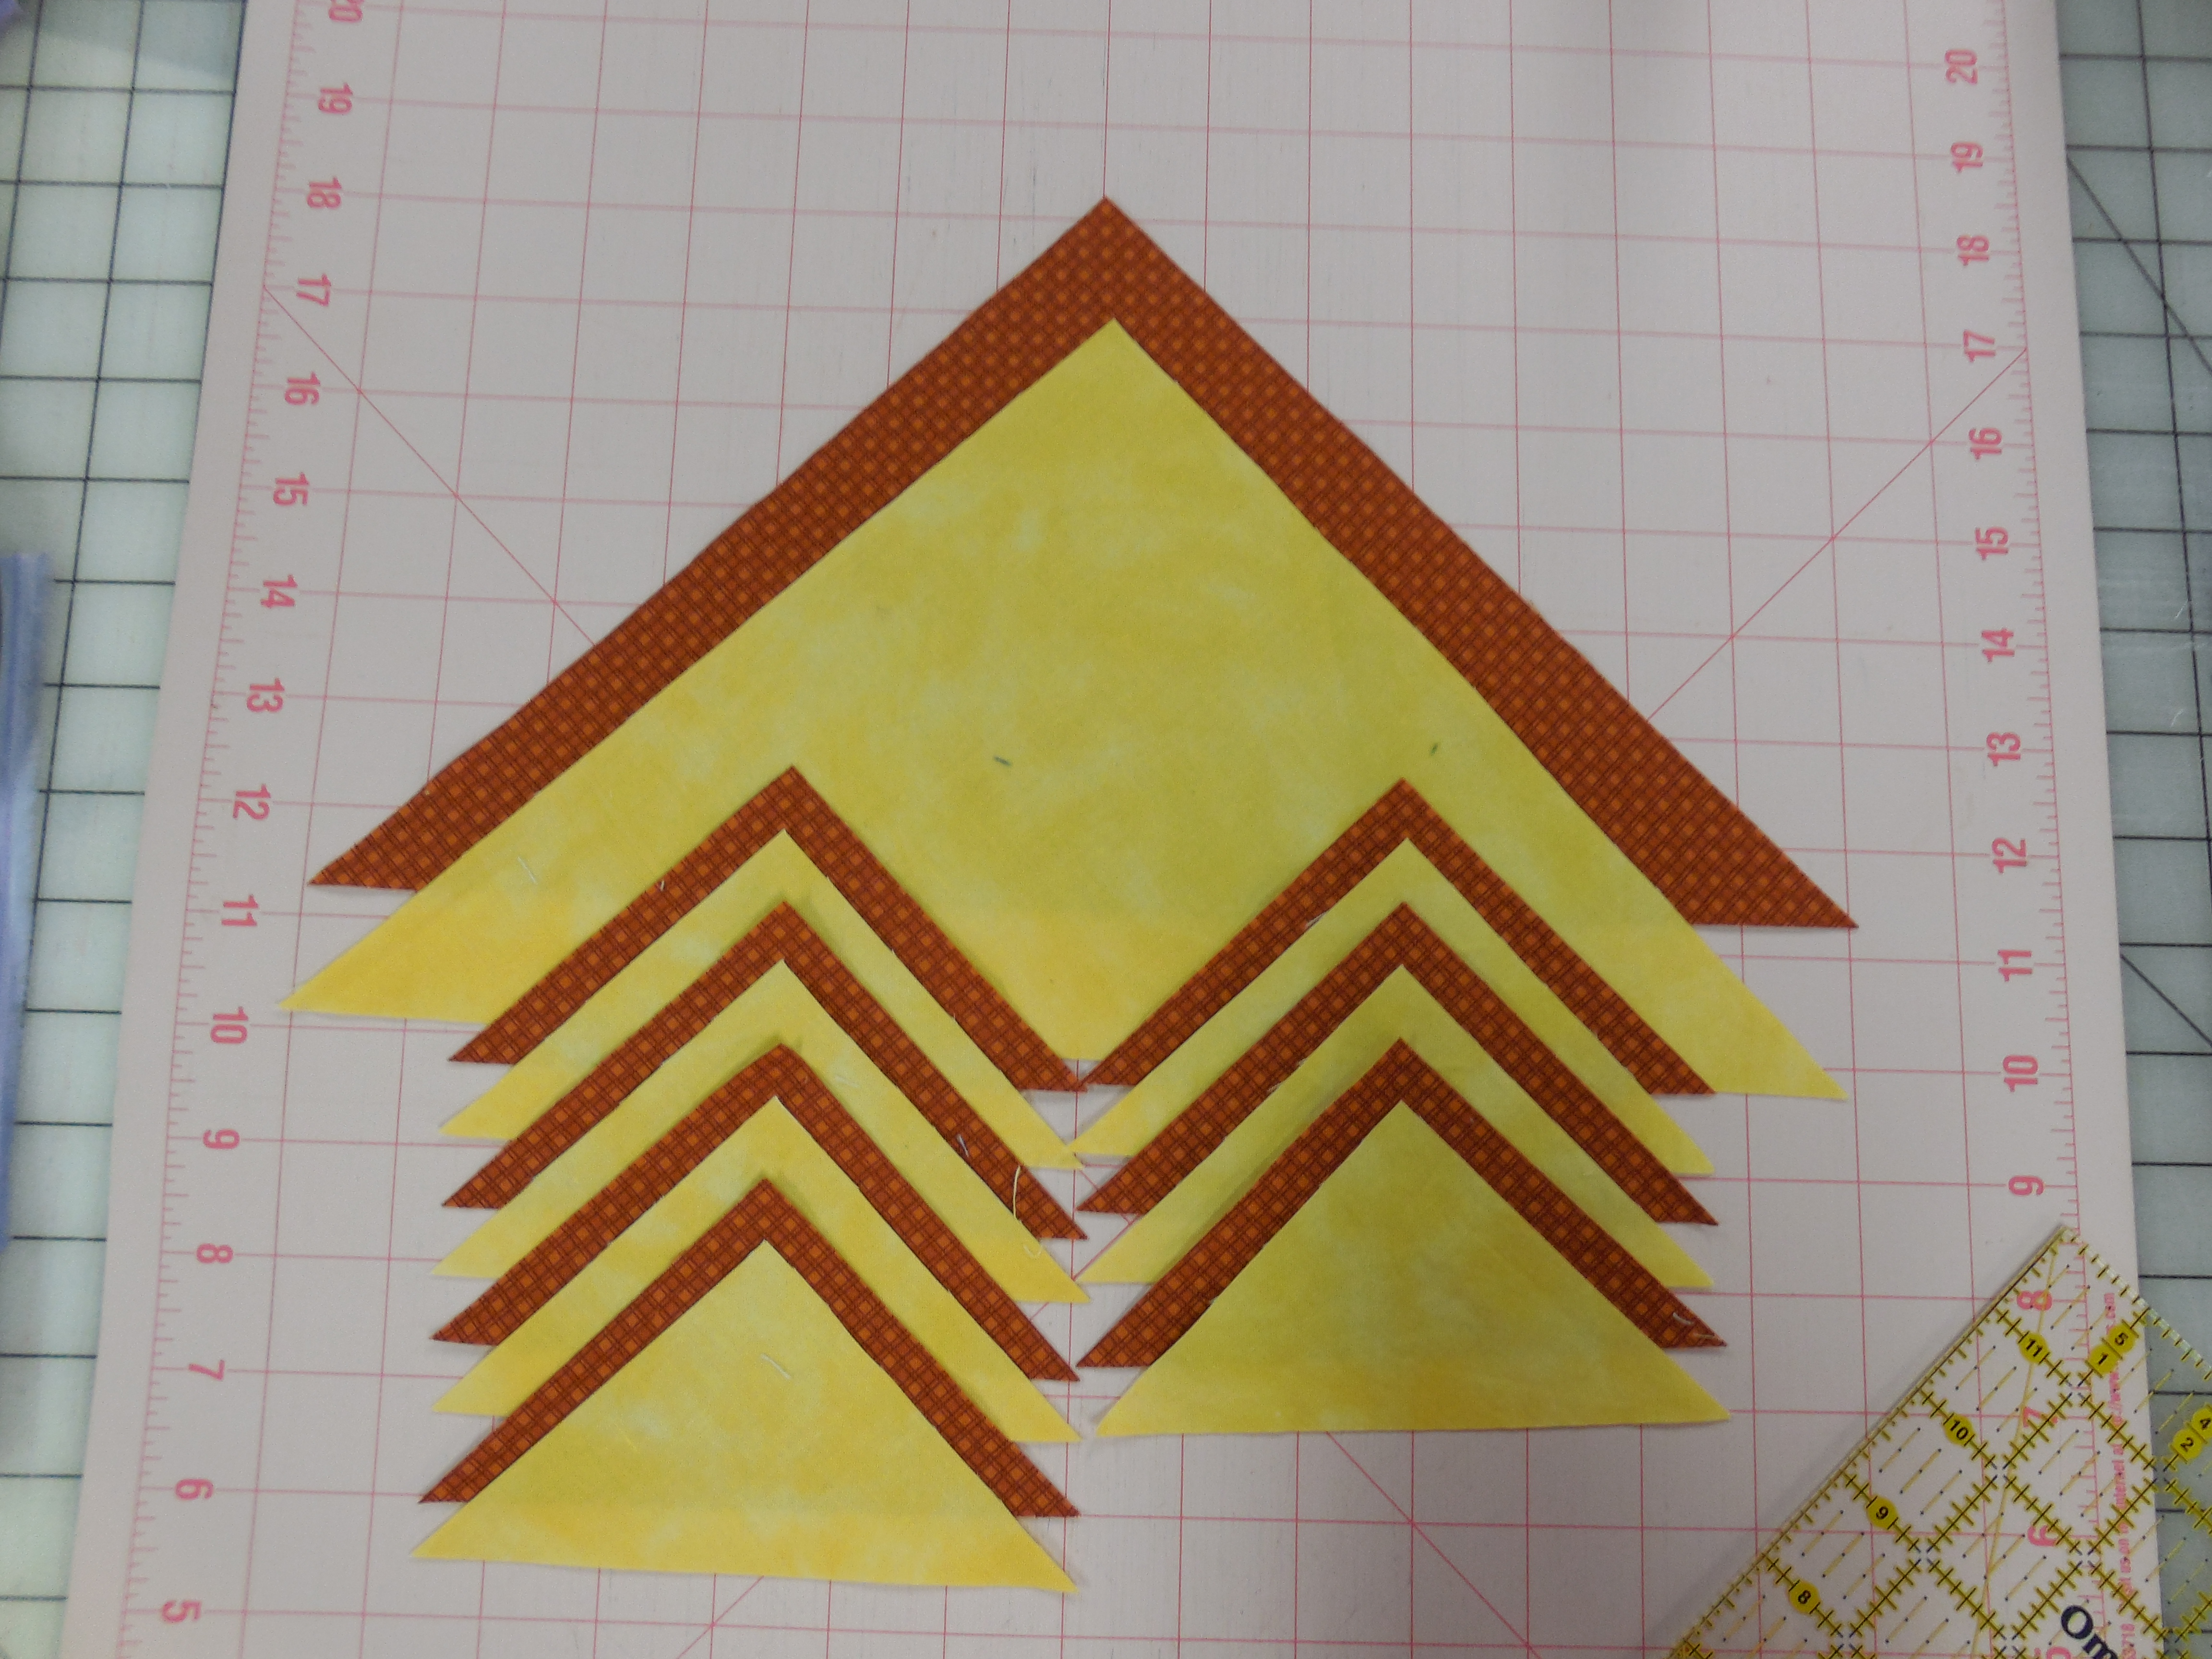
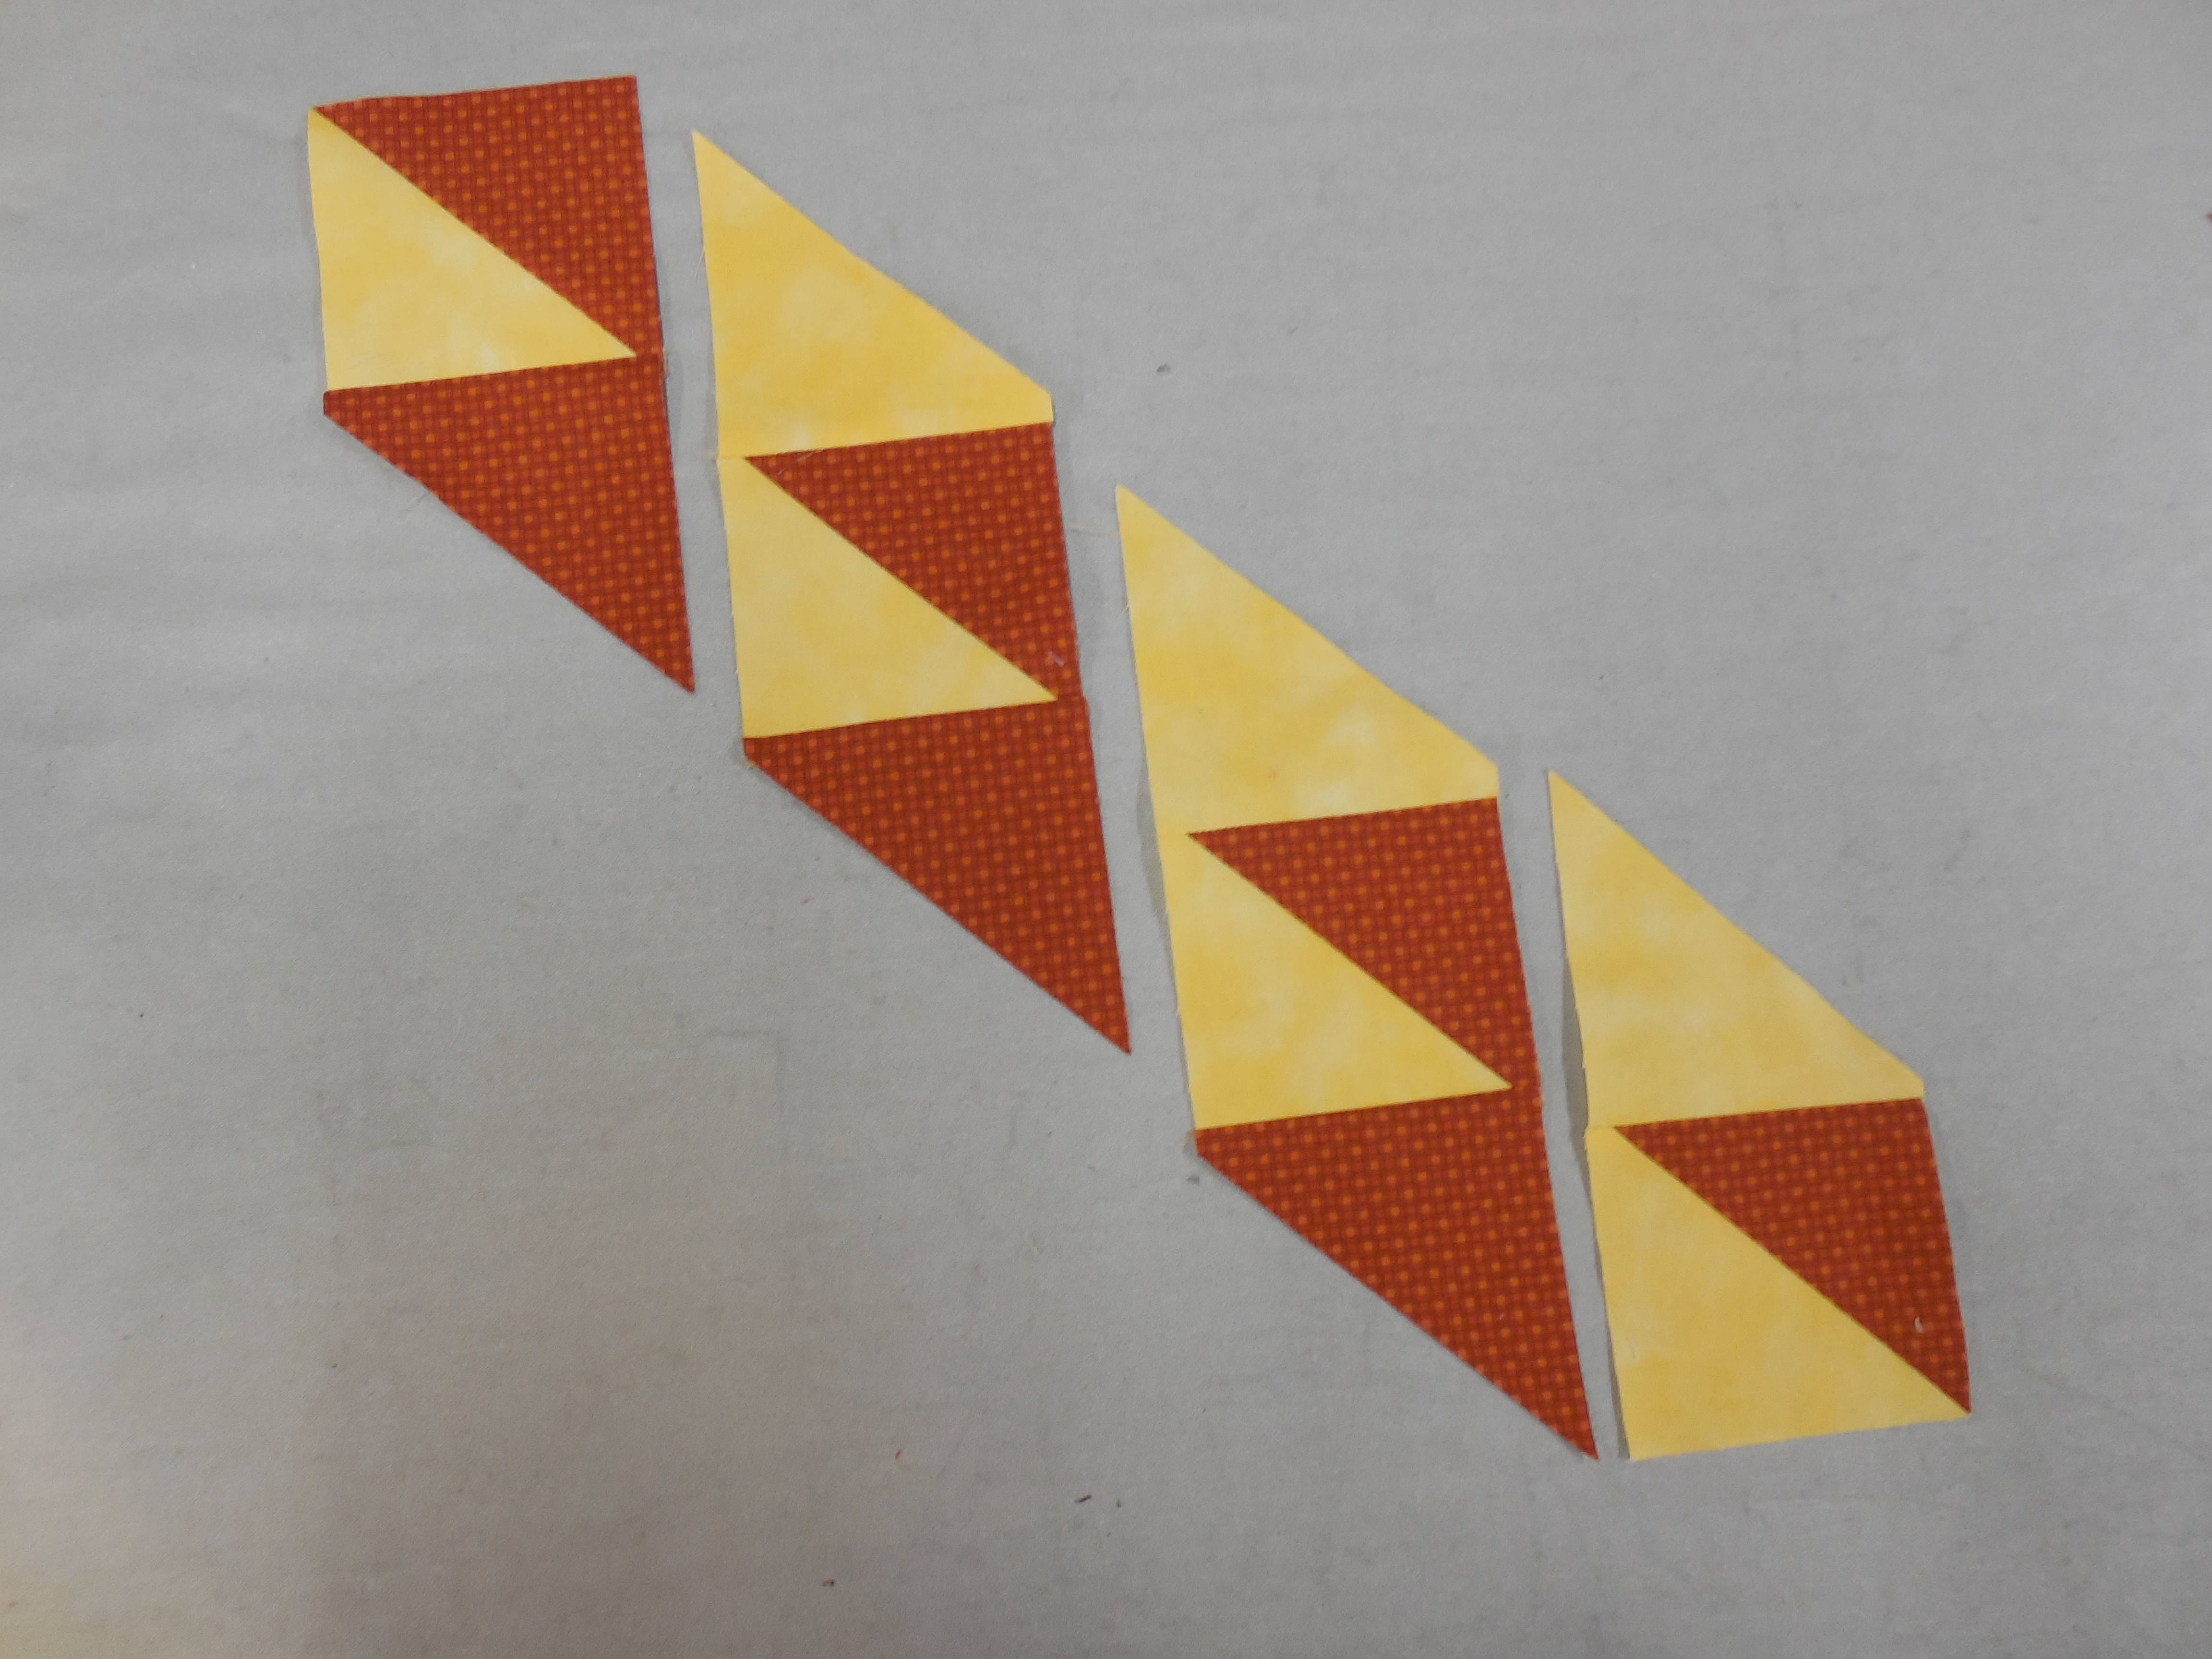
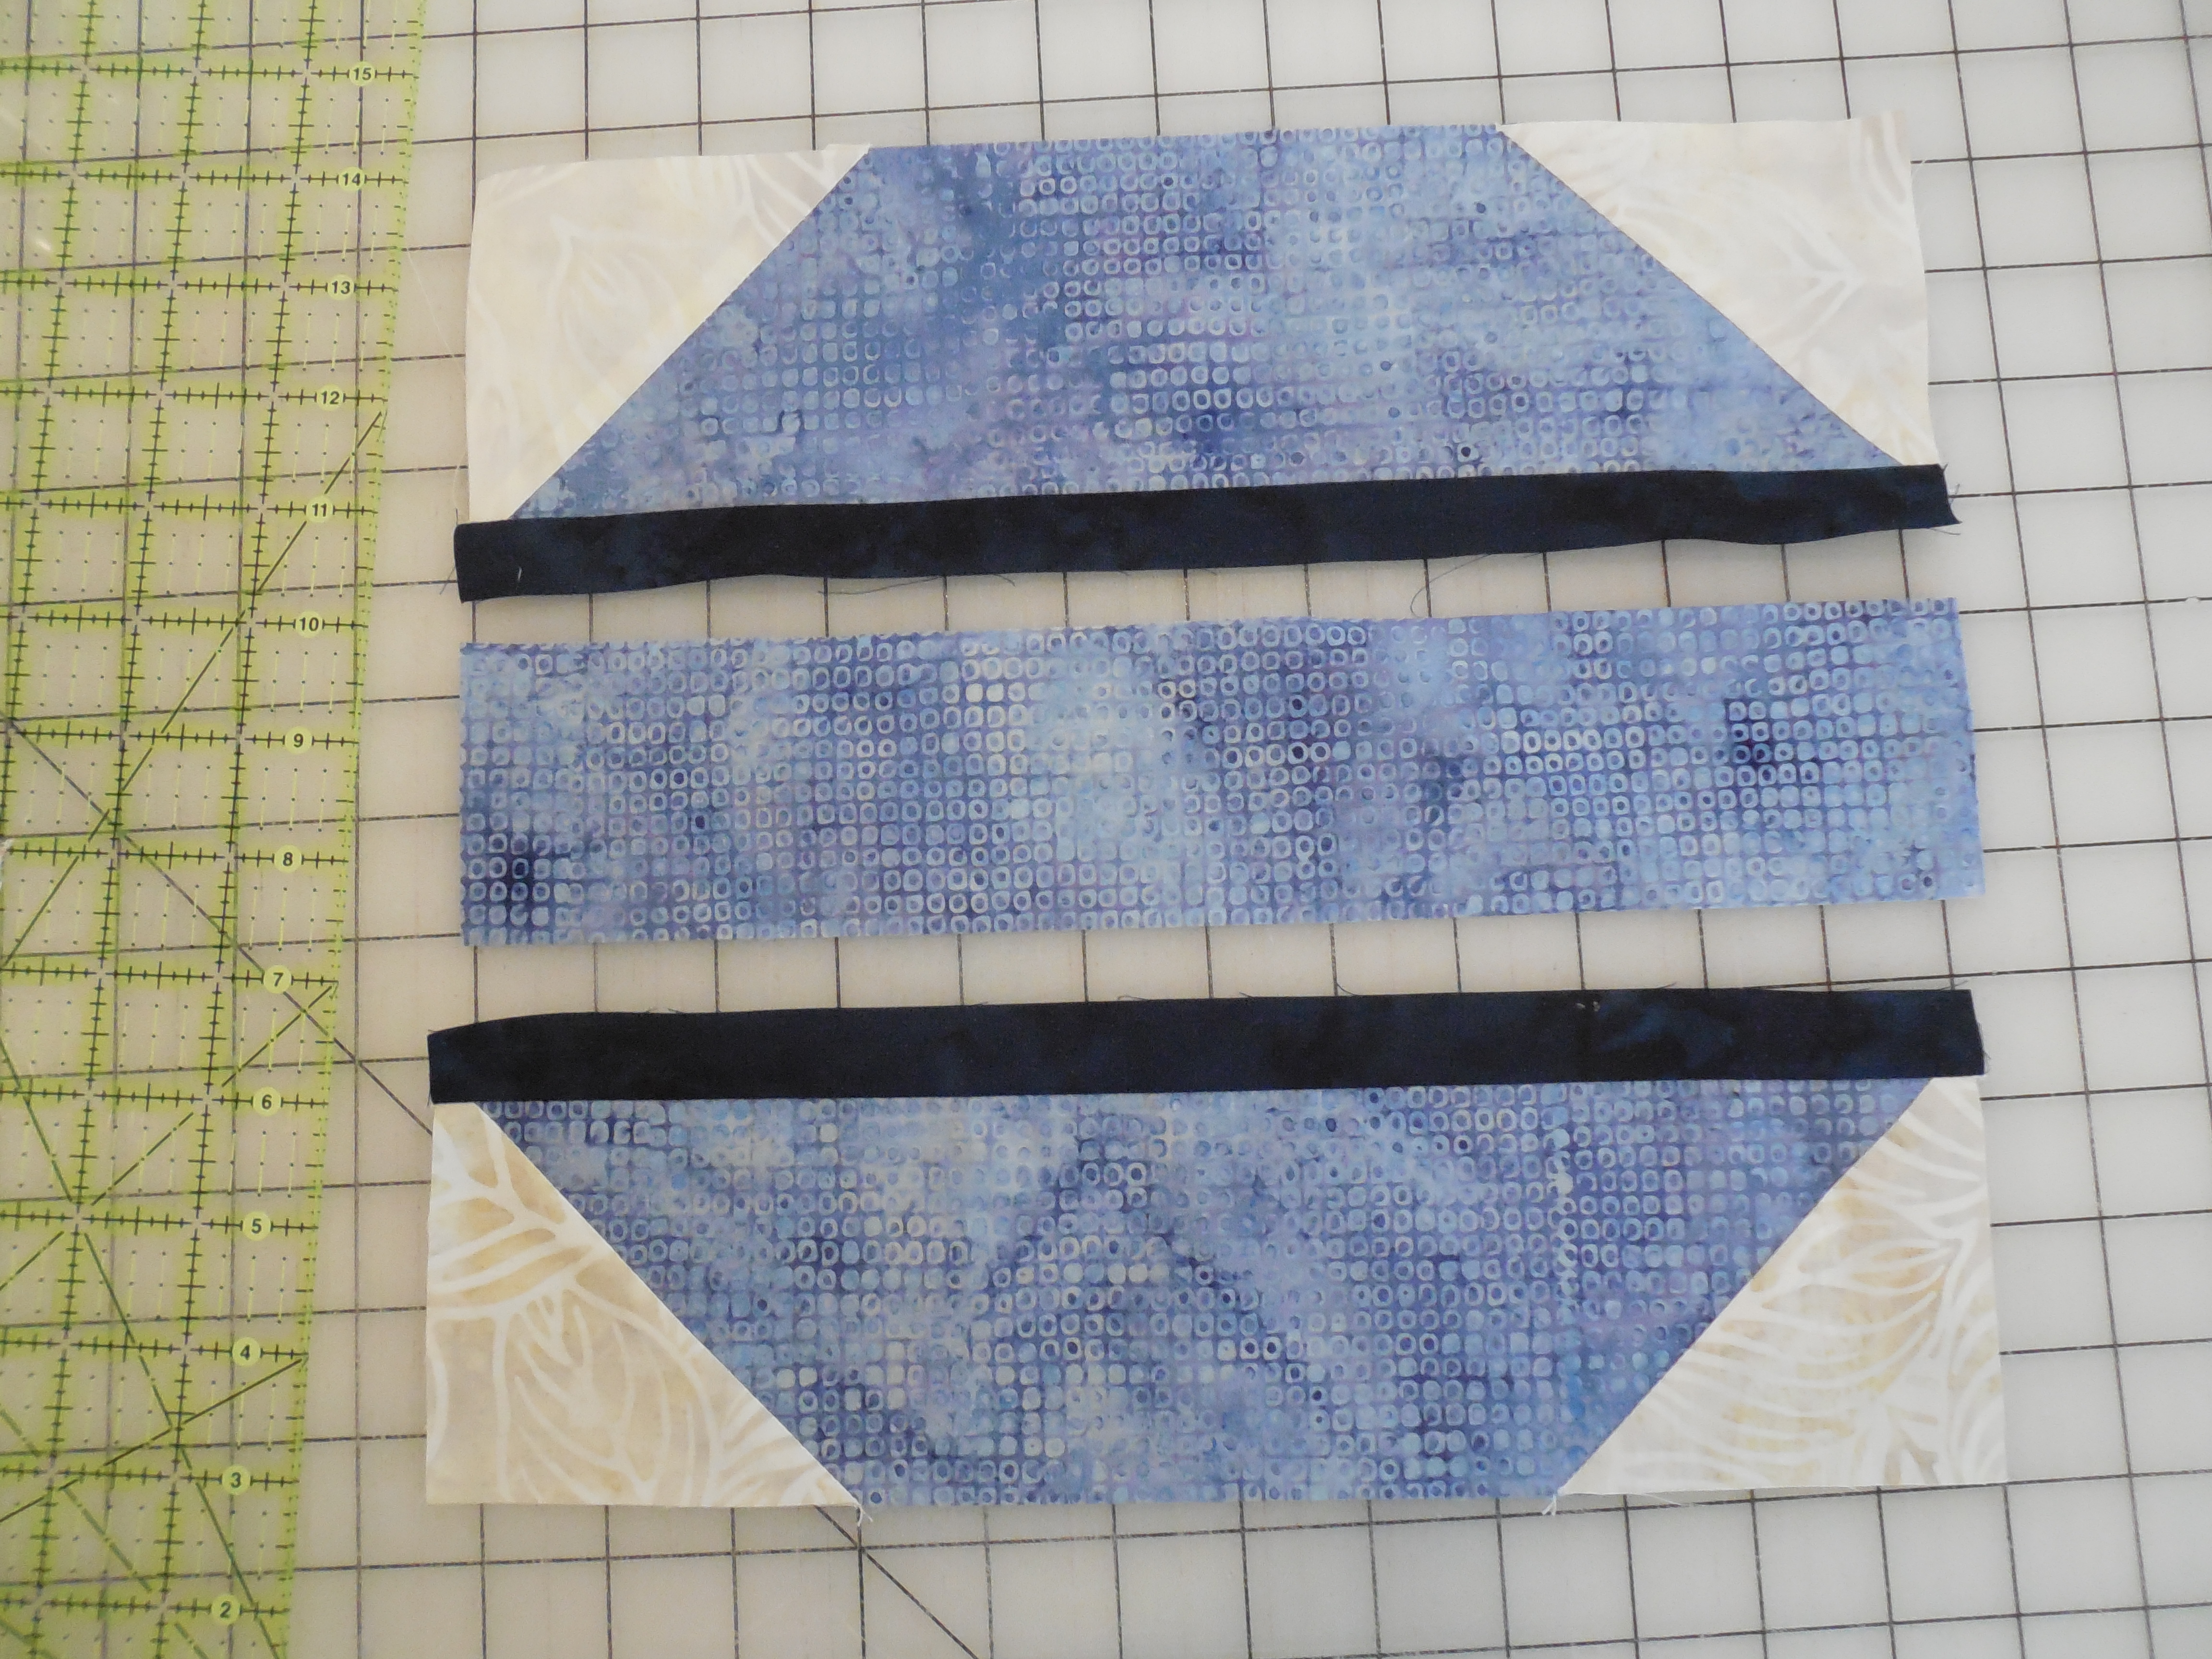
Lay one neutral and one color 1 triangle next to each other as shown below.

MWS 3

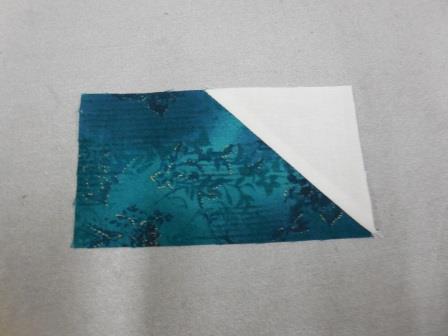
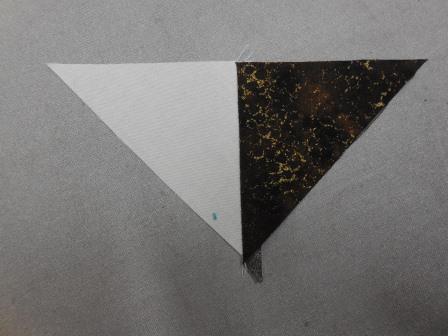
Sew them together on two of the short edges to make a larger triangle.  Do the same with the remaining triangle pieces.  You should have four pieces that look like the picture below.

MWS 4

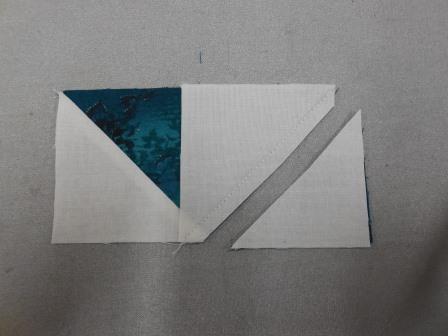
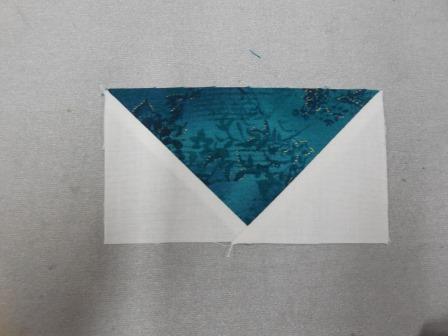
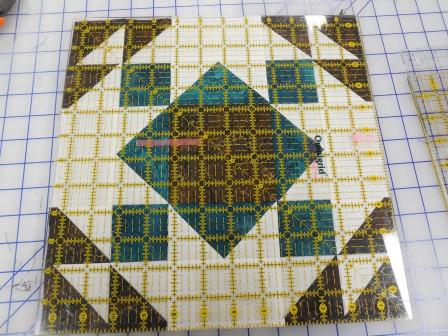
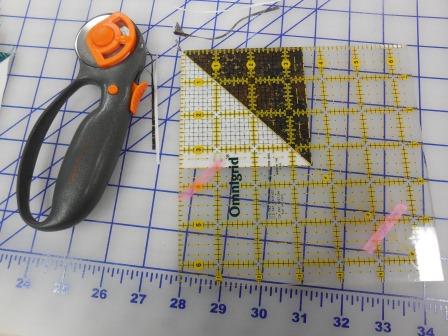
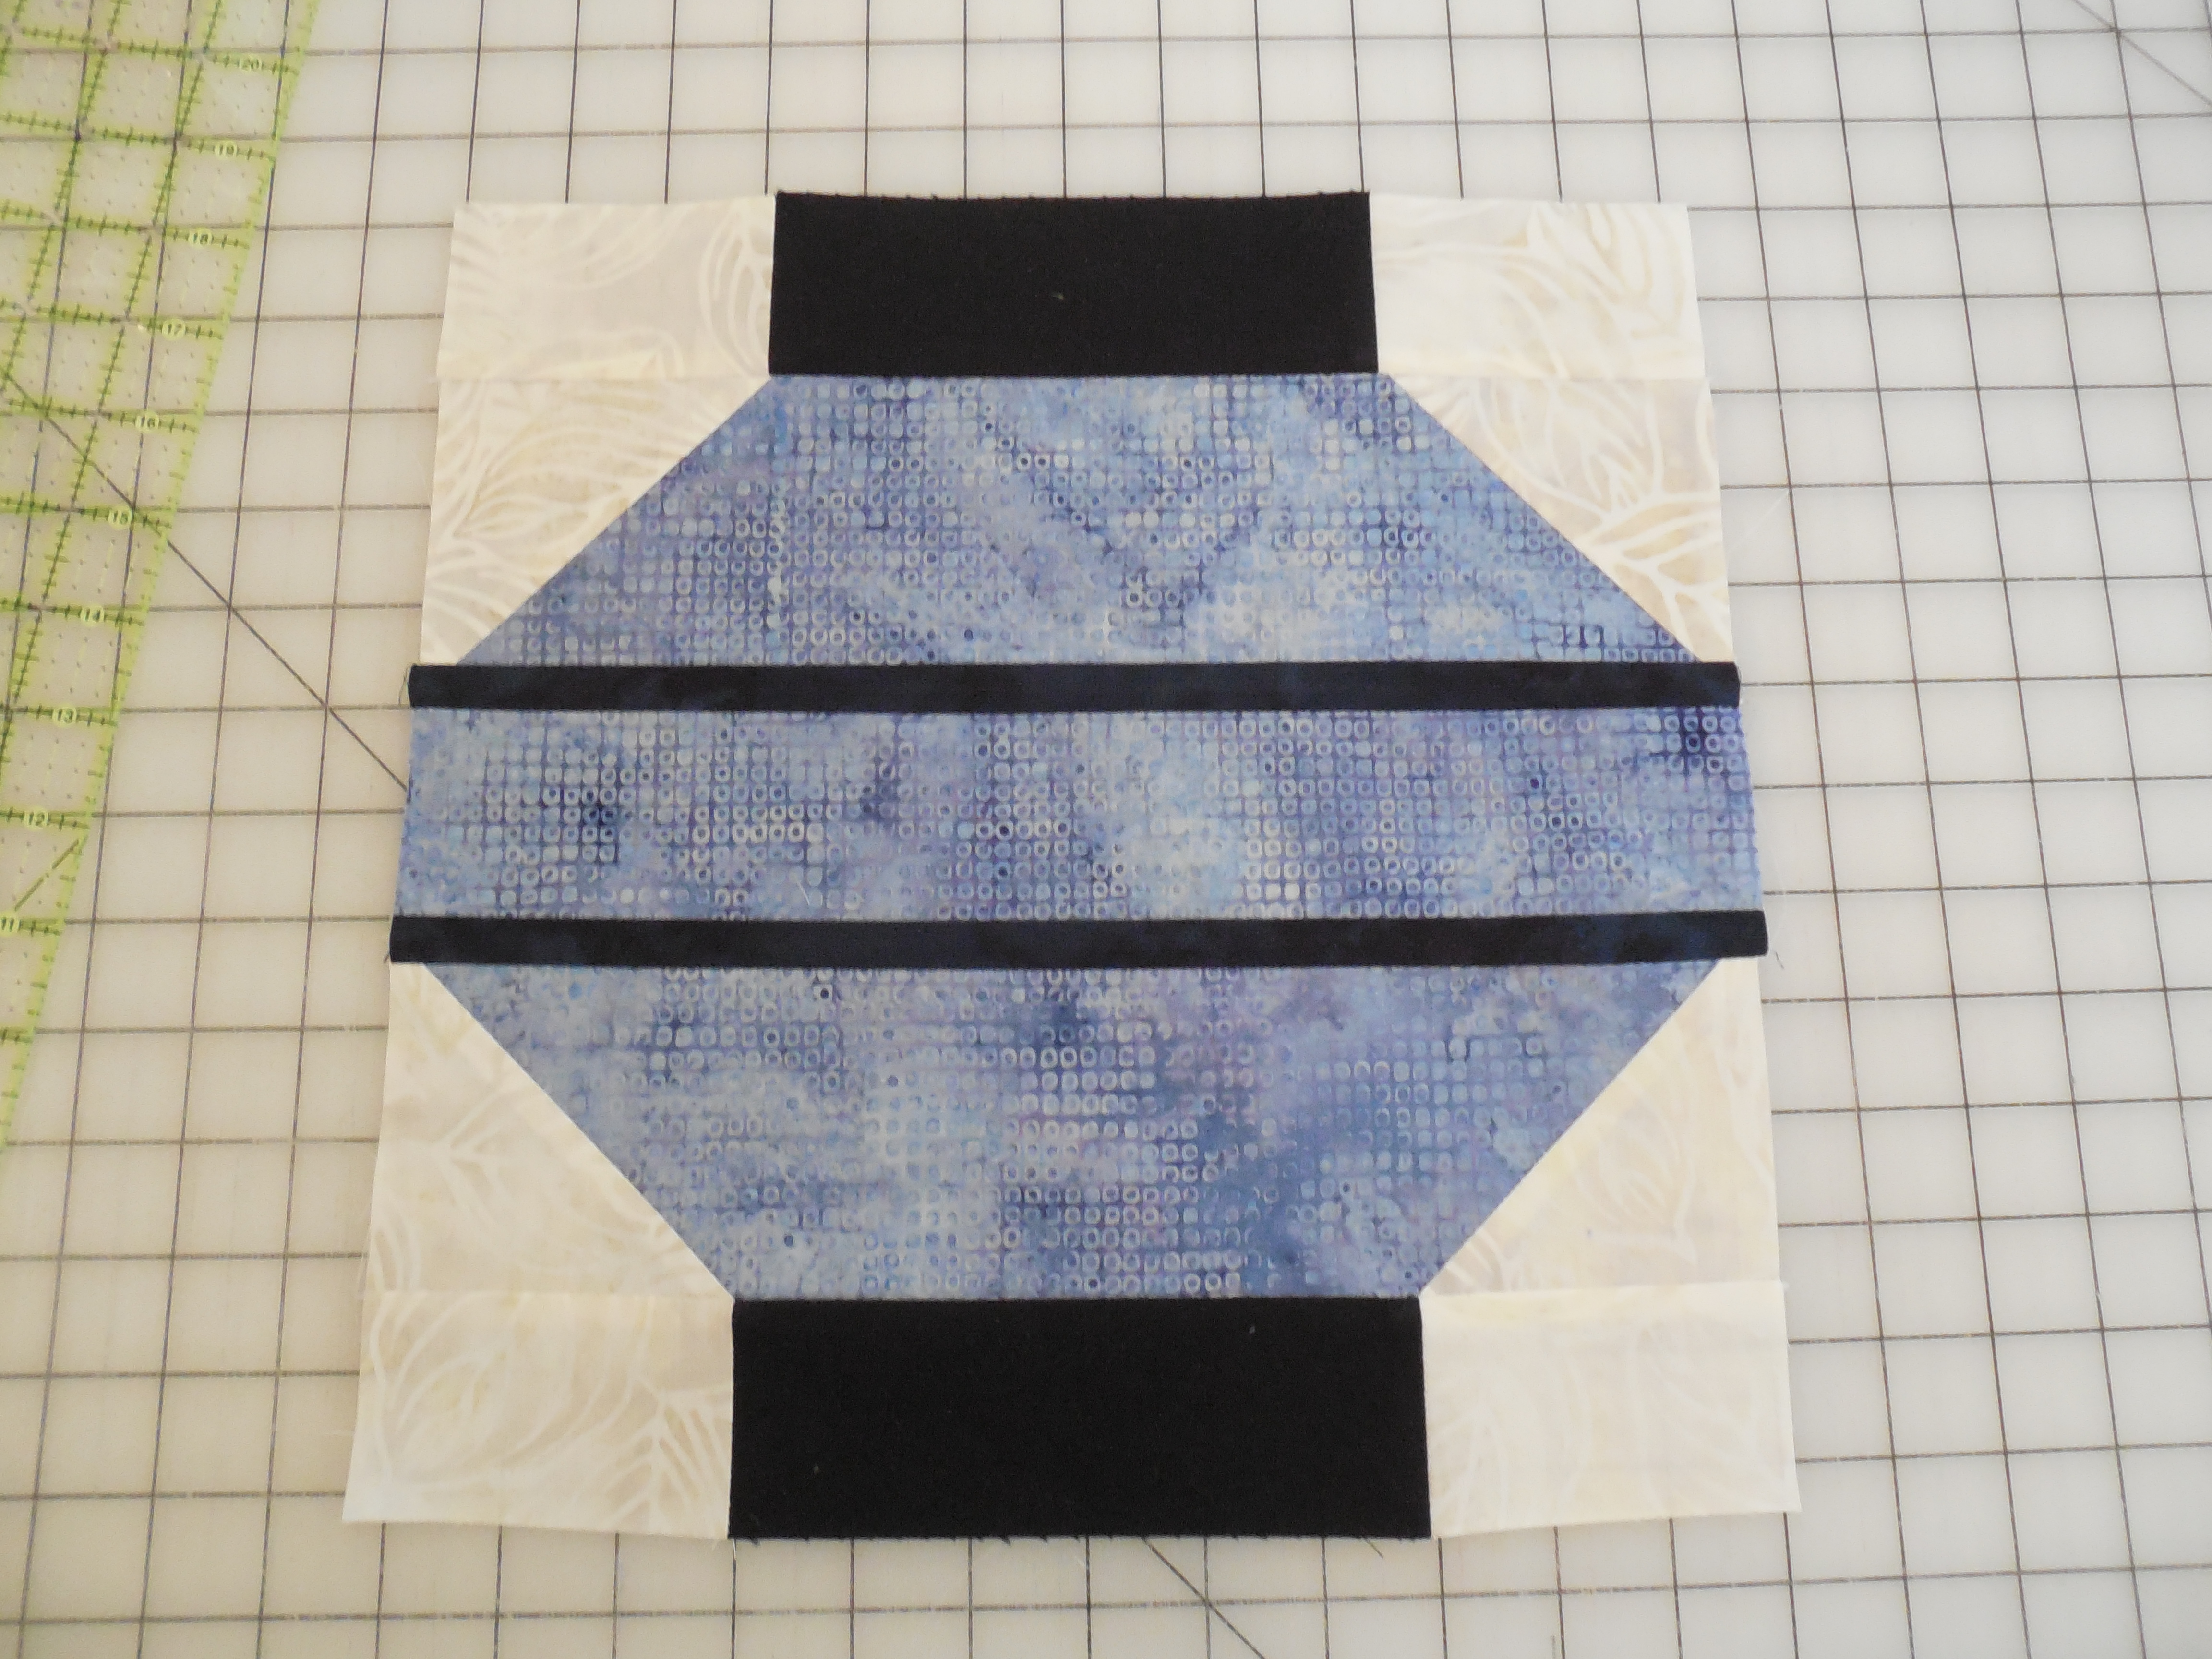
Cut the 4″ squares in half diagonally once.  Center the pieced triangle on one of the neutral triangles and stitch together.  Trim to make 3 1/2″ squares with the intersection meeting at the 1 3/4″ mark in both directions.

MWS 5

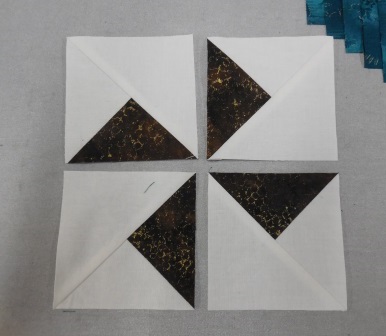
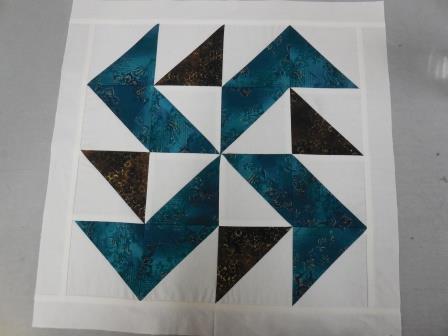
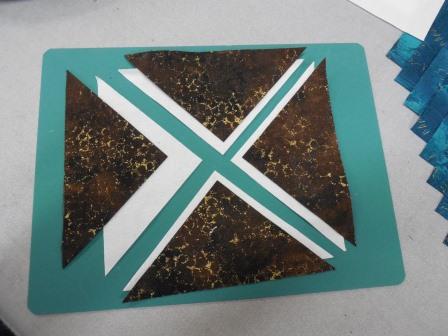
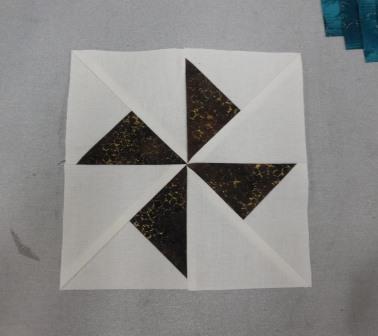
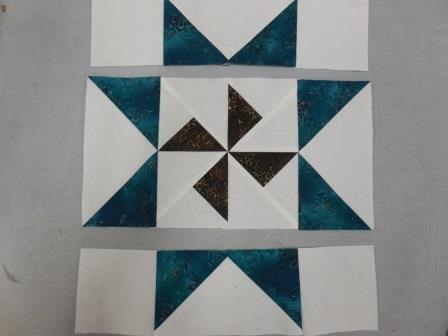
Sew the four blocks together as shown to make a pinwheel block.

MWS 6

Mark all eight of the  3 1/2″ Color 2 squares from corner to corner.

MWS 7

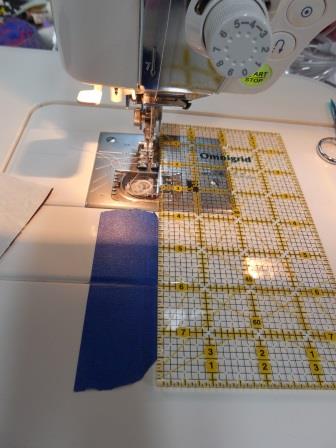
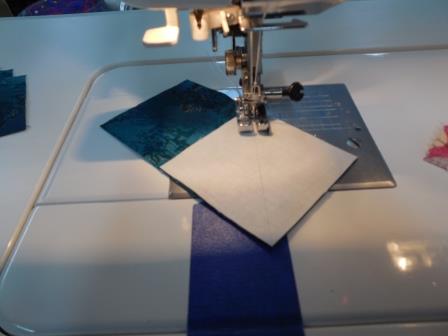
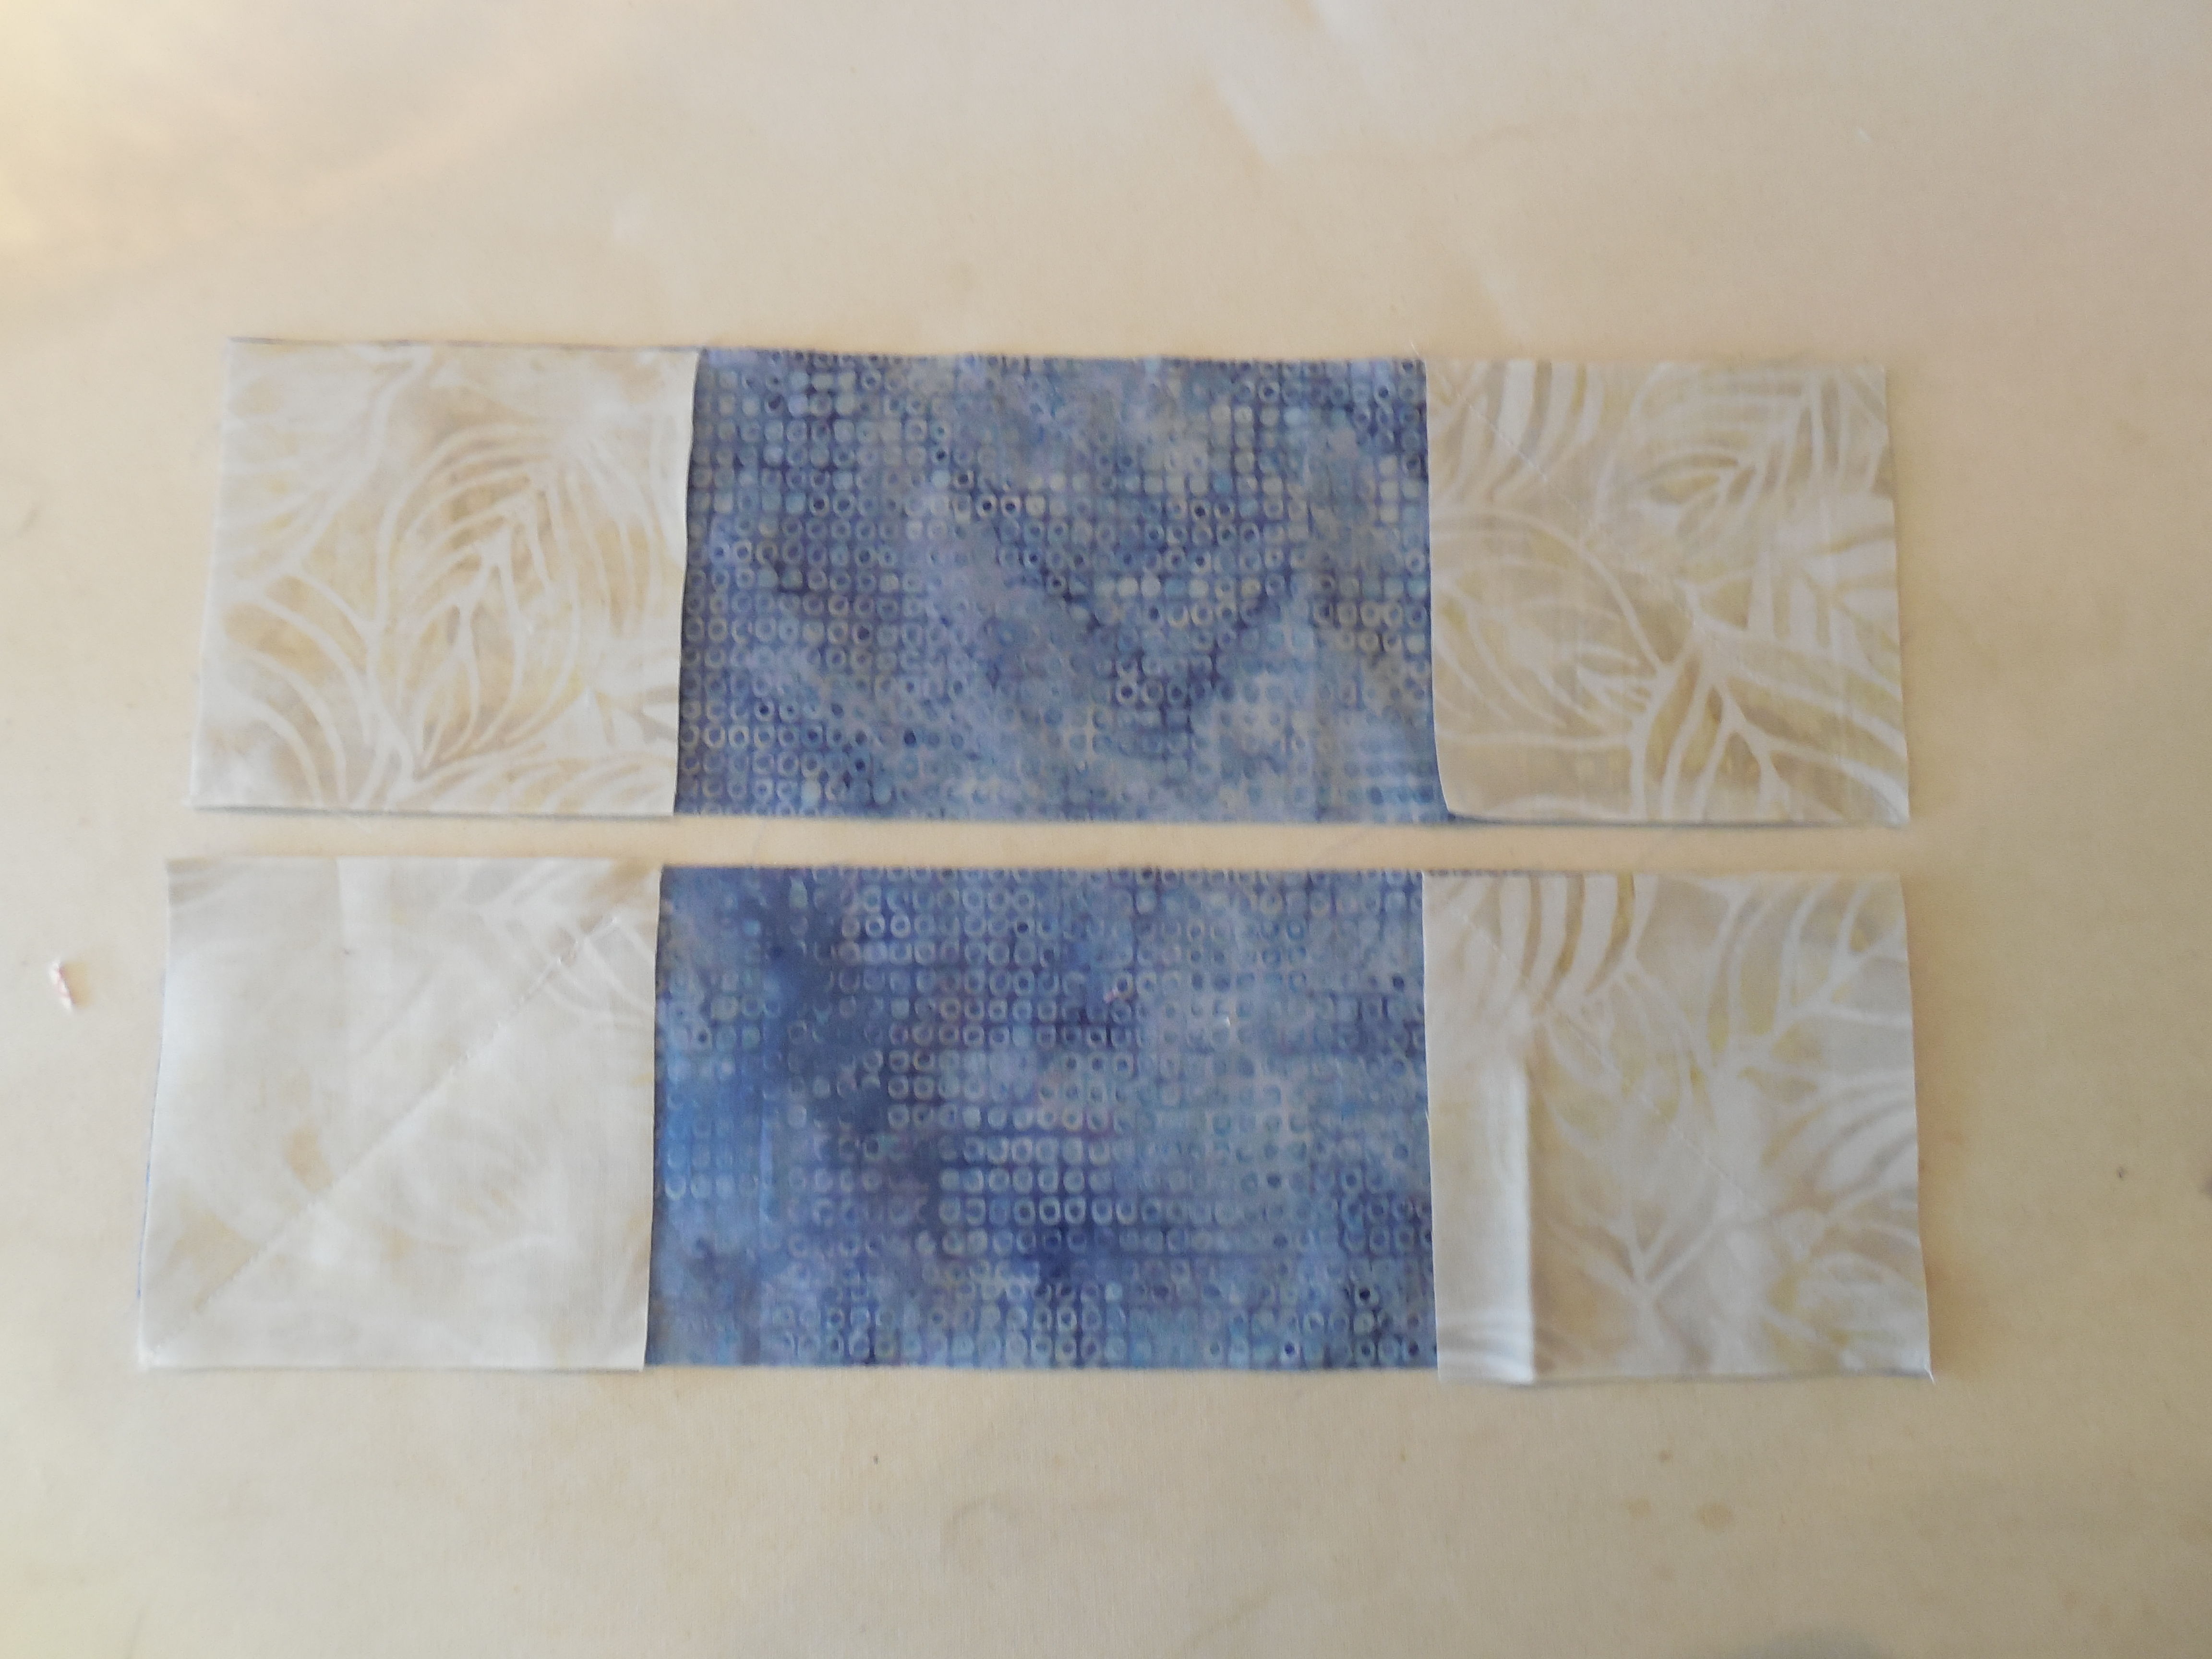
As with the Block 2 you will make four Flying Geese blocks by laying the 3 1/2″ square at the end of the 3 1/2″ x 6 1/2″ rectangle and stitch just outside of the drawn line.  You should be able to see the distance on this picture.

MWS 8

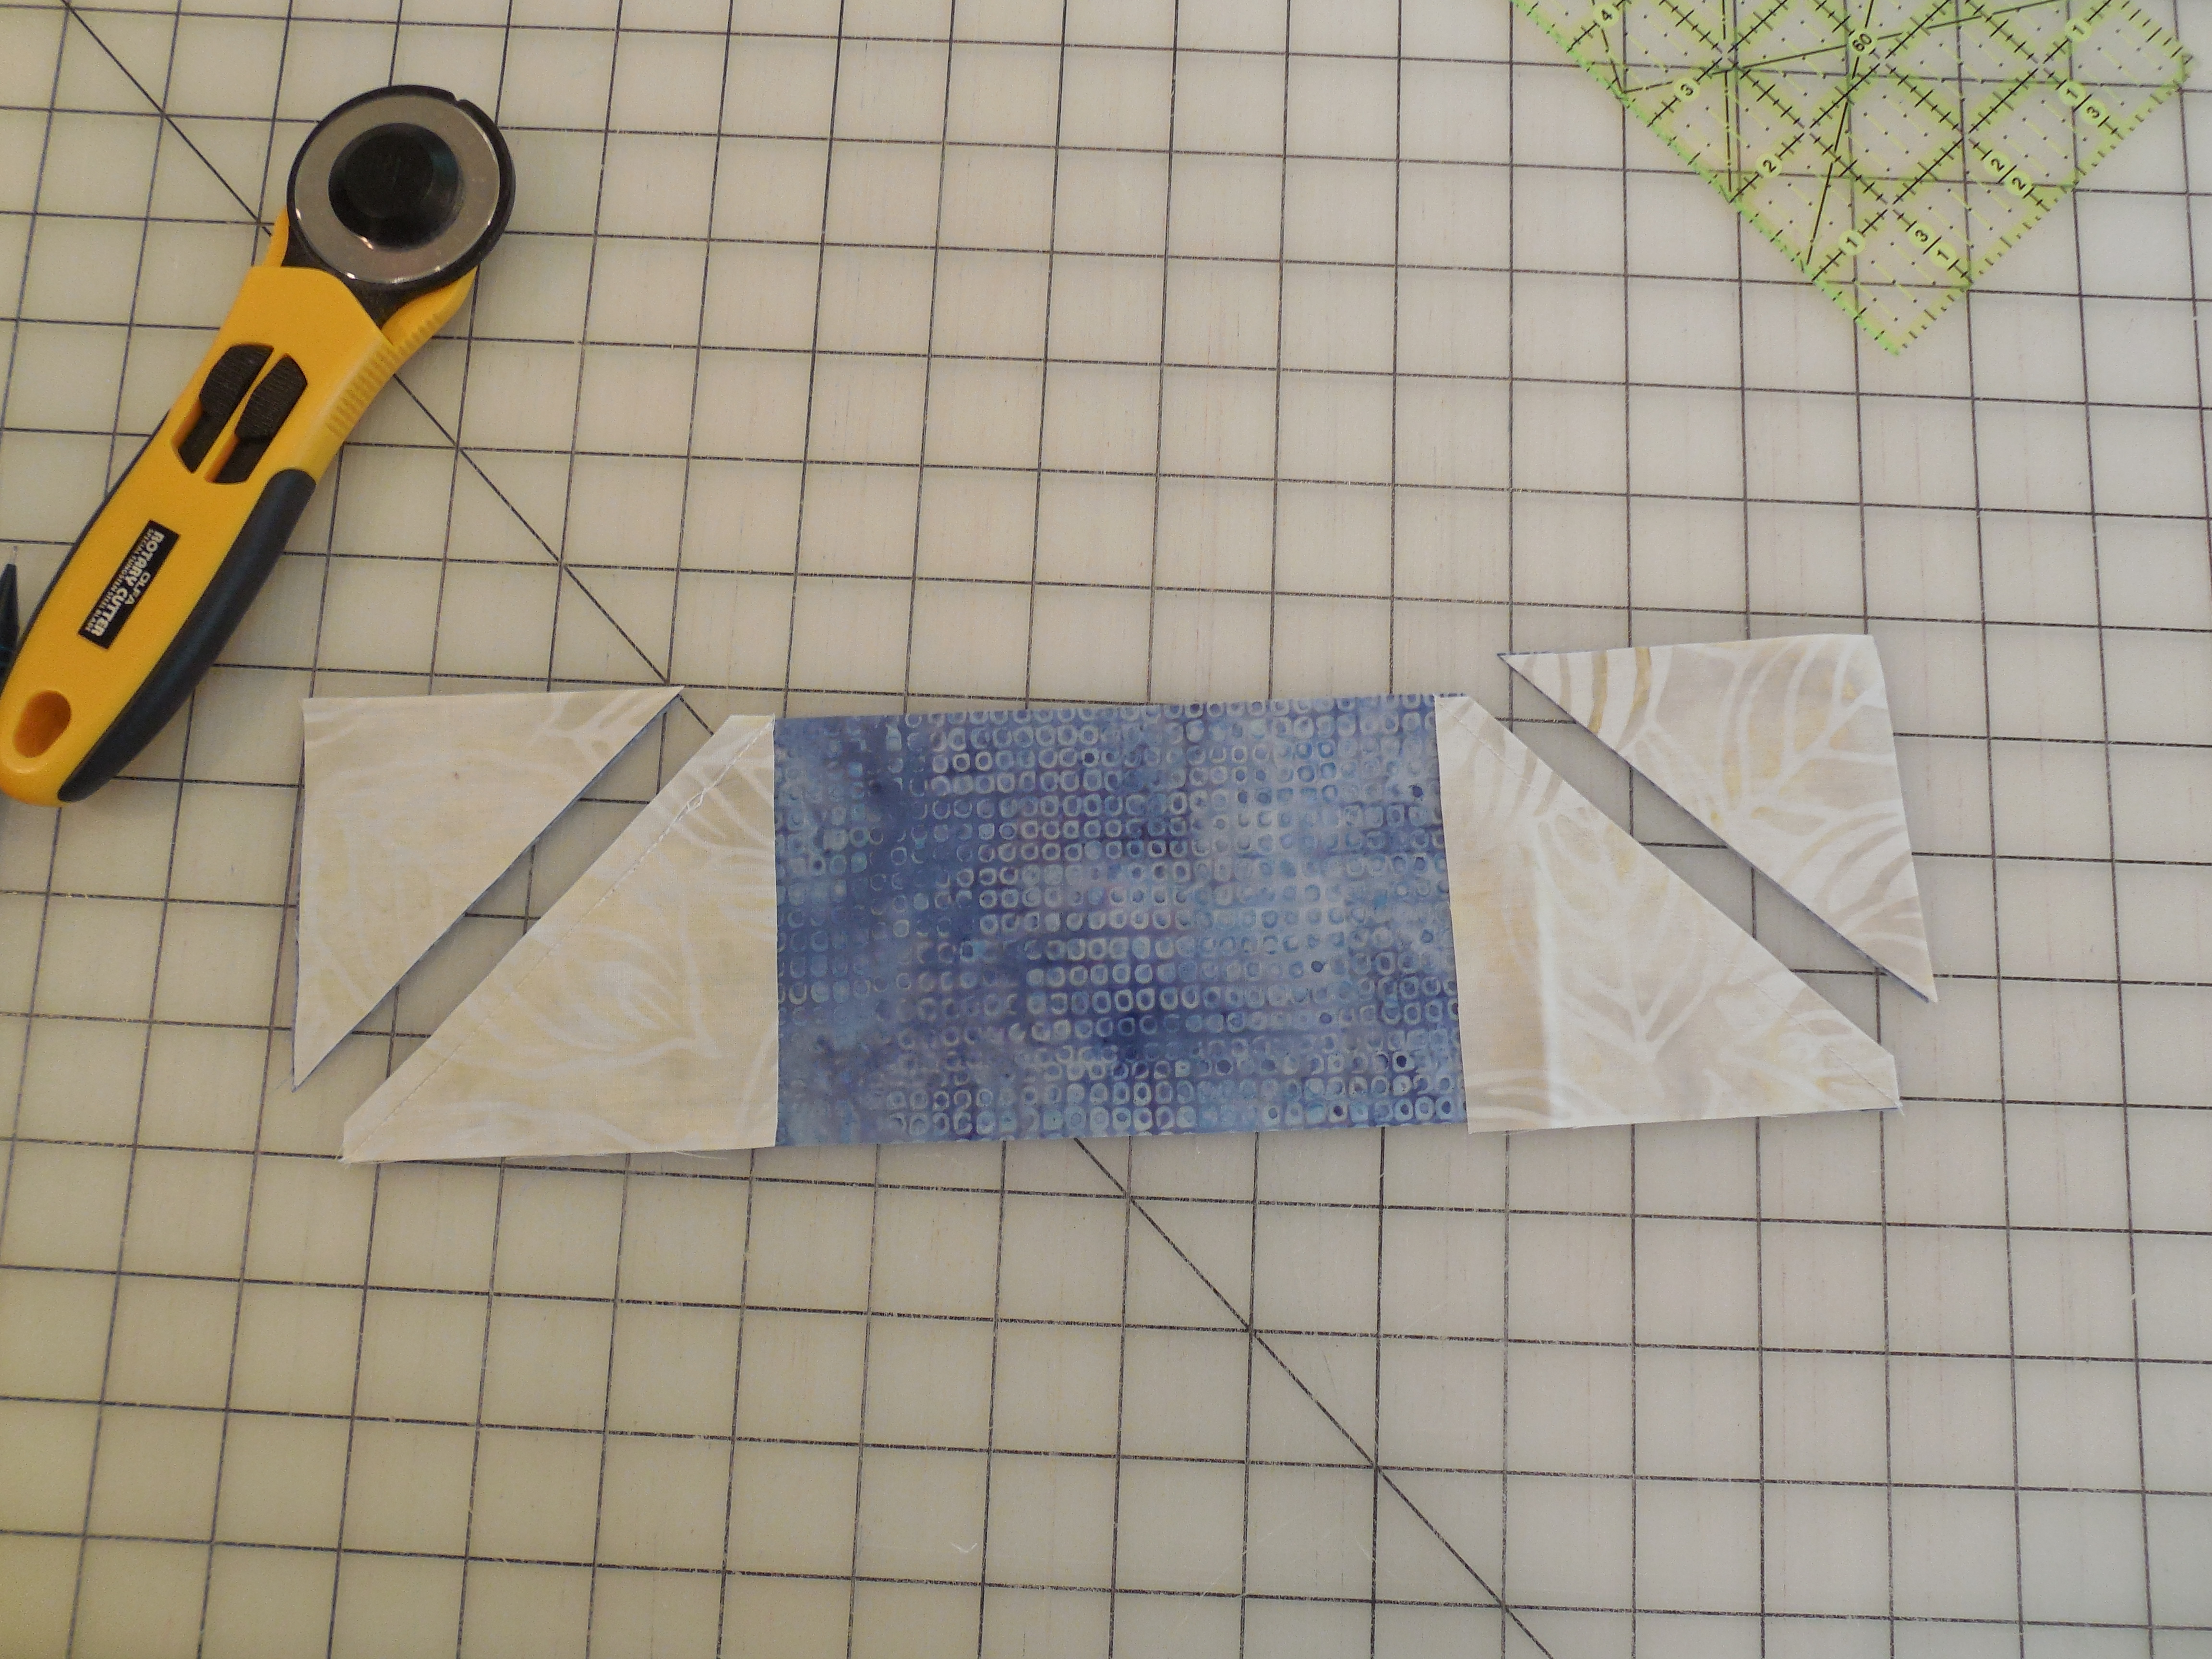
Cut the excess away.

MWS 9

And press.

MWS 10

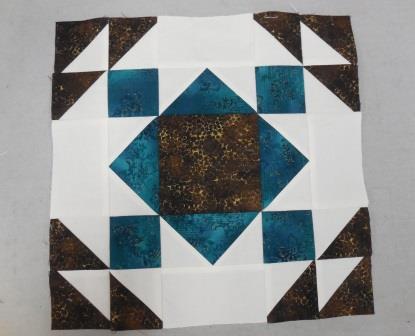
Repeat this on the other side of the rectangle.  Make four Flying Geese units and lay all the units out as shown below.

MWS 12

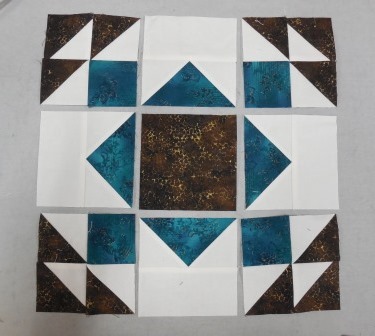
Stitch together and press well.

Add the 1 1/2″ x 12 1/2″ pieces to two opposite sides.  Then add the 1 1/2″ x 14 1/2″ pieces to the other sides to finish the block.

MWS 13


Block 2 – Summer Winds

Standard

For this block you will need to cut the following pieces for each block:

Neutral:

(6) 3″ x 3″ squares

(8) 2 1/2″ x 2 1/2″ squares

(4) 2 1/2″ x 4 1/2″ rectangles

(2) 1 1/2″ x 12 1/2″ rectangles*

(2) 1 1/2″ x 14 1/2″ rectangles*

*I cut a piece of neutral 12 1/2″ x WOF and also 14 1/2″ x WOF.  For each block I cut the 1 1/2″ pieces from these strips.

Color 1:

(6) 3″ x 3″ squares

(1) 4 1/2″ x 4 1/2″ squares

Color 2:

(4) 2 1/2″ x 2 1/2″ squares

(4) 2 1/2″ x 4 1/2″ rectangles


SW 1

We are going to make HST (half square triangle) units again.  However, this time I’m not going to draw the pencil line through the center.  With smaller pieces you can just use a piece of painters’ tape instead.  Place a ruler flat against your quarter inch foot and lay a piece of tape along the line formed by the ruler in front of the foot.  This will be your guide.

SW 2

Using the 3″ squares of the neutral and color 1, place one of each square together.  Place one of the corners at the edge of the quarter inch foot and make a seam toward the opposite corner.  Guide the pieces through the machine keeping the front corner on the edge of the tape as shown below.  This will make your first seam.

SW 3

Do the same thing on for the 2nd seam.  Cut the piece into two between the two seams.  Press toward the darker fabric.

SW 5

Trim each unit to 2 1/2″ x 2 1/2″.

SW 6

Lay out three of the HST units with one of the 2 1/2″ squares from color 2 as shown below.

SW 7

Sew the units together as shown below.  You will make 4 of these.

SW 8

For the flying geese units you will need to draw the pencil line from corner to corner on the 2 1/2″ neutral squares.

SW 9

Lay one of the 2 1/2″ marked neutral squares at one end of a 2 1/2″ x 4 1/2″ color 2 rectangles.

SW 10

Typically when you make the flying geese unit using this method you will come up with a unit that is a little smaller than needed.  However, this little tip will give you the correct size unit.  Do NOT stitch directly on the drawn line.  Stitch about 2-3 threads to the outside of the line.  My needle barely touches the line on one side, but it is not directly on the line.

SW 11

Cut off the excess.

SW 12

Press as shown below

SW 13

Repeat on the opposite side.

SW 14

SW 15

Don’t forget to trim this unit to 2 1/2″ by 4 1/2″ being careful that the “v” intersection is right at 1/4″.


Assemble the units as shown below.

SW 17

Piece them together.

SW 18

Square up the block to 12 1/2″ x 12 1/2″.

SW 20

Sew the 1 1/2″ x 12 1/2″ strip to opposite sides.  Press and stitch the 1 1/2″ x 14 1/2″ strips to the remaining sides and press.


Block 1 – Yankee Puzzle

Standard

There are truly only 6 blocks in this quilt.  Each block is made twice with opposing colors.  For instance if the center block is color 1 in your first block, it will be color 2 in your second block.  I will be calling the fabrics either neutral, color 1 or color 2.  You can assign these names based on your own fabrics.  The color 1 and color 2 will be the opposite for the second of each of the blocks.  Keeping the colors straight won’t matter too much until we get to the sashing and cornerstones.  Border fabrics will be referred to as Inner border and Outer border.

For the Yankee Puzzle block you will need to cut the following:

Neutral

Two 4″ x WOF strips — subcut into 16 4″ squares.  Save the remainder of the 4″ strip.

One 12 1/2″ x WOF strip — subcut four 1 1/2″ pieces.  Save the remainder of the 12 1/2″ strip.

One 14 1/2″ x WOF strip — subcut four 1 1/2″ pieces.  Save the remainder of the 14 1/2″ strip.

Color 1

One 4″ x WOF strip — subcut into 8 4″ squares.  Save the remainder of the 4″ strip.

Color 2

One 4″ x WOF strip — subcut into 8 4″ squares.  Save the remainder of the 4″ strip.

YP 2

Each of the neutral pieces will be paired with each of the colored pieces to make half square triangles.

To make half square triangles (HST) draw a pencil line from corner to corner using a straight edge.

YP 3

Sew a scant 1/4″ away from both sides of the line.

YP 4

Cut between the two seams

YP 5

Press each unit open with the seam allowance facing the darkest of the two fabrics.

Trim each block to exactly 3 1/2″ square.

YP 6

Arrange the blocks as shown in the picture below

YP 7

After you have the pieces sewn together add the 1 1/2″ x 12 1/2″ to two opposite sides and the 1 1/2″ x 14 1/2″ to the remaining sides.

YP 8

Yardage for Quilt Along

Standard

Have you decided on the colors for your quilt along yet?  Here is the required yardage.

Background                  6 1/2 yards

Color 1                           2 yards

Color 2                           2 yards

Inner Border                  1/2 yard

Outer Border                  1 5/8 yards


Although my electronic samples all have solid borders, I have chosen a medium-large scale print for my outer border.  I have broken down the border yardages should you decide to do the same.  I hope you will join us.

I will post the first blocks next Wednesday, February 17.

London Square – November/December BOM

Standard

London Square

Please make this block in November to bring to the December meeting.

We will be using warm fall colors for this block.  Please use two different fabrics that contrast each other.

Cutting instructions:

You will cut the same pieces from both of your fabrics.

Out of each fabric cut a 9 7/8″ square.  Then cut the square in half diagonally.  You will have two extra triangles, one of each fabric.  (So you can make two blocks, right?  ☺)

Out of each fabric cut four 3 7/8″ squares.  Cut each of these diagonally.  You will need 7 triangles, so you will have one of each fabric left over.

**I tend to cut my squares a smidge larger and then trim them after I’ve assembled them.

DSCN0706

I first assembled four HST units using one of each color.  If you cut your triangles a little bigger you would trim the ones you used in the HST units to 3 1/2″

DSCN0707

I then added the triangles to these HST units as shown below.

DSCN0708

After adding the additional triangles I trimmed them even with the HST unit.

Next begin piecing these units together matching the points as well as possible.

DSCN0709

Once all four units are pieced together, you will sew the dark triangle to the side of the strip that has the light triangles.  You will sew the light triangle to the other side.  It should look something like this.

DSCN0710

I left mine untrimmed to give the winner of the blocks a little extra room to play if they need it.

BOM June/July 2014

Standard

Welcome to China!  If you missed the meeting last night you missed learning that our ever-important toilet paper was invented in China.  However, only Emperors were able to own and use it.  Sure glad that has changed!

So our Block of the Month is the Chinese Lantern.  You will make this block in June and bring it to the July meeting.  I really enjoyed making this block and think several of these blocks together in a quilt would be adorable.

Our palette for this block will consist of a medium batik for the bulk of the lantern, a darker, coordinating batik for the two stripes in the middle.  A pale or neutral (batik or solid) for the four corners and black (batik or solid) for the top and bottom of the lantern.

Cutting instructions

Neutral:    4 pieces cut 2 x 3 1/2″

4 pieces cut 3 1/2″ x 3 1/2″

Black:         2 pieces cut 6 1/2″ x 2″

Medium Batik:    1 piece cut 12 1/2″ x 2 1/2″

2 pieces cut 12 1/2″ x 3 1/2″

Dark Batik:            2 pieces cut 12 1/2″ x 1″

DSCN0455

Next sew the white rectangles to each side of the black rectangles

DSCN0457


On each neutral square, draw a pencil line diagonally.

DSCN0463

Place the squares on each side of both medium batik (3 1/2″) rectangles.  Be sure the drawn lines are going in opposite directions.

DSCN0465

Sew ON the line and trim off the excess fabric.

DSCN0468

Assemble the center pieces together as shown below.

DSCN0471

Add the top and bottom and you will be finished!

DSCN0474

I hope you enjoy this block as much as I did!


Brown Bag Exchange

Standard

Recently I have found myself making a couple of small projects.  At the September meeting of the Quilt Connection Guild our newly elected president Linda R. asked us each to take a small brown bag home with us.  During the month we were to fill it with something fall-related.  It didn’t have to be quilt related, but we could spend no more than $5.  We were also encouraged to use part of this budget to decorate the bag.  At the October meeting we had the brown bag exchange.

I l keep a small stock of coffee cups in my studio.  When I see one that I like and it is $4 or less I will buy it for my cup stash.  I picked out a fall-colored mug and used that mug as inspiration for a quick mug rug.  The recipient (Mary H.) said that she loved her gift.

2013-09-28 18.07.57

The contents of my bag were from Ana S.  It was filled with lots of goodies!  A cute pin cushion, and handmade needle case and a fat quarter.  Also, a large flower pin was used to decorate the bag.

2013-10-09 15.12.15

I hope all who participated in the brown bag exchange were pleased with what they received.  It was a fun activity.