Odds and Ends

Standard

Getting caught up before Christmas was advantageous for me.  I came home from our holiday celebration with only one client quilt remaining!  I really dislike having a backlog and try to finish quilts as I receive them.  I finished the remaining quilt and also received a really cute table runner to quilt for a friend at church.  I only took a picture of a portion of it–don’t you just love her turkey?


amyd.jpg

Woooo Hoooo!!  Now I had a little time to work on my own quilts.  I pulled out a UFO.  I have started and stopped this one more times than I can remember.  The main blocks were a piece of cake.  The blocks on the sides and in the corners slowed me down–I didn’t feel like doing the math.  When I pulled it out this time all that was left were the borders.  Borders are not my favorite thing to do–which is why it was sitting.  After finishing the borders I loaded it on the longarm and started quilting.  I LOVE how it turned out!


lr-quilt1

lr1

lr2

This is an original design and after I make it one more time in a different colorway I will be writing a pattern for it.  (Stay tuned!)

[If you like this pattern and would like to test it for me, let me know]


By this time it was February and Valentine’s Day was on the horizon.  My mom’s birthday is also a few days after Valentine’s Day so I decided to quilt one of her quilts that was sitting on the shelf.  It is made with a line of Northcott’s Stonehenge.  Mom thinks that I designed this one but I honestly can’t remember and will have to wait until I’m at her house next time to look at my notes.  If it is my design, I’ll also write this pattern.  I quilted it with sweet little ribbon hearts.

[If you like this pattern and would like to test it for me, let me know]

bemyvalentine2

bemyvalentine1

bemyvalentine3

And then my moment of insanity!  I decided to make a dress for my granddaughter’s American Girl Doll.  How hard could it be?  I’ve made plenty of garments–this would just be on a little smaller scale.  I clearly didn’t think this through completely!  Still, it turned out nicely and she couldn’t be more thrilled!

elizabeth

There’s more, but I’ll get a little further on in the process before I show my current project–it’s a doozie!


Meet Lucey Lou!

Standard

As some of you know I sold my Prodigy in November and ordered a new machine from APQS.  My space was a little lonely for about 3 weeks but it gave us an opportunity to make some storage improvements.  I was able to get a couple of quilts finished before we left for Christmas.

So, here is Lucey!

lucey

Yes, she came with the big red bow!  Nice touch from APQS, right?


The first quilt I worked on was for my granddaughter, Olivia.  I wanted to start with a edge to edge freehand so I could get used to the feel of the new machine.  I just did some loops and leaves which went well with the quilt top.

olivia1

I’ll add a full size picture soon.

It didn’t take long to fall in love with Lucey!


Next, I wanted to finish one of my mom’s quilts.  This was mostly ruler work, with a little freehand on the border.

dessert1

dessert2

dessert3

Here is a close-up of the border freehand from the back.

dessert4

I have a couple more pieces to show, but I need to do a little photo editing first.  WordPress has changed the photo editing and I haven’t yet found the rotate function (as you may have noticed above)

Until next time….happy quilting!

Quilt Along Cornerstones

Standard

To finish the quilt you will need some cornerstones–20 to be exact!

The color choice is up to you, but I used the same color as the small squares in the sashing blocks.  This made a nice alternating color scheme in the sashings.

Begin by cutting your pieces:

Color fabric:

20 squares at 3 5/16″ x 3 5/16″

White fabric:

40 squares at 3″ x 3″

Cut the white squares in half diagonally.

CS1

Lay the long edge of one white triangle along one side of one of the color squares and stitch at 1/4″.  Do your best to center the triangle onto the square.

CS3

Add another triangle on the other side.

CS4

Press both triangles away from the square.

CS5

Trim the “dogears” along the unsewn edge of the color square.

CS6

Add triangles onto the remaining sides, keeping the triangles centered on the square

CS7

Press the triangles away from the square.

CS8

Trim the the block so it measures 4 1/2″ x 4 1/2″ with the intersections 1/4″ away from the edge.

CS9

You will need to make 20 of these for the quilt!

CS10


Quilt Along Sashing

Standard

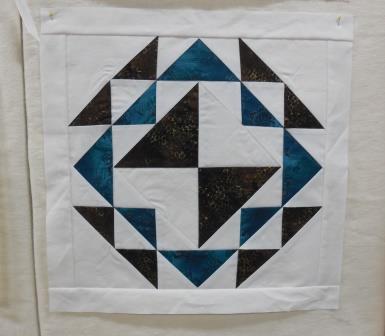
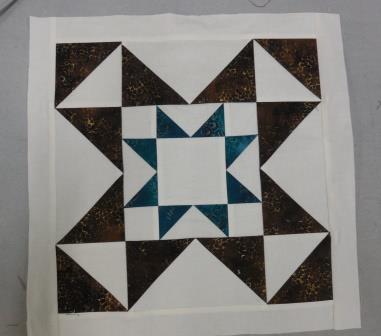
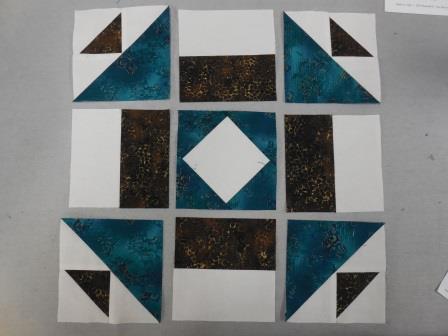
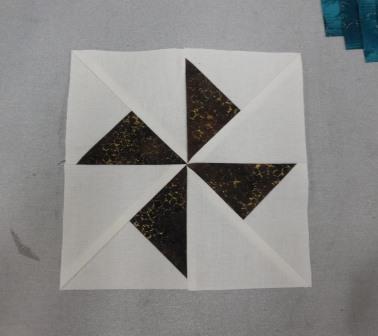
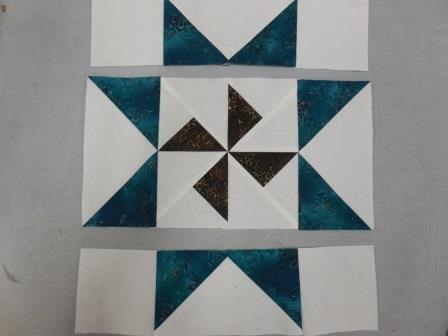
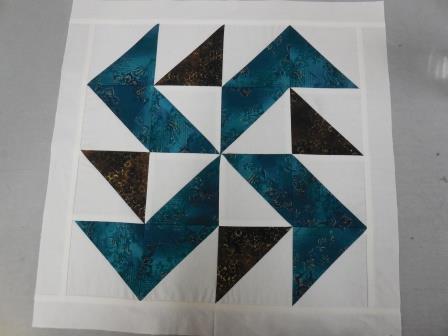
This is a pieced sashing that looks a little challenging–but don’t be alarmed!  I’ve broken it down enough to be easier than it appears.

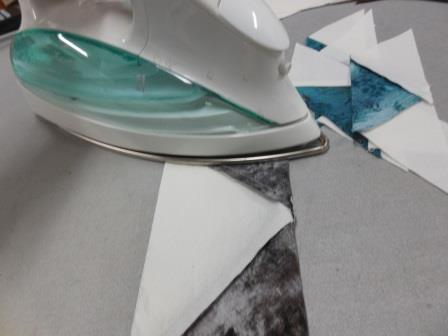
That being said, I would encourage you to begin by making one at a time and then measuring the sashing to be sure it is exactly the same size.  You may have to make a slight adjustment depending on the accuracy of your 1/4″ seams as well as the nature of the fabric you are using.  I’m using Kona cotton and I found that when I sprayed starch on the final sashing block and pressed it, it became a little bit longer–which ended up being the exact size that I needed.

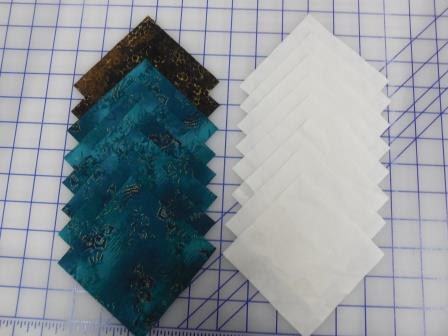
Decide which color you want to be your large diamonds and which you want to be your small diamonds.  My small diamonds will be the same color as the cornerstones we will make in the next step.

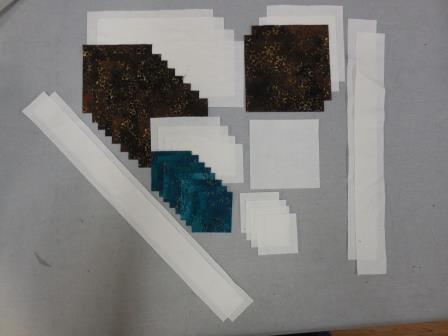
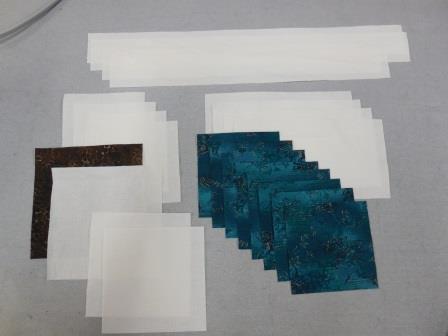
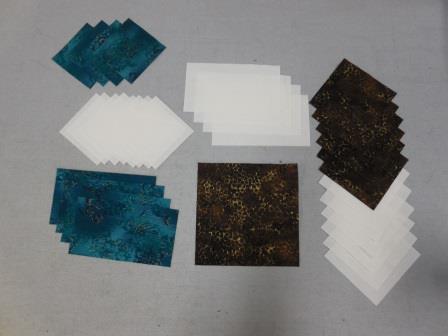
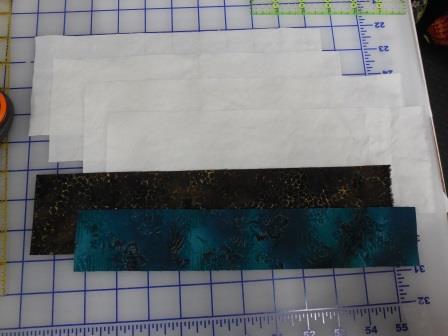
Begin by cutting the following pieces:

Neutral

Eleven strips 3 3/4″ x WOF

Four strips 2 1/4″ x WOF

Four strips 4 1/2″ x WOF

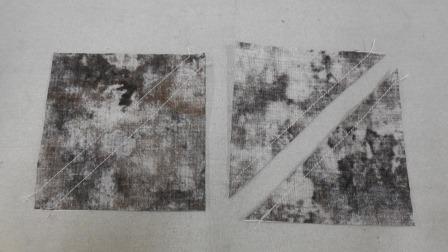
Subcut into thirty-one (31) 4 1/2″ squares

Cut squares in half diagonally.

Four strips 4 1/2″ x WOF

Do not subcut these yet.

Color 1 (small diamonds)

Four strips 1 15/16″ x WOF

Color 2 (large diamonds)

Five strips 2 5/8″ x WOF


Using Three of the 1 15/16″ x WOF (color 1) strips and six of the 3 3/4″ x WOF strips and make three strip sets with the color strip in the center.  Press toward the center fabric.

Sash7

Make four strip sets using four of the (color 2) 2 5/8″ x WOF strips, four of the 2 1/4″ neutral strips and four of the 3 3/4″ neutral strips.  Press toward the center fabric.

You will have one 3 3/4″ x WOF neutral strip, and one of each of the color strips (one 1 15/16″ x WOF and one 2 5/8″ x WOF)

Cut the remaining neutral strip in four approximately equal pieces.  Cut each of the color strips approximately the same length.  Use these pieces to make two mini strip sets to match the previous strip sets.  (The 2 5/8″ strip set will have a bigger piece of neutral on one side, but it will eventually be cut off.)

Sash8a

Sash8b

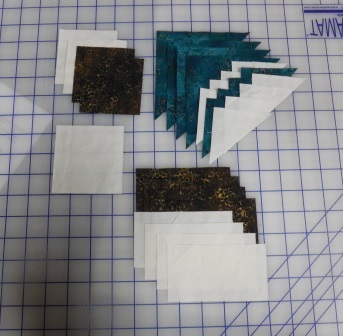
Cut across the strip sets to make the individual pieces.  Cut each of the 2 5/8″ strip sets into fifteen 2 5/8″ pieces.  Cut two more pieces from the mini strip set.

Cut each of the 1 15/16″ strip sets into twenty 1 15/16″ pieces.  Cut two more pieces from the mini strip set.

In total you should have 62 of each of these pieces.

Sash8

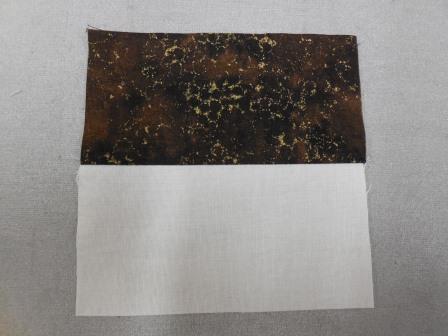
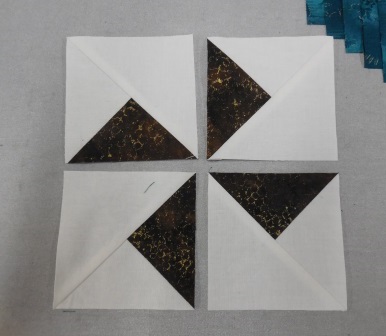
Sew one of each of the above pieces to each other matching seams as shown below.  Make 62 of these.

Sash9


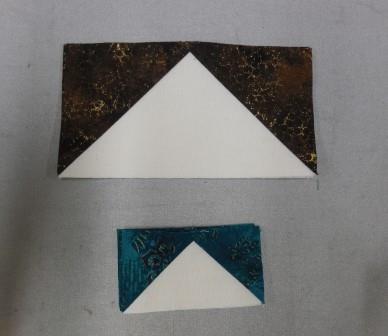
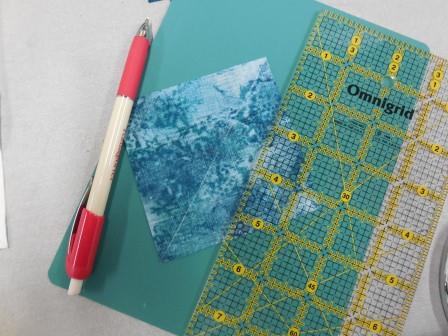
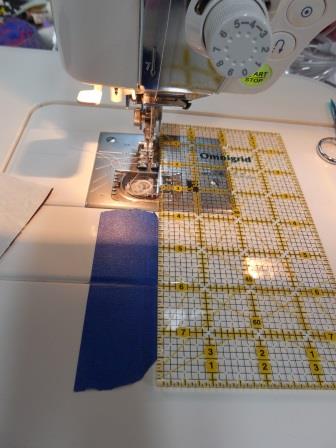
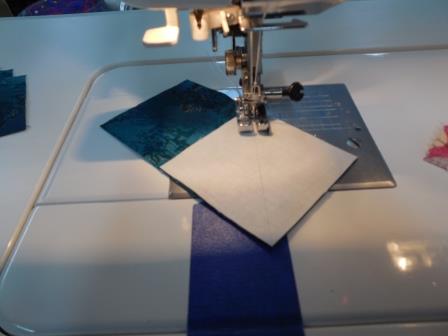
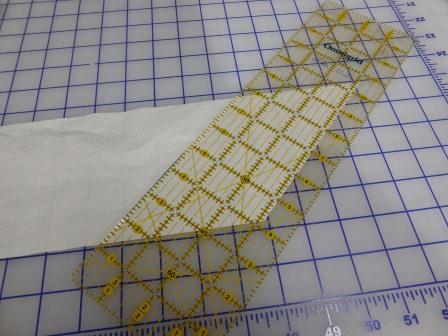
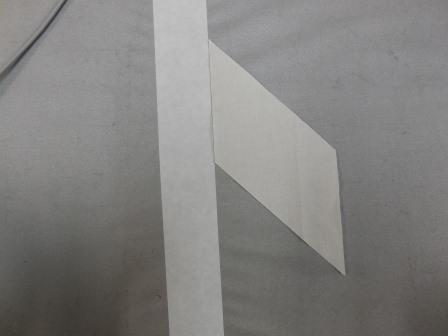
Using one of the 4 1/2″ uncut strips, cut one end off at a 45 degree angle as shown below.

Sash1B

Cut ONE 3 1/8″ angled piece from this strip.  (Remember we are making just one sashing unit until we know it is the correct size.)

SashA1

We now need to find the center of this piece.  Here is my method.

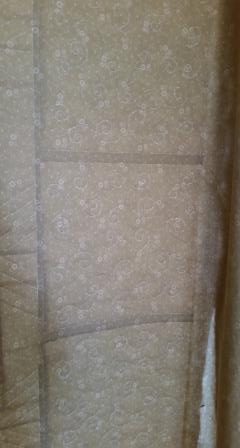
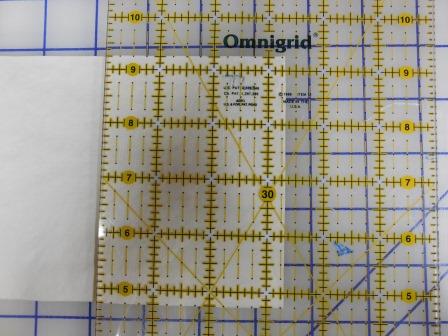
Cut one strip of freezer paper with your rotary cutter and ruler.  Cut it approximately 1 1/2″ wide, but be sure it is absolutely straight.  Press this piece to your ironing board.

Sash1

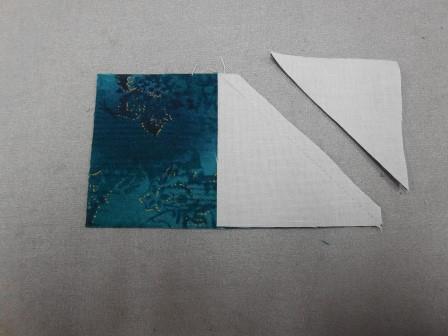
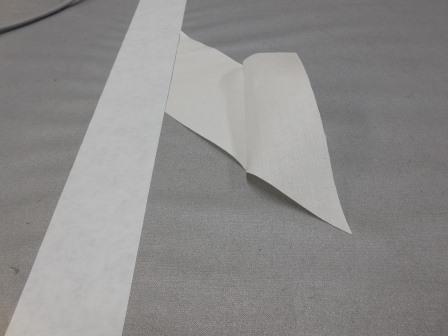
Lay one of the shorter edges directly next to the freezer paper.

Sash2

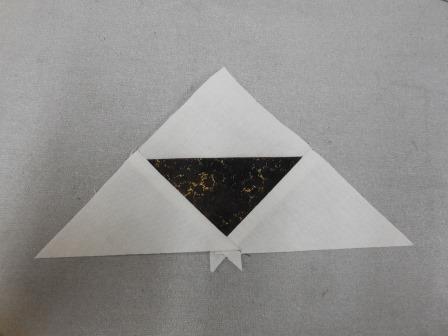
Now fold over so the other end is also directly next to the freezer paper.

Sash3

Sash4

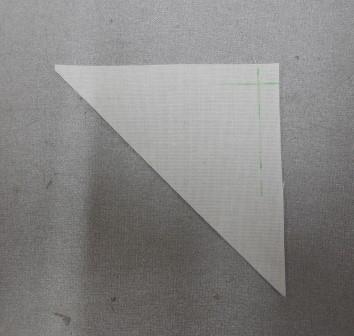
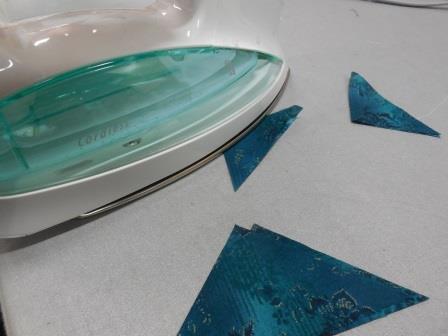
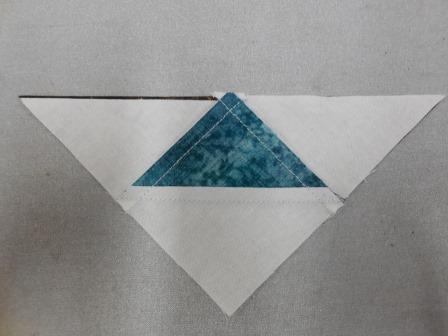
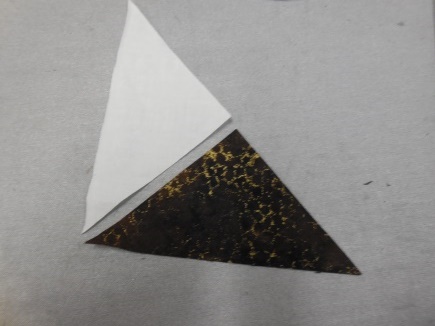
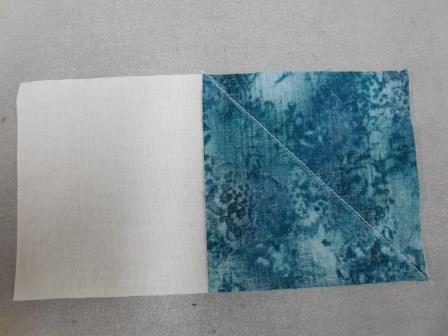
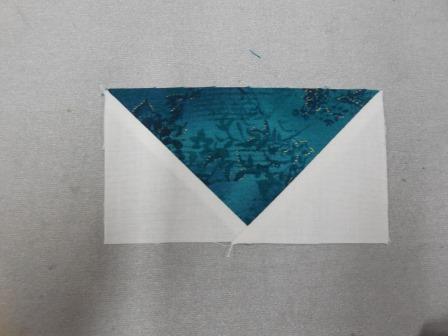
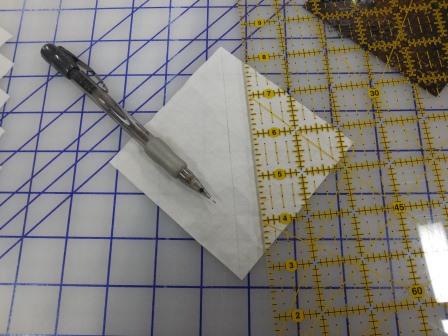
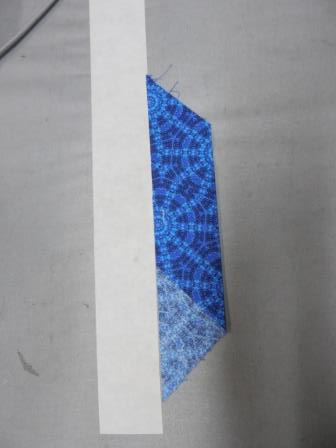
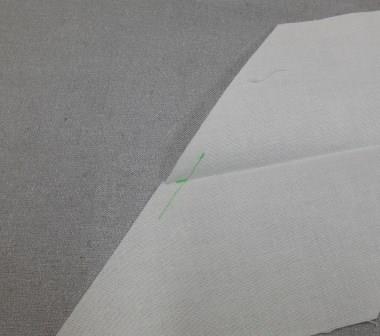
Here is a picture with a different fabric that makes it easier to see.

Sash5

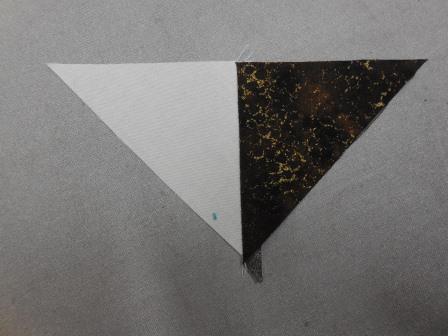
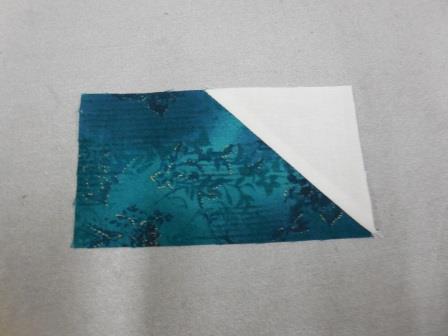
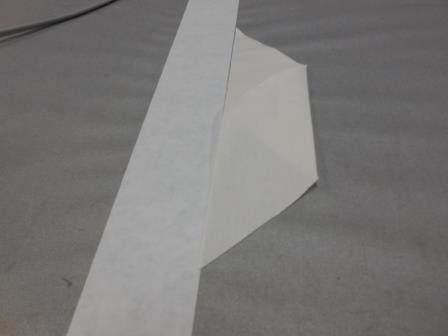
Using your favorite disappearing marker draw a short line across the fold and 1/4″ away from the edge of the fabric.

Sash10

I also like to slightly mark the fold line inside the seam allowance.

Sash11

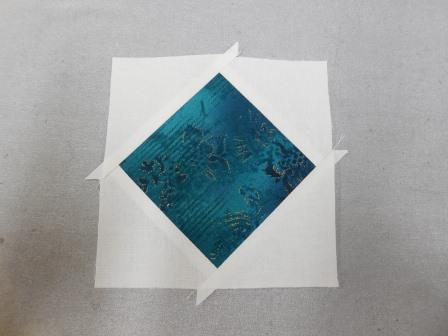
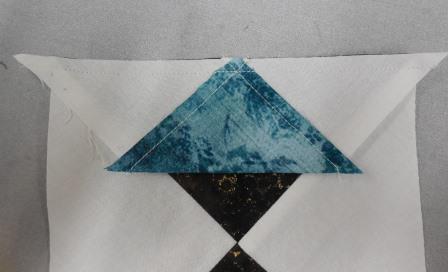
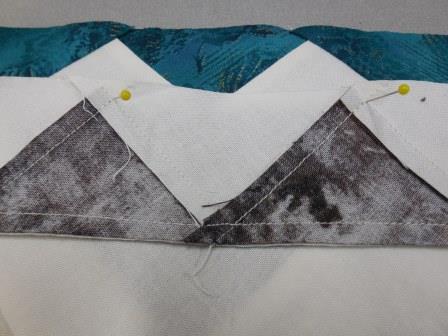
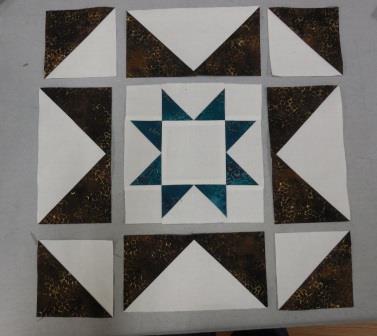
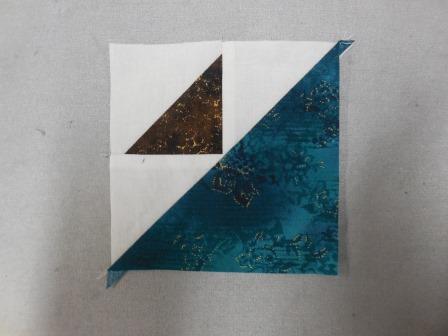
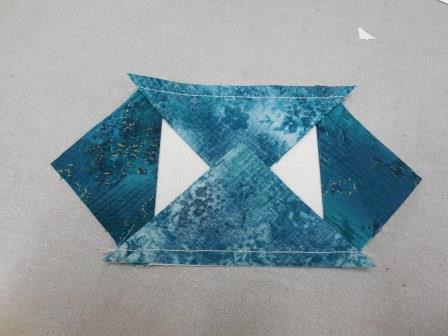
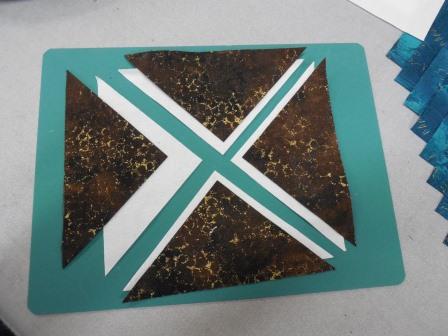
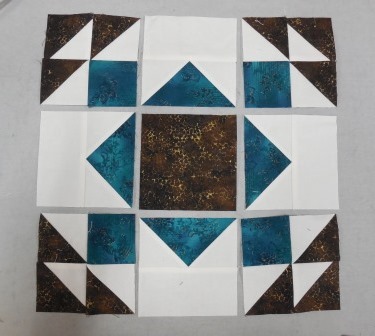
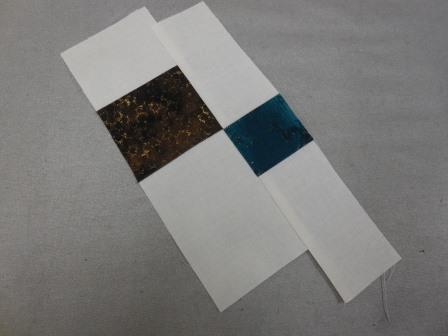
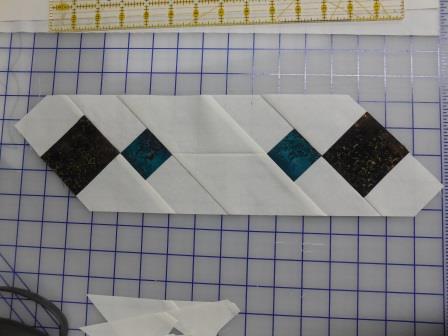
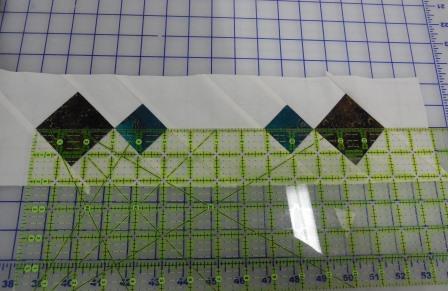
Lay out your pieces as shown below.

Sash12

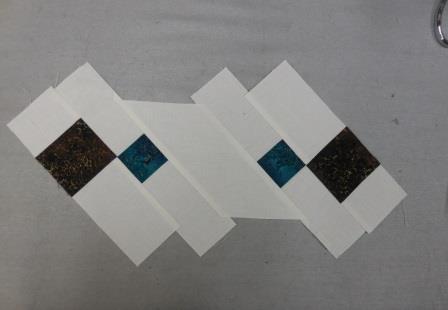
Each of the corners of the small diamonds will match the mark I just made.

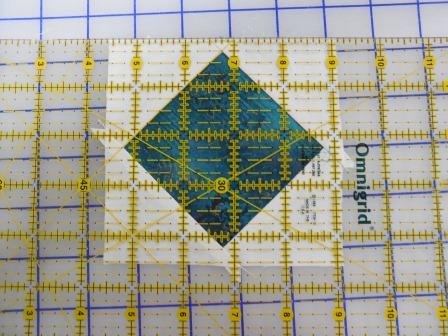
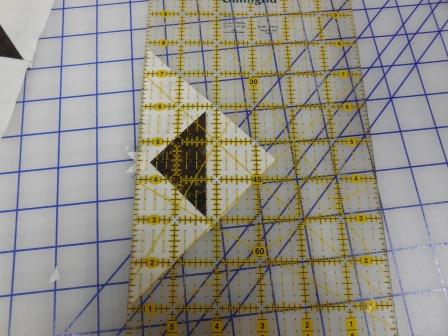
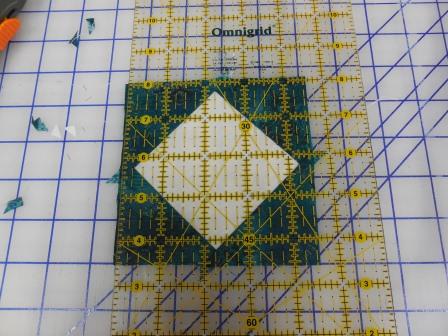
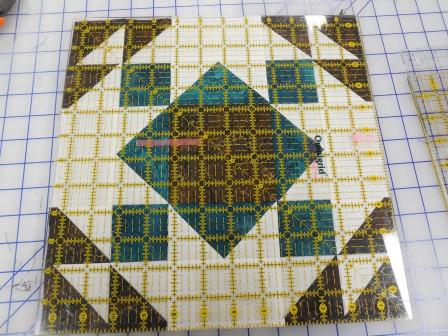
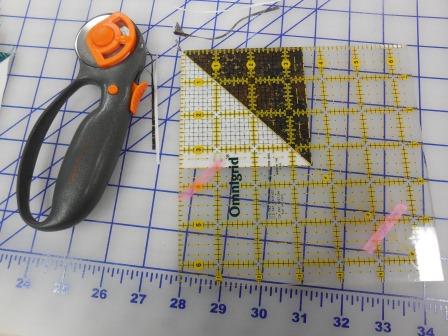
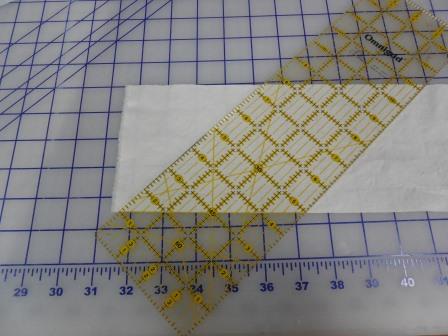
Trim this unit to 4 1/2″ wide with the intersections along the 2 1/4″ mark on your ruler.
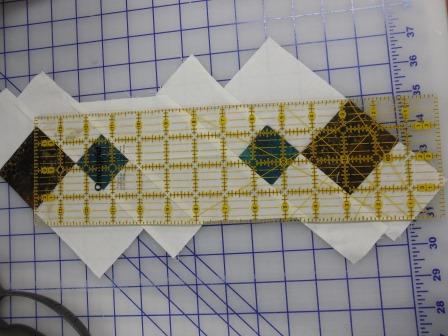
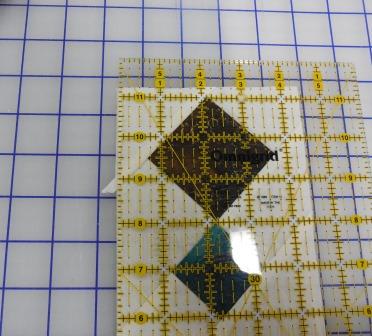
Sash13

Here is a close up.

Sash14

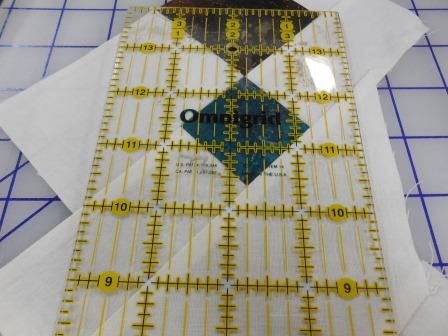
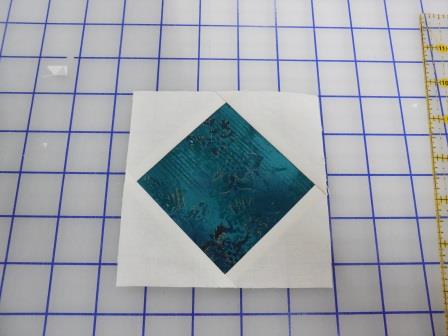
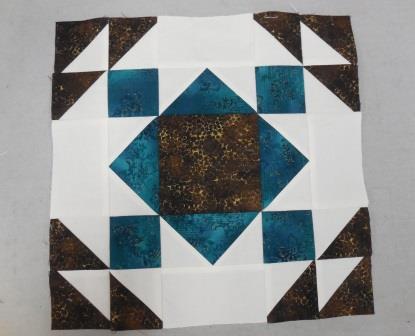
Your piece should look like this.

Sash15

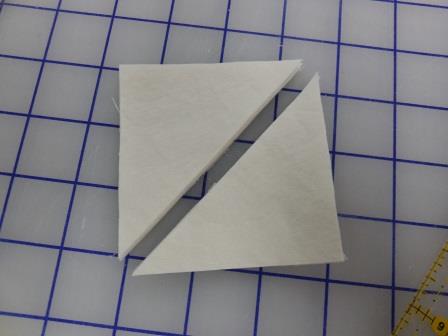
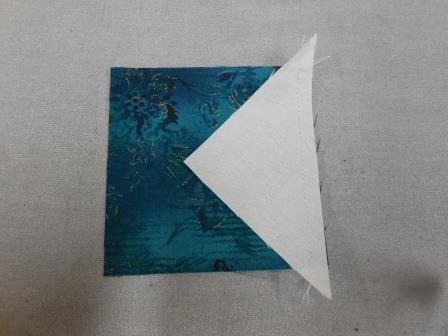
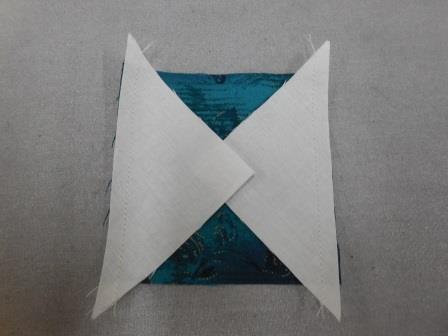
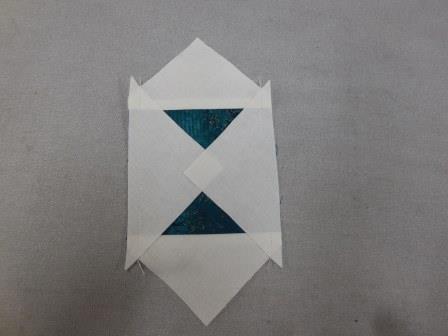
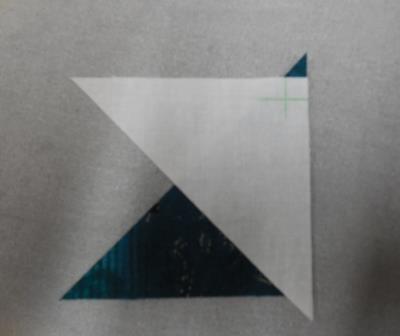
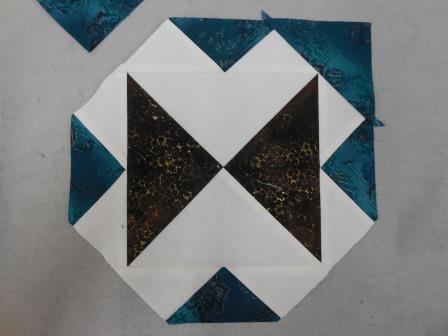
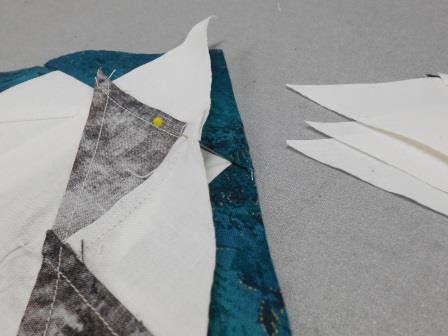
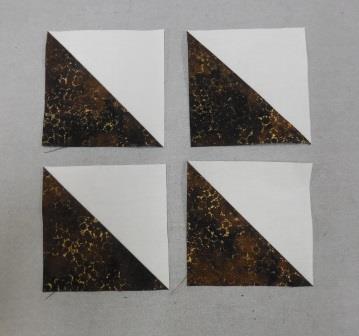
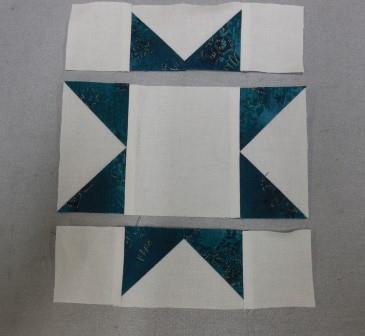
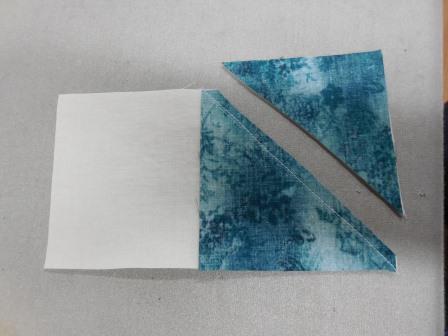
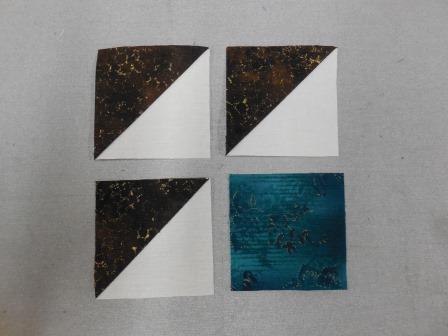
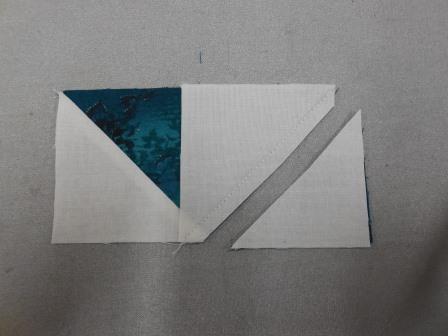
Sew two of the neutral triangle pieces on each end as shown.

Sash16

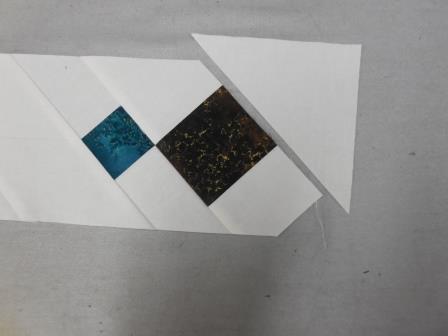
You can eyeball the placement of the triangle.  You must make sure the triangle goes above the cut edge on the side above the larger diamond.  The other side will be cut off so it doesn’t need to be even.

Sash18

Sash17

Now measure the blocks that you have already made over the past couple of months.

Measure from the outer tips of both of the large diamonds.  This should be 1/2″ less than the size of your blocks.  If it isn’t, cut your next diagonal piece a little smaller or a little larger.

Sash20

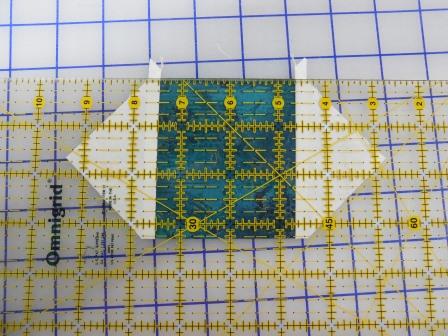
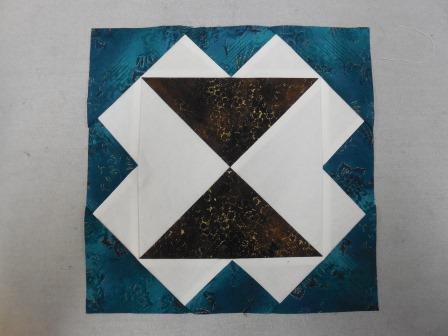
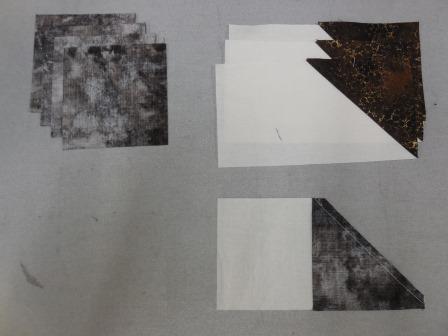
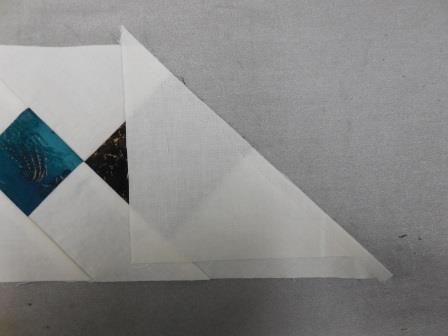
Trim both ends so both ends extend 1/4″ away from the tip of the large diamond.  Use the 45 degree marking for accuracy.

Sash21

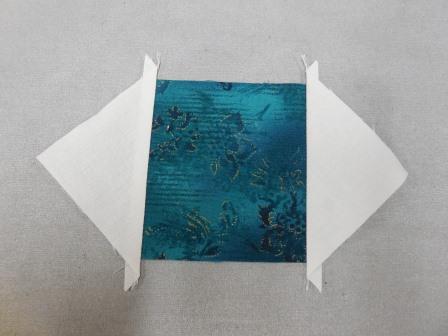
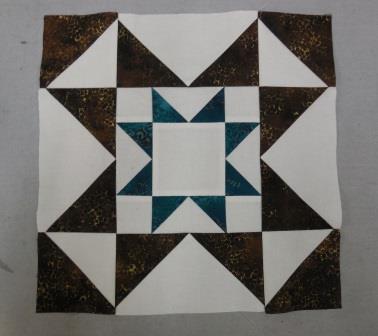
Trim the sides of the added triangles so they are even with the rest of the block.

Sash22

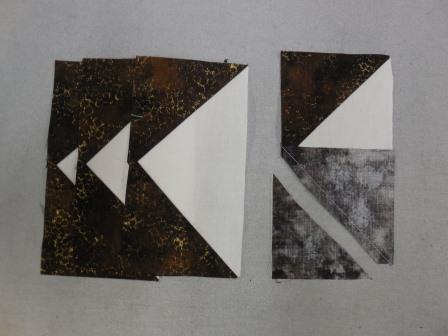
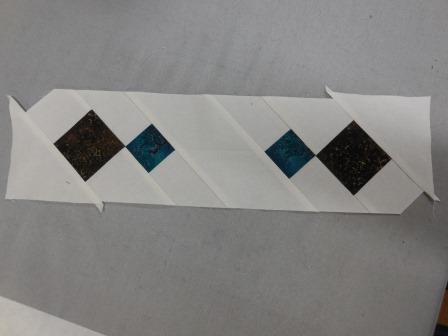
Finally measure the block again to be sure it is 4 1/2″ x the width of your blocks.  (Mine are 14 1/2″)

Sash23

If your measurement is correct cut the remaining diagonal pieces and make 30 more of these units.  You will need 31 sashing pieces.


Block 6 – Northwind

Standard

Of all of these blocks, this one will be the most challenging. There are no shortcuts in doing this block. My best advice is to be very careful with accuracy.

Cut

Neutral

Two 1 ½” x 14 ½” rectangles

Two 1 ½” x 12 ½” rectangles

Three 4 7/8” x 4 7/8” squares

Ten 2 7/8” x 2 7/8” squares


Color 1

One 4 7/8” x 4 7/8” square

Four 2 7/8” x 2 7/8” squares


Color 2

Two 2 7/8” x 2 7/8” squares

One 5 3/16” x 5 3/16” square


With the exception of the 1 ½” rectangles and the 5 3/16” square, every piece needs to be cut diagonally into equal triangles. The 5 3/16” square needs to be cut diagonally in both directions to create four equal triangles.

NW1

Use two of the neutral triangles cut from the 4 7/8″ squares and the two color 1 triangles cut from the 4 7/8″ square and arrange them as shown below.  Press the seams to the darker fabric.

NW2

Make the second seam, matching the previous seams and your block will look like this.  This is the center unit.

NW3

Mark eight of the 2 7/8″ half square triangle pieces along the 1/4″ seam as shown below.  Use your favorite disappearing marking tool.

NW4

This gives you a reference for placing on the adjoining triangle.  You can see that the seam line matches the slanted edge of the triangle behind it.  Sew this seam and press toward the darker fabric.

NW5

Add another neutral triangle to the other side of the color 2 triangle, making the unit shown below.  Press and trim so the intersection is right at 1/4″ and one of the seams is aligned with the 45 degree mark on your ruler.  This is the first strip unit.  You need to make four (4) of these units.

NW6

To accurately place the first strip units on the center unit fold the center unit in half and press to mark the centers of two sides.

NW7

Place the intersection of the point of the color 2 triangle within the strip unit to one of the center marks you just created.  Sew this seam with a 1/4″ seam allowance and you should sew right through the intersection as shown.

NW9

Repeat the process on the remaining sides.

NW10

On the picture below I have marked the crease to make it easier to see.

NW11

We will now use the four triangles that were cut from the 5 3/16″ square.  Begin by pressing each of the triangles in half to mark the centers.

NW12

Match the crease with the intersection from the center block as shown below.

NW13

Do this on all four sides.  Trim to a 9″ square with the intersections as close to the 1/4″ seam line as possible.

NW14

Using the remaining 2 7/8″ half square triangle pieces (12 neutral, 8 color one) you need to make the second strip units.  These are made using the same method as in the first strip units.  Each of these units will have 3 neutral triangles and 2 triangles from color 1.  Again, you will need four of these units.

Sew the remaining neutral triangles cut from the 4 7/8″ squares onto the short side of these strip units.

NW15

In order to line up the intersections between the strip units and the block I place straight pins in the wrong side of the strip unit exactly on the intersection.

NW16

Then those pins go directly into the intersection on the right side of the block.  Bring the fabric together with the pin standing straight up and pin the fabrics together on both sides of the pin.  Be sure you are pinning on the 1/4″ seam line or your fabrics could still shift.

NW17

Most of the time I don’t do much pinning, but this block definitely requires pinning for accuracy.

NW18

Now, trim your block to 12 1/2″ x 12 1/2″ making sure you don’t cut too close to your points.  No matter how careful I was both of my blocks ended up a little bigger.  Fortunately we still have to add the 1 1/2″ strips.  Just trim 1/4″ away from your points and add the 1 1/2″ x 12 1/2″ strips to the two opposite sides.  Now trim those two pieces so the block is 12 1/2″ x 14 1/2″.  Then add the 1 1/2″ x 14 1/2″ pieces and trim down to a 14 1/2″ square.  We have used the strips to compensate for us and it won’t be noticed at all.


NW19


Block 5 – Eight Hands Around

Standard

I hope you are enjoying these blocks!  Remember, trimming each unit before continuing is essential to accurate piecing!

For the Eight Hands Around block you will need to cut the following:

Neutral

Four 3 1/2″ x 6 1/2″ rectangles

Two 4″ squares

Four 2″ x 3 1/2″ rectangles

Four 2″ squares

One 3 1/2″ square

Two 1 1/2″ x 12 1/2″ rectangles

Two 1 1/2″ x 14 1/2″ rectangles

Color 1

Eight 2″ squares

Color 2

Eight 3 1/2″ squares

Two 4″ squares

EHA1

Again I will show pictures of constructing the first block.  The second block will be the same with the colors reversed.

Begin by making four half square triangle units using the 4″ squares (two neutral, two color 2)

EHA2

Press and trim the units to 3 1/2″

EHA3

Using the 3 1/2″ x 6 1/2″ rectangles and the eight 3 1/2″ squares cut from color 2 make four flying geese units.  (You can find the instructions on Block 2 — Summer Winds)

EHA4

EHA5

Press and trim to 3 1/2″ x 6 1/2″ making sure the tip of the triangle is 1/4″ away from the edge.

Make four more flying geese units using the four 2″ x 3 1/2″ neutral rectangles and the 2″ squares from color 2.

Press and trim these to 2″ x 3 1/2″ making sure the tip of the triangle is 1/4″ away from the edge.

EHA6

Using the 3 1/2″ neutral square, the four 2″ neutral squares and the four smaller flying geese units arrange the pieces to make the block shown below.

EHA7

Arrange the remaining units as shown to piece the block.

EHA9

Press and trim the block to 12 1/2″ square.

EHA10

Add the 1 1/2″ x 12 1/2″ and the 1 1/2″ x 14 1/2″ strips to the sides of the block and you will be finished!

EHA11


Block 4 – Joseph’s Coat

Standard

Cut the following for EACH block:

Neutral

Two 3″ x 3″ squares

Four 2 7/8″ x 2 7/8″ squares (cut in half diagonally)

Four 2 1/2″ x 4 1/2″ rectangles

One 3 5/16″ x 3 5/16″ square


Color 1

Two 2 7/8″ x 2 7/8″ squares (cut in half diagonally

Four 2 1/2″ x 4 1/2″ rectangles

Two 4 7/8″ squares (cut in half diagonally)


Color 2

Two 3″ x 3″ squares

JC1

In order to cut the 3 5/16″ square position edge of the fabric half way between the 3 1/4″ and 3 3/8″ marks on the ruler.

JC1a

With the 3″ squares make half square triangle units using one of the previous methods.  Cut them apart between the two seams and press toward the dark fabric.  Trim all four units into 2 1/2″ squares, using the 45 degree line on your ruler.

JC2

Add two of the triangles cut from the 2 7/8″ squares to either side of the half square triangle unit as shown below.

JC3

Press and trim so one edge lies along the 45 degree line and the tip of the triangle is on the 3 1/2″ line.

JC4

Place this unit on top of the triangle cut from the 4 7/8″ square and carefully sew with a 1/4″ seam allowance.

JC5

If unit you made isn’t perfect you can lay it on top of the 4 7/8″ triangle and use that for the guide.  You can see the triangle on the left isn’t exactly right.  I made sure all the points matched and then used the brown triangle as my guide for my 1/4″ seam allowance.

JC5a

Make four units using the 2 1/2″ x 4 1/2″ pieces as shown below.

JC6

For the center block lay the long edge of two of the triangles cut from the 2 7/8″ squares on either side of the 3 5/16″ neutral square.  Stitch on a 1/4″ seam allowance.

JC7

Press and trim the dog ears.

JC9

Add the last two triangles on the remaining sides.

JC10

Press and trim to 4 1/2″

JC11

Lay the units out as shown below.

JC13

Sew the pieces together and press well.  Trim to 12 1/2″

JC14

Add the 1 1/2″ x 12 1/2″ pieces to two opposite sides.  Press

Add the 1 1/2″ x 14 1/2″ pieces to the remaining sides.  Press

Block 3 – Martha Washington’s Star

Standard

Following are the pieces you will need to cut for EACH block:

Neutral

(2) 1 1/2″ x 14 1/2″ rectangles

(2) 1 1/2″ x 12 1/2″ rectangles

(4) 3 1/2″ x 3 1/2″ squares

(4) 3 1/2″ x 6 1/2″ rectangles

(2) 4″ x 4″ squares

(1) 4 1/2″ x 4 1/2″ square

Color 1

(8) 3 1/2″ x 3 1/2″ squares

Color 2

(1) 4 1/2″ x 4 1/2″ square

MWS 1

Take the Neutral 4 1/2″ square and the Color 2 4 1/2″ square and lay one on top of the other.  Lay your ruler from corner to corner and cut in half diagonally.  Without moving the fabric pieces, cut between the other two corners to make 4 smaller triangles of each fabric.

MWS 2

Lay one neutral and one color 1 triangle next to each other as shown below.

MWS 3

Sew them together on two of the short edges to make a larger triangle.  Do the same with the remaining triangle pieces.  You should have four pieces that look like the picture below.

MWS 4

Cut the 4″ squares in half diagonally once.  Center the pieced triangle on one of the neutral triangles and stitch together.  Trim to make 3 1/2″ squares with the intersection meeting at the 1 3/4″ mark in both directions.

MWS 5

Sew the four blocks together as shown to make a pinwheel block.

MWS 6

Mark all eight of the  3 1/2″ Color 2 squares from corner to corner.

MWS 7

As with the Block 2 you will make four Flying Geese blocks by laying the 3 1/2″ square at the end of the 3 1/2″ x 6 1/2″ rectangle and stitch just outside of the drawn line.  You should be able to see the distance on this picture.

MWS 8

Cut the excess away.

MWS 9

And press.

MWS 10

Repeat this on the other side of the rectangle.  Make four Flying Geese units and lay all the units out as shown below.

MWS 12

Stitch together and press well.

Add the 1 1/2″ x 12 1/2″ pieces to two opposite sides.  Then add the 1 1/2″ x 14 1/2″ pieces to the other sides to finish the block.

MWS 13


Block 2 – Summer Winds

Standard

For this block you will need to cut the following pieces for each block:

Neutral:

(6) 3″ x 3″ squares

(8) 2 1/2″ x 2 1/2″ squares

(4) 2 1/2″ x 4 1/2″ rectangles

(2) 1 1/2″ x 12 1/2″ rectangles*

(2) 1 1/2″ x 14 1/2″ rectangles*

*I cut a piece of neutral 12 1/2″ x WOF and also 14 1/2″ x WOF.  For each block I cut the 1 1/2″ pieces from these strips.

Color 1:

(6) 3″ x 3″ squares

(1) 4 1/2″ x 4 1/2″ squares

Color 2:

(4) 2 1/2″ x 2 1/2″ squares

(4) 2 1/2″ x 4 1/2″ rectangles


SW 1

We are going to make HST (half square triangle) units again.  However, this time I’m not going to draw the pencil line through the center.  With smaller pieces you can just use a piece of painters’ tape instead.  Place a ruler flat against your quarter inch foot and lay a piece of tape along the line formed by the ruler in front of the foot.  This will be your guide.

SW 2

Using the 3″ squares of the neutral and color 1, place one of each square together.  Place one of the corners at the edge of the quarter inch foot and make a seam toward the opposite corner.  Guide the pieces through the machine keeping the front corner on the edge of the tape as shown below.  This will make your first seam.

SW 3

Do the same thing on for the 2nd seam.  Cut the piece into two between the two seams.  Press toward the darker fabric.

SW 5

Trim each unit to 2 1/2″ x 2 1/2″.

SW 6

Lay out three of the HST units with one of the 2 1/2″ squares from color 2 as shown below.

SW 7

Sew the units together as shown below.  You will make 4 of these.

SW 8

For the flying geese units you will need to draw the pencil line from corner to corner on the 2 1/2″ neutral squares.

SW 9

Lay one of the 2 1/2″ marked neutral squares at one end of a 2 1/2″ x 4 1/2″ color 2 rectangles.

SW 10

Typically when you make the flying geese unit using this method you will come up with a unit that is a little smaller than needed.  However, this little tip will give you the correct size unit.  Do NOT stitch directly on the drawn line.  Stitch about 2-3 threads to the outside of the line.  My needle barely touches the line on one side, but it is not directly on the line.

SW 11

Cut off the excess.

SW 12

Press as shown below

SW 13

Repeat on the opposite side.

SW 14

SW 15

Don’t forget to trim this unit to 2 1/2″ by 4 1/2″ being careful that the “v” intersection is right at 1/4″.


Assemble the units as shown below.

SW 17

Piece them together.

SW 18

Square up the block to 12 1/2″ x 12 1/2″.

SW 20

Sew the 1 1/2″ x 12 1/2″ strip to opposite sides.  Press and stitch the 1 1/2″ x 14 1/2″ strips to the remaining sides and press.


Block 1 – Yankee Puzzle

Standard

There are truly only 6 blocks in this quilt.  Each block is made twice with opposing colors.  For instance if the center block is color 1 in your first block, it will be color 2 in your second block.  I will be calling the fabrics either neutral, color 1 or color 2.  You can assign these names based on your own fabrics.  The color 1 and color 2 will be the opposite for the second of each of the blocks.  Keeping the colors straight won’t matter too much until we get to the sashing and cornerstones.  Border fabrics will be referred to as Inner border and Outer border.

For the Yankee Puzzle block you will need to cut the following:

Neutral

Two 4″ x WOF strips — subcut into 16 4″ squares.  Save the remainder of the 4″ strip.

One 12 1/2″ x WOF strip — subcut four 1 1/2″ pieces.  Save the remainder of the 12 1/2″ strip.

One 14 1/2″ x WOF strip — subcut four 1 1/2″ pieces.  Save the remainder of the 14 1/2″ strip.

Color 1

One 4″ x WOF strip — subcut into 8 4″ squares.  Save the remainder of the 4″ strip.

Color 2

One 4″ x WOF strip — subcut into 8 4″ squares.  Save the remainder of the 4″ strip.

YP 2

Each of the neutral pieces will be paired with each of the colored pieces to make half square triangles.

To make half square triangles (HST) draw a pencil line from corner to corner using a straight edge.

YP 3

Sew a scant 1/4″ away from both sides of the line.

YP 4

Cut between the two seams

YP 5

Press each unit open with the seam allowance facing the darkest of the two fabrics.

Trim each block to exactly 3 1/2″ square.

YP 6

Arrange the blocks as shown in the picture below

YP 7

After you have the pieces sewn together add the 1 1/2″ x 12 1/2″ to two opposite sides and the 1 1/2″ x 14 1/2″ to the remaining sides.

YP 8